@Hamspiced im upset i haven’t signed up here earlier to be honest but nevertheless here now (: Thanks for letting me be apart of this project, still learning arduino but i felt like a perfect little project to merge my new found love for RFID and basic coding (very new to this)
1 Like
Welcome to the community sir. If you were on the edge of getting an implant this group is an excellent source for any questions you may have.
2 Likes
Github Project Repository
3 Likes
Updated git with esp32 version with active webserver to change modes and log cards scanned. Will be updating with esphome and home assistant endpoints eventually
3 Likes
I lied, im not going to update with ESPHome. it seems like it would be a whole rewrite and i dont have that kind of time.
I did however add all of the endpoints for Rest Api so you can use Home Assistant to call the webhooks. I have it in the code commented about halfway down.

3 Likes
Been Busy today…
Took the jump and installed Home Assistant on my server.
Added Home Assistant Integration instructions to the Git. tested it and it works well. You wont be able to add or remove cards but you can trigger the door state, log cards that were scanned and setup your own automations based on that (Ie. Lighting effects etc). Everything seems to work well so i think im gonna move my focus from this project to maybe case design and adding the Decoy board for 12v PD and a relay.

3 Likes
Case Widening
Updated the case design so i could flip the ESP32, Relay, and stepdown board 90*.
Also added a PD Dummy board instead of the USB-C Pigtails. She sits a bit wider but everything fits nicely underneath without having to play tetris.
Ill be posting my little creation of adding a Door Lock to this in the 3d printing thread when my 10hr print finishes.

R10 Case_Wide_Bottom.stl (426.5 KB)
R10 Case_Wide_Top.stl (331.9 KB)
Shouldnt need to update the R15 as it is long enough to accomodate the parts, but i do need to add the decoy board to it.
Also considering converting the code to use a T-display as it is like an all in one unit and could clean up some of this. But switching the display from OLED to TFT comes with new vibe coding challenges.
Code Updates
I had a delay of 500ms setup for each card scan. The problem is that the reader can scan much faster so you could keep scanning a card while the MCU’s loop was delayed, when it caught back up it would receive partial data and stall the loop. I reduced it to 100ms and it is much more responsive.
Also my webserver had the ability to clear your logs, but i never actually setup that endpoint. Its added now so you can actually clear the logs.
Admin cards now can be added using RAW card data via the webserver. For whatever reason they werent being added.
May look into themeing.
3 Likes
is the 12V only for the door strike or is the reader also 12v?
got a pic of the inside of the “wide bottom”?
I finally have time to put it together ![]()
1 Like
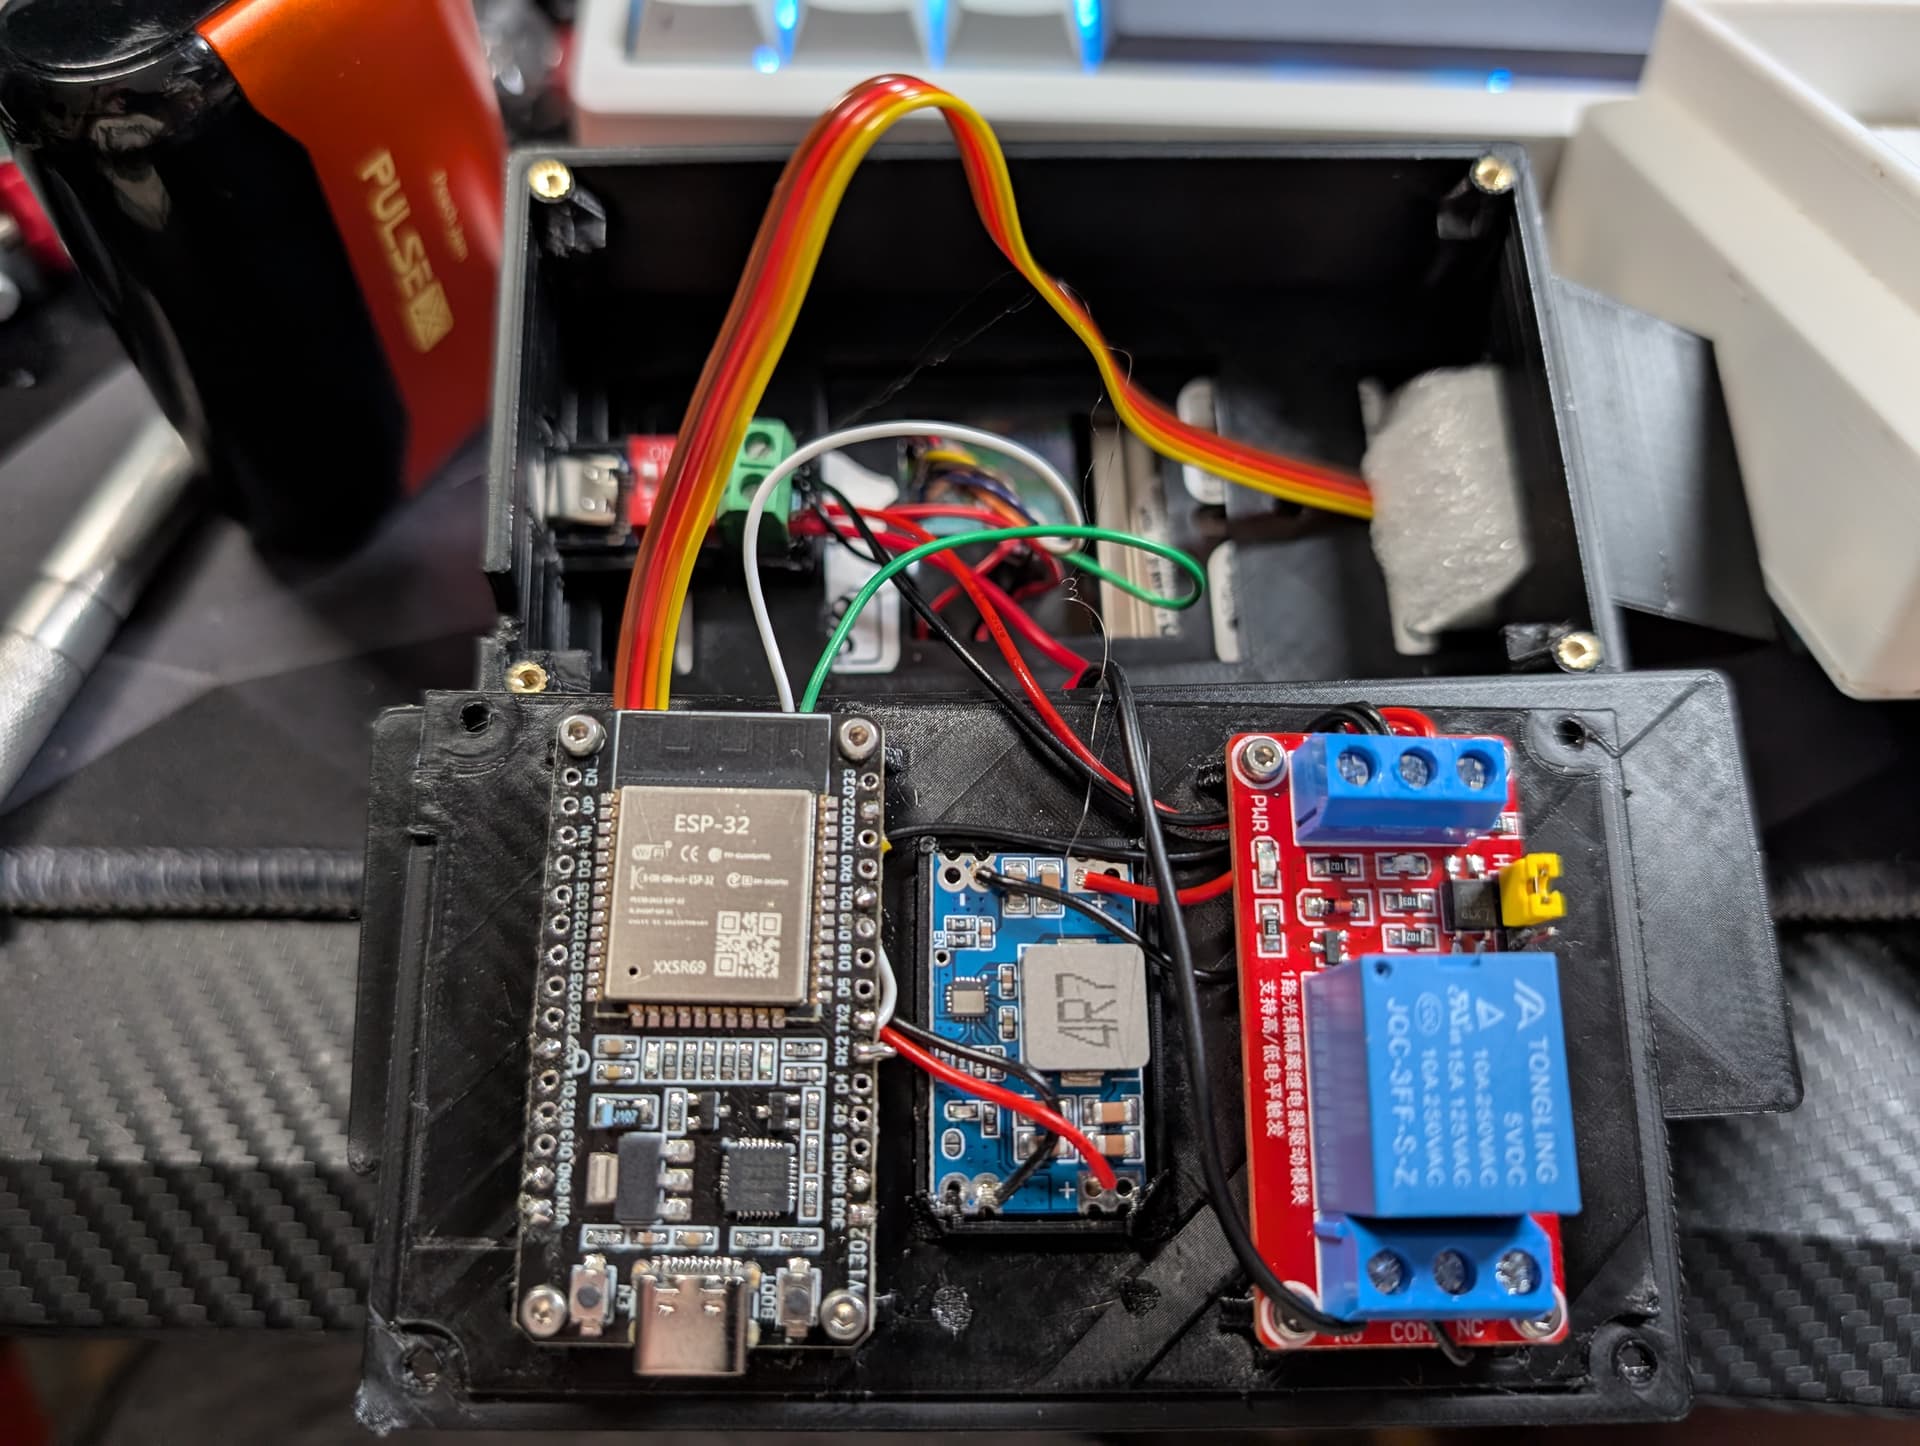
Reader should be powered off of the 5v stepdown. I had issues with it when I gave it 12v.
Also download the HID app and change the reader to be in 26bit mode. It may be set to raw.
3 Likes
I also gave you a 12v relay. You need a 5v one.
Only the door strike should get the raw 12v.
Everything else should pig off of the esp32 or the stepdown
3 Likes
I may tweak teh case a bit if thats OK.
Are you using M3 inserts?
1 Like
M2
Tweak away sir
2 Likes
Seems i forgot to upload the finished demonstration unit.
Apologies for the kiddos in the background.
This shows off the door simulator in read mode, then i use the admin card to switch the mode to Door mode. I show off an unauthorized key and the no-entry display. then i use an authorized key and shows it triggers the relay to power the mag plunger.
Admin cards can be enrolled in the web interface or hard coded before compiling. I am also making it so the first time running the code it will prompt to enroll the admin card to the reader.
Also i added the Demonstration unit’s STL’s to the git. This one seemed to gain the most popularity. Lots of changes occured that deviated from the original plan to make it so similar to Red Team Alliances Building in a Box. Originally they had multiple cards that changed the modes. I did that, and found it incredible cumbersome. I had to either hard code 4 cards or use 4 magic cards and clone my admin cards to it. Seemed like a shit end user experience. So i made one admin card that just cycled the other modes and it made the 4 card system obsolete.
Also with the ESP32 you can unenroll admin cards and authorized cards. The web interface giving access to that and allowing you to plug into Home Assistant i think is the best option between the Arduino version and the ESP32 option. but for cost and ease of parts the Arduino version works great.
I used this device as my primary testing rig at Defcon33 and it worked flawlessly. highly reccomend it to anyone that wants something fun to play with.
3 Likes
Finally managed to port the code over to VSC to run it on teh ESP32-C3 super mini
also took the liberty to ass a button (to change mode) and an LED (to not change the strike’s logic) ![]()
I haven’t checked the HA integration and all the wifi functionality, but the main logic works.
Ill clean up a few things and post it on GitHub if youre OK with it
1 Like
Absolutely. I want to build a board that houses all the components. To reduce the footprint down.


