Mifare Classic 1K > xM1 Clone help

Hi Pilgrimsmaster!

I don’t have an Android phone but I did it with MWT (same program for Windows). I ordered a brand new Miface Classic 1k magic 2nd gen fob and managed to describe it with my Gym Card (Same with my xM1 gen2 Mifare Classic Implantat)

But now comes the most important question for me:

If I have described a Mifare Calssik 1k magic 2nd gen, can I NOT rewrite it or change UID etc.? Am I correct that I can only describe this ONCE?
For Example I want to clone my hotel card for a week and after my stay I want to clone back my Gym card…

If that is not the case, could you please explain to me how I can re-describe an already described Mifare Calssik 1k magic 2nd gen or reset it to the factory settings?

Thankss!!!

I am not going to be near a PM3 for a number of hours to test it for you, I also haven’t fully read through your outputs.

NORMALLY
you would just overwrite it with your new data and it’s done.

If you ae having problems doing that
@Concorde has done some great work,

https://forum.dangerousthings.com/t/handy-dandy-tips-and-tricks/13041/17

and @autom8 has used that with an example here

Once you get yours recovered, In the future remember to use restore rather than cloadfor your gen2

Hey Thanks for your fast answer…
When I write this:
hf 14a config --atqa force --bcc ignore --cl2 skip --rats skip
nothings happend…

My Main Issue that my xM1 gen2 Mifare Classic looks like this after cloning my Gym Card:
12

He no longer recognizes that it is a magic mifare gen2

Before I cloned my gym card, my implant looked like this
13
(Just an example because I do not have a screenshot from this)

So cloning is working but just one time, I cant clone again.
Thats my issue. I bought this implant to clone diffrent Mifare Classic Cards time for time on my implant.

Hope you know what I mean…

nothing is supposed to happen really… you are simply setting configuration flags telling the proxmark3 how to behave when dealing with iso14443 transponders. It might be nice though if it said something like “Configuration updated” or something… but this is normal.

Did you actually run the recovery command after this as mentioned in the threads @Pilgrimsmaster linked above? You need to tell the exact and complete story of what you did… otherwise we have to play detective, and that only makes things harder for you.

From what you posted above, I assume maybe you have simply set the configuration part, got no response, then did not proceed with the rest of the recovery commands? First do those things.

how gen2 tags work

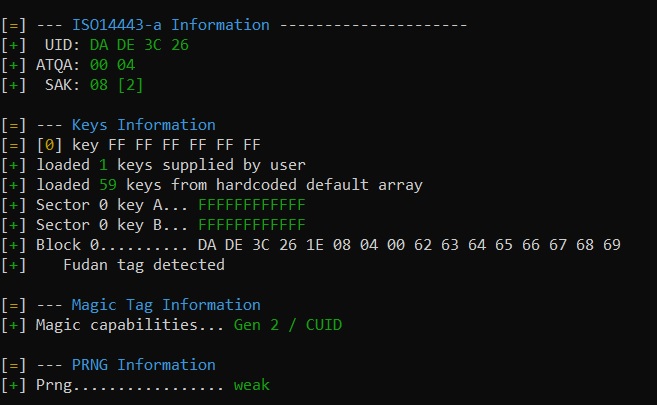
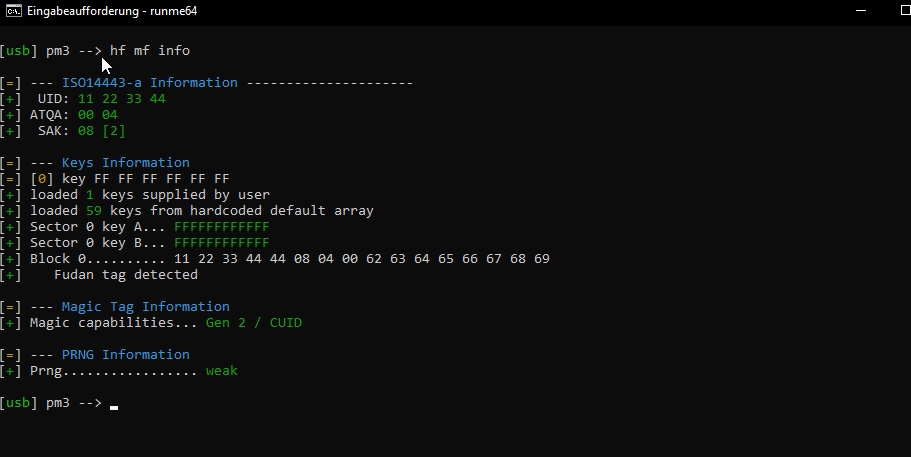
Let me briefly explain how gen2 tags work… they work just like a normal Mifare S50 1k chip works, except you can change sector 0… but other than that, they work exactly like a legitimate Mifare S50 1k chip. That means if you change the keys or access bits for any sector (including sector 0) in such a way that the sector is locked, or even protected from reading without first authenticating, then after cloning you will need those keys to access / change / read that sector… even sector 0.

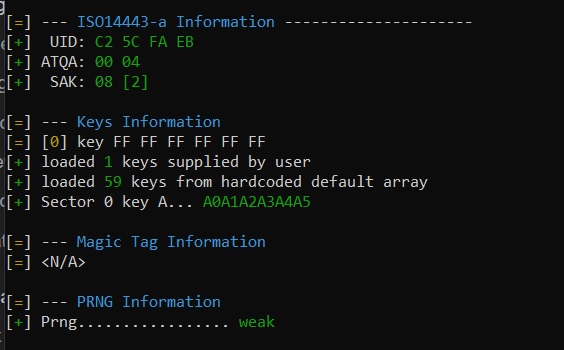
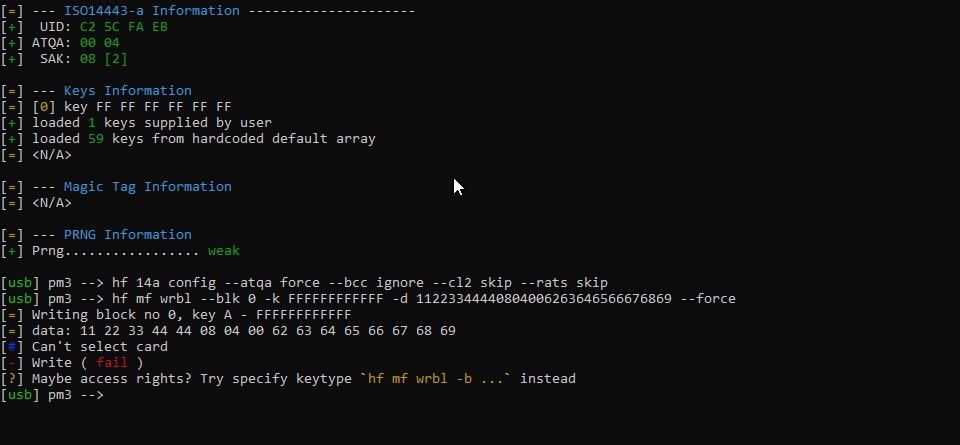
You can see in this screenshot under “Keys information” that there is a key loaded (supplied by user) which is the factory default FF FF FF FF FF FF and a set of 59 “default” keys… but chances are your gym card’s keys are not included in that list of default keys… and it’s probably not the factory default FF FF FF FF FF FF key either… so at this point you can’t change sector 0 without those keys.

Because a gen2 chip works EXACTLY like a legit Mifare S50 1k chip, there is no way for the proxmark3 to really “know” if it’s a gen2 chip or a legit Mifare chip without some way to probe or test sector 0 … and that’s only really possible if the keys are the factory default keys, or known to the proxmark3 in the default key array. Since it appears something cloned successfully to the chip, chances are sector 0 keys and access bits got changed so the proxmark3 could no longer probe it successfully, hence the missing “magic capabilities” line.

@iceman, this sounding correct so far?

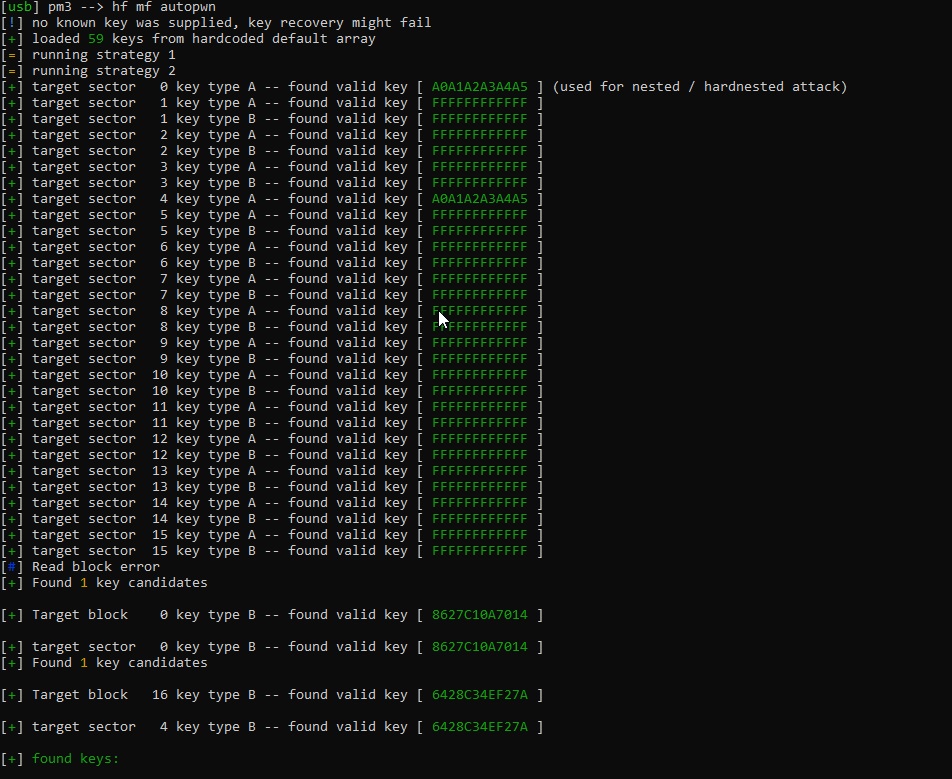
Luckily you can get those keys because you should be able to run autopwn on the gym card again and get the keys from that, then assuming the clone to your chip was exact and complete, use those keys to unlock sector 0… or you may be able to autopwn your implant as well and get the keys directly.

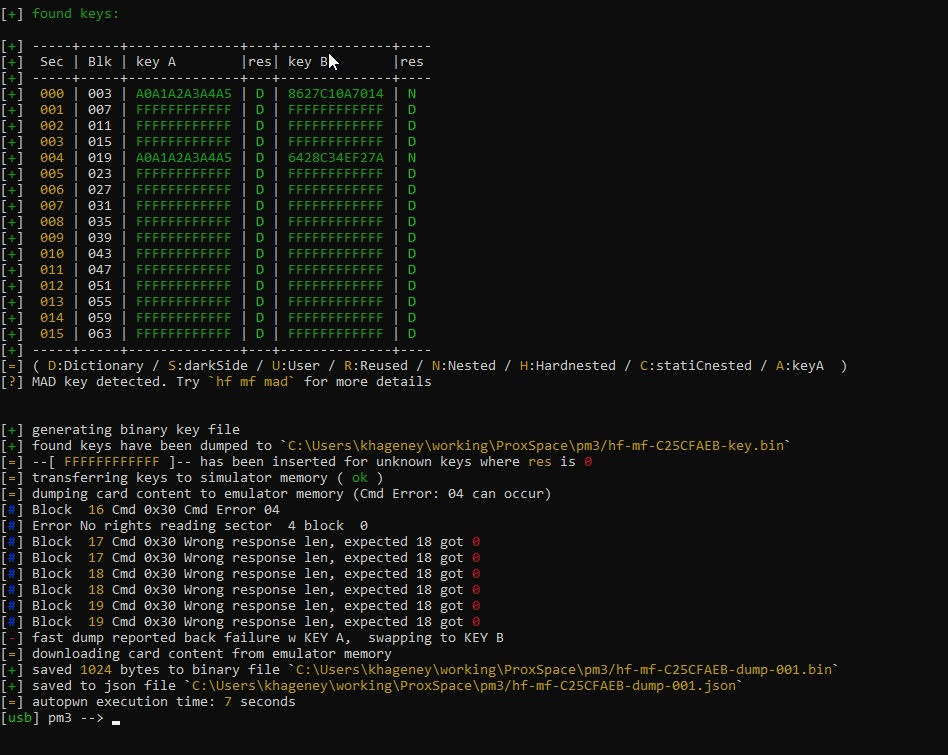
Once you have the keys, you should be able to wipe sector 0 using those keys. Exactly how to do that I’m not sure but I know you should be able to specify them in the command line or reference a key file that autopwn generates.

1 Like

Good morning guys,

I have now analyzed everything again in detail.
First I took a NEW Mifarce Classic 1k Magic 2gen fob and tested the following commands on this fob:

hf 14a config --atqa force --bcc ignore --cl2 skip --rats skip
hf mf wrbl --blk 0 -k FFFFFFFFFFFF -d 11223344440804006263646566676869 --force

and its working:

Then I tested the whole thing on my implant:

The result: Write fail

Now I have executed a hf mf autopwn on my implant:


That worked too. I have made the dump and key file available to you at the following link:

Dump and Key Files Implant

You are my last chance. If I no longer have the implant described, it will be worthless to me because described the gym card doesn’t even work.
Then I’ll probably be forced to remove it … :pensive: :sleepy:

Guys! F**ck I solved it!!! :heart_eyes: :heart_eyes:

I took a new (empty) Mifare classic 1k Gen2 fob and start it with:
hf mf autopwn
With the dump.json I see exactly what an original Gen2 fob should look like.
Thhen read in my implant:
hf mf autopwn
I compared both dump.json and saw exactly which sector looked different.
I was also able to look at keys a and b there. Or I can see further down in the dump file which key I need for which sectors
With the following commands I have now described sector by sector that my implant looks like the original fob

hf mf wrbl -b --blk 0 -k 8627C10A7014 -d EE96D8ED4D08040003AC9384788DD91D --force

hf mf wrbl -b --blk 1 -k 8627C10A7014 -d
00000000000000000000000000000000 --force

hf mf wrbl -b --blk 3 -k 8627C10A7014 -d FFFFFFFFFFFFFF078069FFFFFFFFFFFF --force

hf mf wrbl -b --blk 16 -k 6428C34EF27A -d 00000000000000000000000000000000 --force

and so on…

It works perfectly!!!

Thanks a lot for your help!

3 Likes