Since I was able to unbrick my pm3 I figured I’d try to get it working on my android (un-rooted Samsung s22 ultra) using AndProx
I used Windows for this.
Software Requirements:
AndProx fullimage.zip file
DO NOT DOWNLOAD OR FLASH THE BOOTROM FILE - YOU WILL BRICK YOUR PM3
AndProx apk file
Hardware Requirements:
PM3
USB cord for PM3 (must be data and power, not charge only)
USB-OTG cable (i got mine here )
Steps:
Unzip the downloaded official build folders to desktop in a single folder (eg: “pm3” we’ll use pm3 to make this easier)
Plug in your pm3 into the computer while holding the side button (release button after plugged in) and open “Device Manager”
Check the COM port that the pm3 is using (mine was COM9)
Go into the “pm3” folder and locate “FLASH - fullimage.bat” then open it with a text editor (I use notepad++)
On line "client\flasher.exe com5 -b client\fullimage.elf
" change the com number to match the pm3 from device manager (mine was 9, i changed it to “COM9”
Save the file
Extract the “fullimage.zip” into “pm3>client” folder, click “yes” to overwrite the existing “fullimage.elf” file already in “client”
Go back to the root folder and double click “FLASH - fullimage.bat” (you may need to allow your antivirus to unblock it)
DO NOT FLASH THE BOOTROM FILE - YOU WILL BRICK YOUR PM3
Follow the instructions in the terminal pop-up
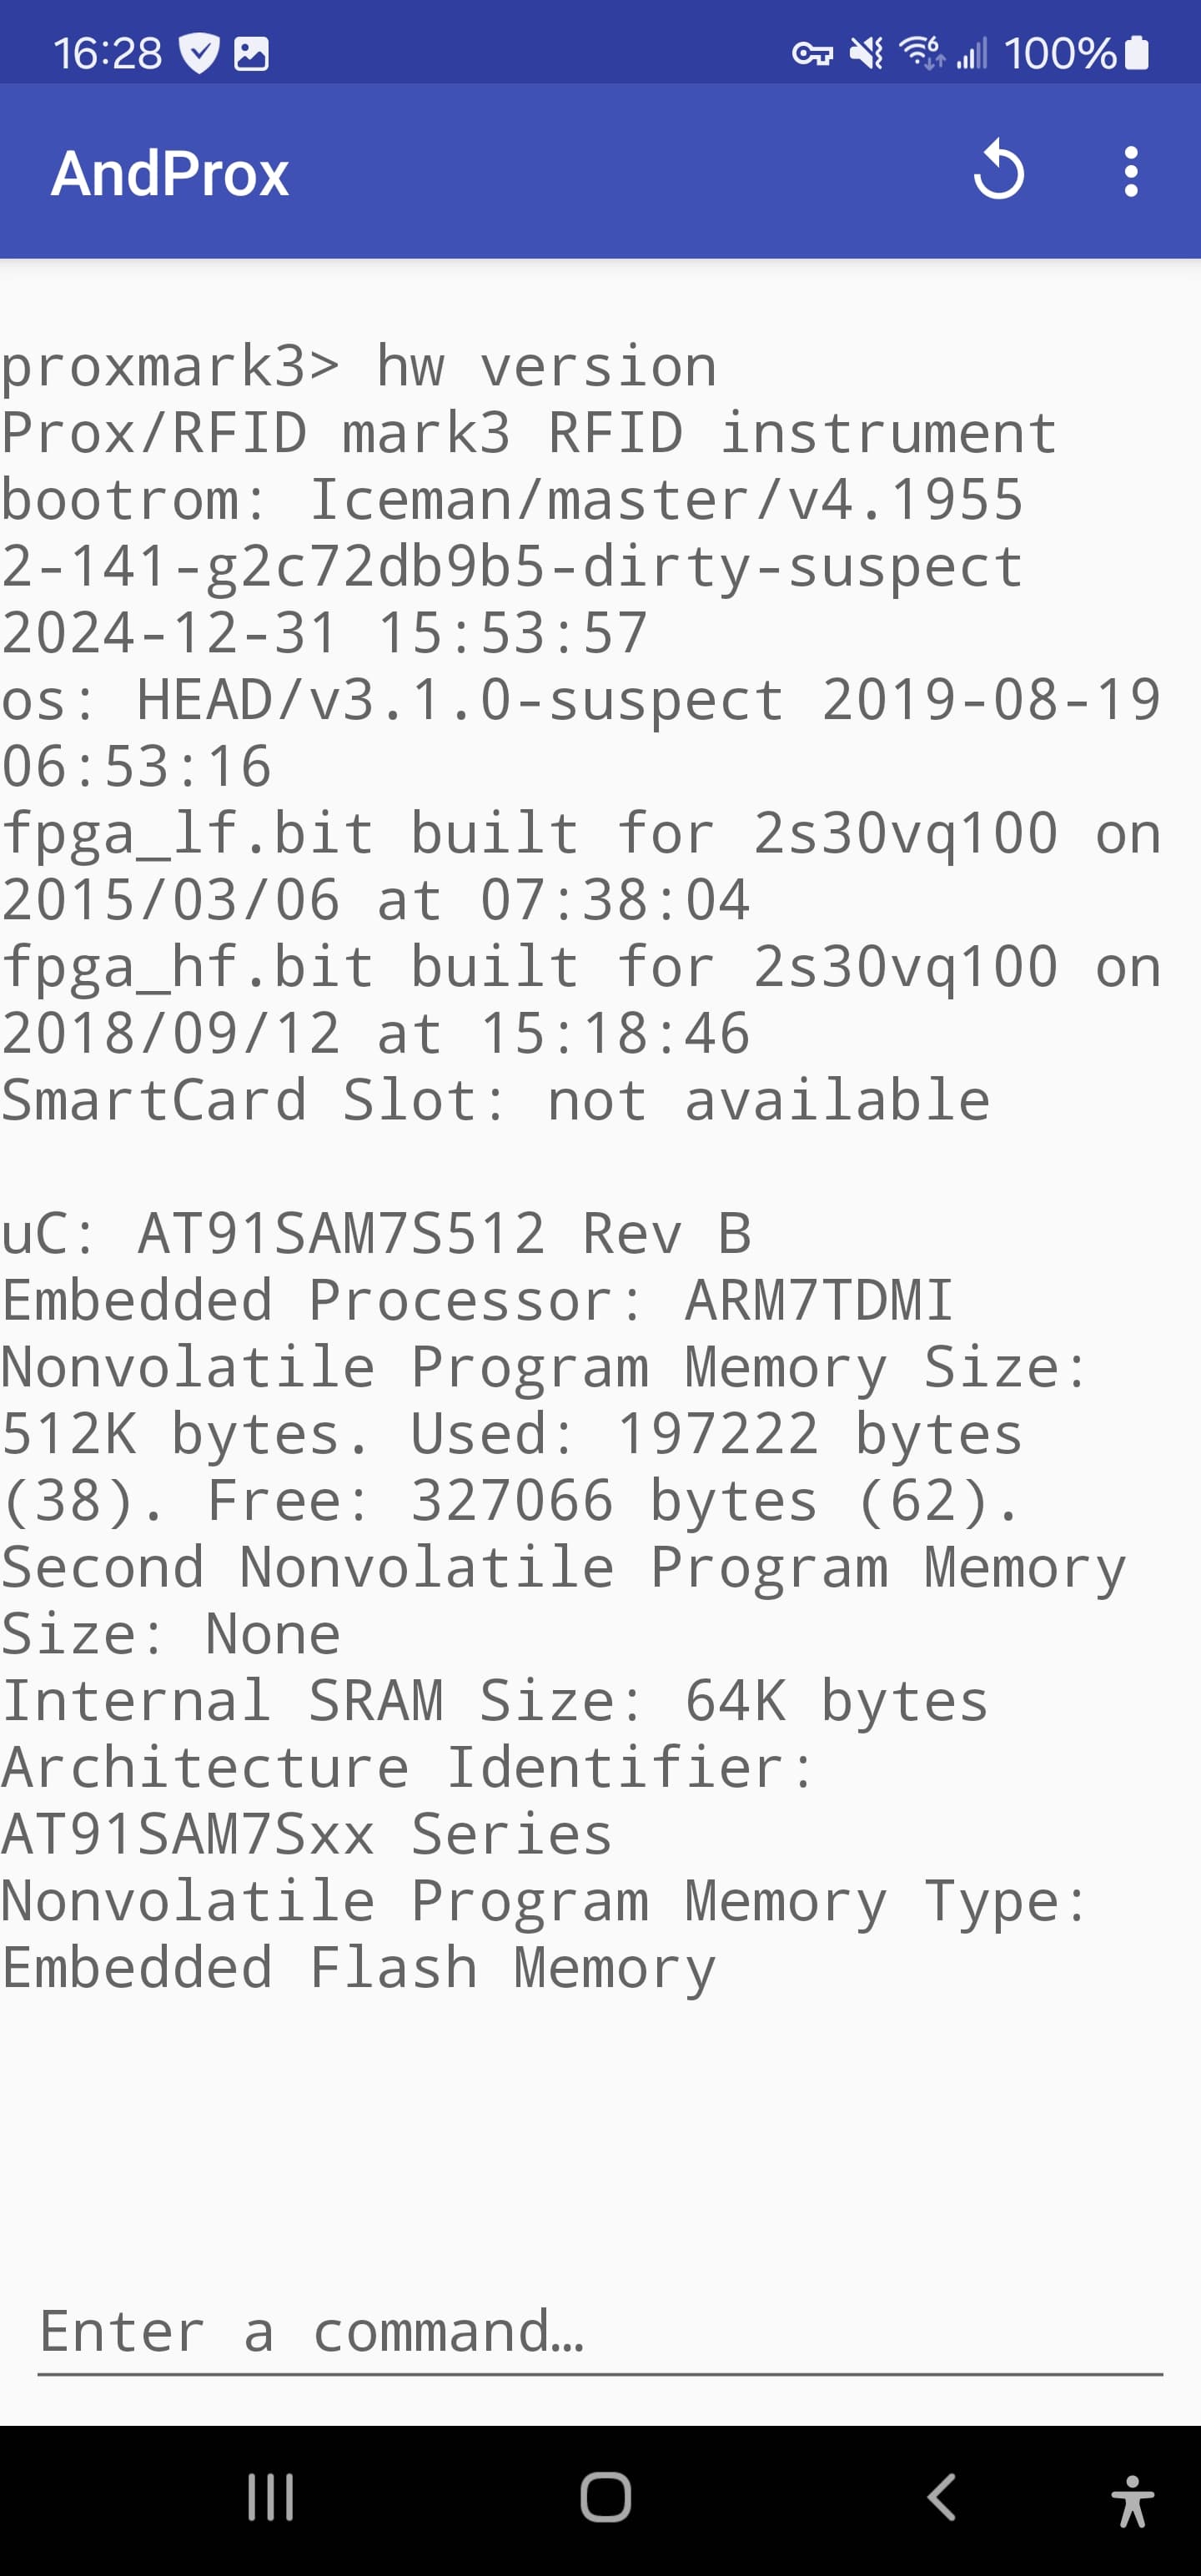
Once done, open “AndProx” on your android, you can then plug your pm3 into the OTG cable and into your phone
AndProx should auto-detect the pm3, click “connect via usb” in AndProx
The pm3 should connect and show the chip ID and other commands, if so, you’re good to go!
WARNING!
After flashing the new AndProx fullimage, you will not be able to use your pm3 on your computer.
To get the pm3 working with proxspace again, you have 2 options
Option 1: Open proxspace as you normally would
Hold the pm3 button while connecting the pm3 to the computer
Proxspace will fail to run the pm3 GUI, that’s fine
When it shows “~pm3” type “cd proxmark3” and press enter
Terminal will show “pm3 ~proxmark3”
Type “./pm3-flash-fullimage” and press enter, it’ll load the iceman fullimage.elf and reboot the pm3
When it shows “waiting for pm3 to re-appear” press the pm3 button to abort and unplug the pm3
Plug the pm3 back in while holding the button, then release after connected
Re-run the “./pm3-flash-fullimage” command again, it should continue as normal and re-flash the firmware
Option 2:
Open the previously “pm3” folder from flashing the custom firmware and navigate to “pm3>client”
Open a second folder and navigate to the location you have ProxSpace installed to
Navigate to “proxspace>pm3>proxmark3>armsrc>obj”
Copy “fullimage.elf” into the “pm3>client” folder
Follow the same steps we did to flash the custom firmware
If you brick your pm3, follow my guide
If you have any questions, leave them below and I’ll answer to the best of my knowledge