Back in March, I installed my NExT. Works wonderfully, but I knew that unlocking my phone using it probably wasn’t possible, because Apple generally looks down upon unconventional methods of authentication. But, my phone was jailbroken, so all I needed to do was figure out how to do it.
This is a tutorial on how to do this. I am trying to make this as seamless as possible, so if anyone is having problems, please let me know and I will see what I can do to improve this.
So, heres how:
First off, you need to make sure that you have an iPhone 7 or later. It is possible that this could work on an iPhone 6 or 6s, but I have some doubts.
You also need to have a jailbroken phone, and have some knowledge of how to install packages using a package manager such as Cydia or Sileo. I won’t get into the specifics of that, you might want to check out the jailbreak subreddit for more information on that. (https://reddit.com/r/jailbreak)
With those requisites in mind, we can begin.
-
You need to install ‘Shortcuts’ by Apple from the App Store, assuming it isn’t already installed by default.
-
Then, you need to add the following repositories:
Cydia
http://apt.thebigboss.org/repofiles/cydia/ (this is generally added by default, so you may not need to add it)
https://repo.chariz.io/ (also probably default, but check to make sure) -
Then, Install the latest versions of the following packages using your package manager of choice (Cydia, Sileo, Zebra, etc.):
NewTerm
Activator
PassBy
OpenSSH
LocalSSH ← (no space, not to be confused with Local SSH)
Filza File Manager
StopShortcutsNotifications (This isn’t required, but highly recommended if you don’t want a notification every time you unlock your phone.) -
After this, you will need to go to this link on your device, unzip the .zip in Filza File Manager, and install the .deb files in this order: NFCBackground, NFCUnblock
https://github.com/mealdy/nfcunblock/releases/latest/download/nfcunblock.zip -
(To install the .deb files, select each of them and press install in the top right. Rinse and Repeat)
-
Now, you’re ready to begin getting things set up. First, go to Settings and find the PassBy section. Turn on the sliders next to ‘Enable’ and ‘Do not require passcode after respring’.
Now, lock your phone and bring up the password prompt(do not use Face/Touch ID). It should say ‘PassBy requires passcode’. Enter your passcode, and an alert should come up saying that PassBy is enabled.
We’re halfway done!
-
Open NewTerm and run:
killall -9 nfcd
That should return nothing, which is the desired result. Exit NewTerm.
-
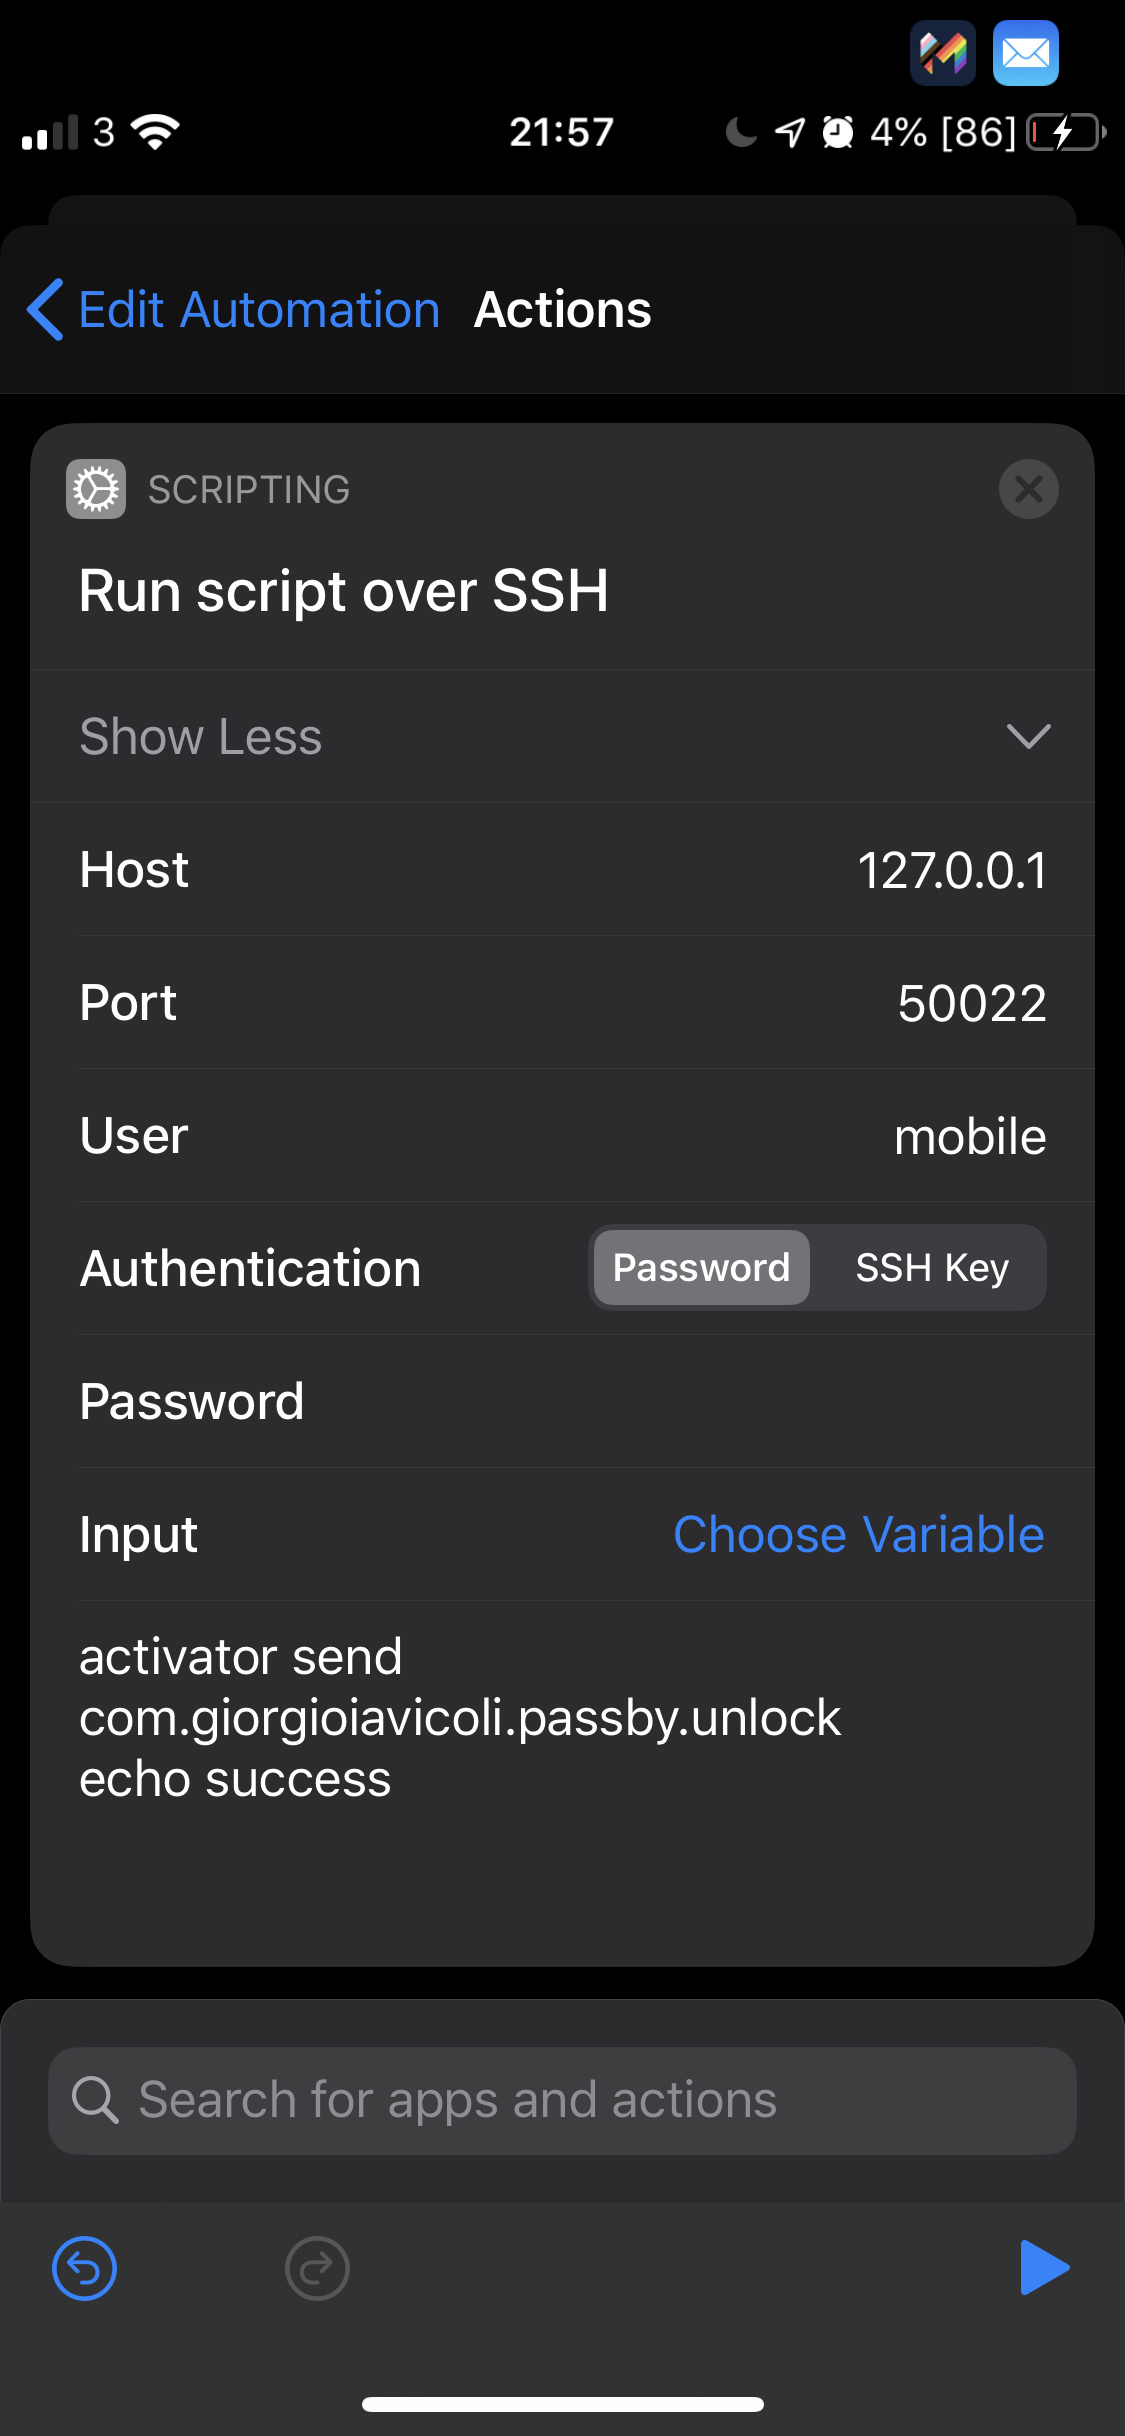
Now, open the Shortcuts App and head to the Automation Tab. Select ‘Create Personal Automation’
Scroll down, and find ‘NFC’. Select that.
Then, press ‘Scan’, and scan your HF NFC compliant implant or other chip (doesn’t have to be an implant i suppose). You can name it anything. Press ‘Next’
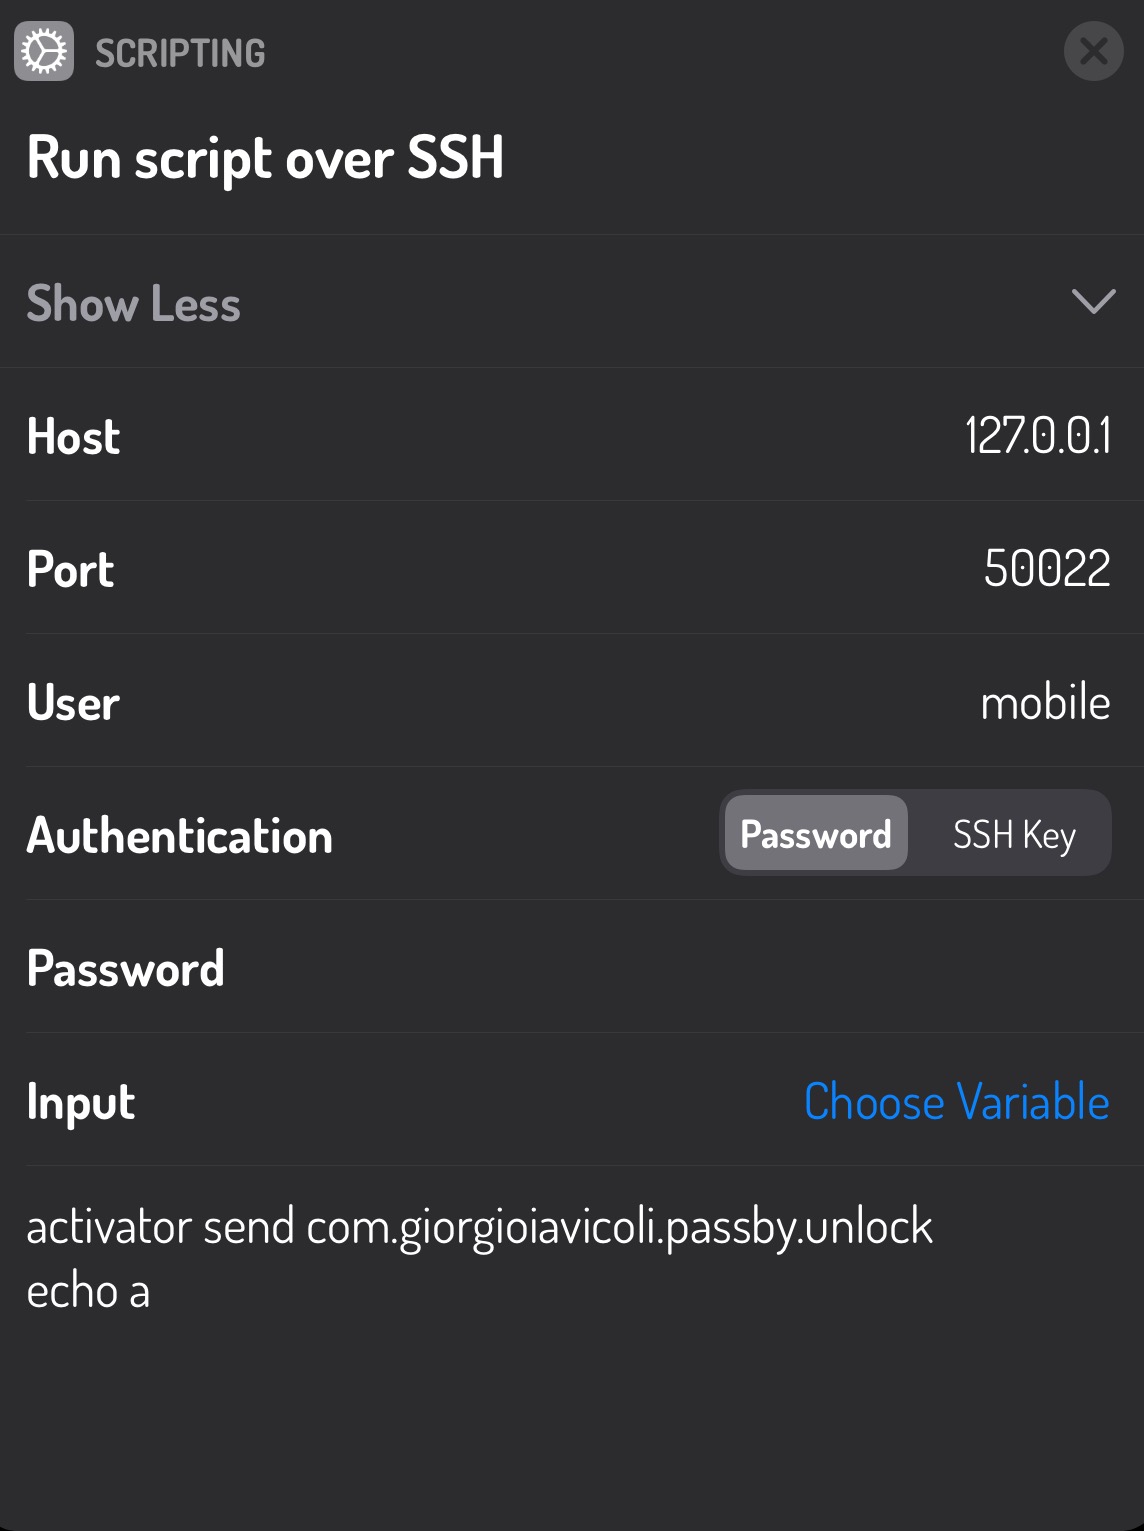
In the search bar on the bottom of the screen, find and select ‘Run Script Over SSH’, then fill in the fields as follows:Host: 127.0.0.1
Port: 50022
User: mobile
Authentication: Password
Password: alpine (by default, fill in with a different password if you changed it)
Input: (dont touch this)
Script: activator send com.giorgioiavicoli.passby.unlock
echo successNote: You MUST type in the echo command or it will return with an error. I don’t know why.
Disable ‘Ask Before Running’
And, that’s it! You should now be able to unlock your iDevice with your implant, as long as it can be read.
If anyone is having any problems, please please please let me know, I want to refine this tutorial as best as I can.
Edit: Here is a video of me using it. I apologize for poor camera quality. https://drive.google.com/file/d/1cXitYfnc0SAEKKMgAXx6SRkD4qlHRuI1/view?usp=sharing