Not relevant, but the lounge can have some “non-relevant” topics at times. Let me know if it’s an issue.
I’ve been bringing my old server back online, and as I get free personal-use Windows Server licenses through my university, I’ve been toying with Storage Spaces again. It’s well-known that parity speed on these is typically abysmal, due to caching.
However, I found some research on the version in Server 2019 (which is the latest I’ve got… they gave me a 2022 ISO but no license key yet) on optimising this by getting the cache bypass to occur. However, this research was incomplete and I’d like to take the time to complete it.
The original post was on Technet and can be found here.
The main takeaway was this table:
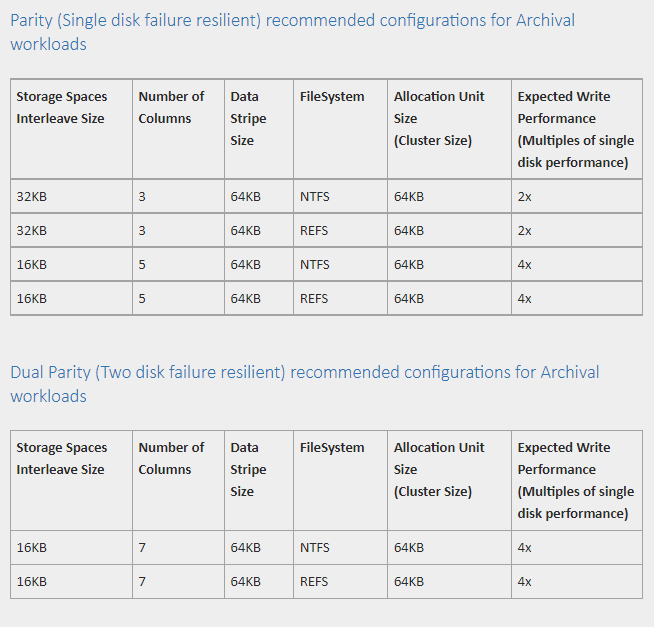
The single parity numbers and setups are all correct, but I found that configuring the dual parity in the manner stated gives the same atrocious 5-10MB/sec write performance.
The solution is simple - the columns must correspond to how many data + parity stripes you require, and the interleave size multiplied by the data stripe number is best if it’s the same as the allocation unit size of the file system used (which doesn’t matter for ReFS or NTFS, both you would use 64KB for). Basically, for a dual parity set up, the columns need to be data stripe number + 2. So if you want 4 data stripes, the interleave is 16kb, the columns is 6 and the cluster size is 64kb. 8 data stripes is 10 columns, 8kb interleave. You need at least as many drives as columns.
The command used to create such a space is:
New-VirtualDisk -StoragePoolFriendlyName *pool name* -ProvisioningType Fixed -Interleave 16KB -FriendlyName *vdisk name* -Size 4TB -ResiliencySettingName Parity -NumberOfColumns 6 -PhysicalDiskRedundancy 2
Once I tried these numbers, I was able to easily saturate my 1Gbit link and get 200MB/sec via a SSD to space copy.