CaRFID - Custom Ignition Switch Replacement (Open Source)

Excellent write-up, nice work!

1 Like

great job…

Radio working now! As suspected, it was just a loose connection from the previous owner. There was a join in the cable that was completely unsoldered, just wrapped together + electrical tape. That pulled apart while I was fiddling around. It was the main +12V wire, so it makes sense as to why it wasn’t working at all lmao.

Forgot to mention in the main post, I also plan on soldering up a partial board (just 2 relays), and using the same board for my door unlock/lock. Didn’t want to start on that til I got the kinks worked out with the ignition, so I’m going to work on that in the next 2 weeks or so, once parts come in.

1 Like

don’t you kinkshame the ignition… after all it does for you…

3 Likes

Basic design done for a 1U front panel, holding the main power switch, the two LEDs, and the two buttons, along with an expansion for the reader to allow for easy access with my hand. The buttons along with the switch just use a nut on the front to attach.

Almost forgot, also need to add two little arms coming off of the back, for the board to screw onto. Once I add that, printer time.

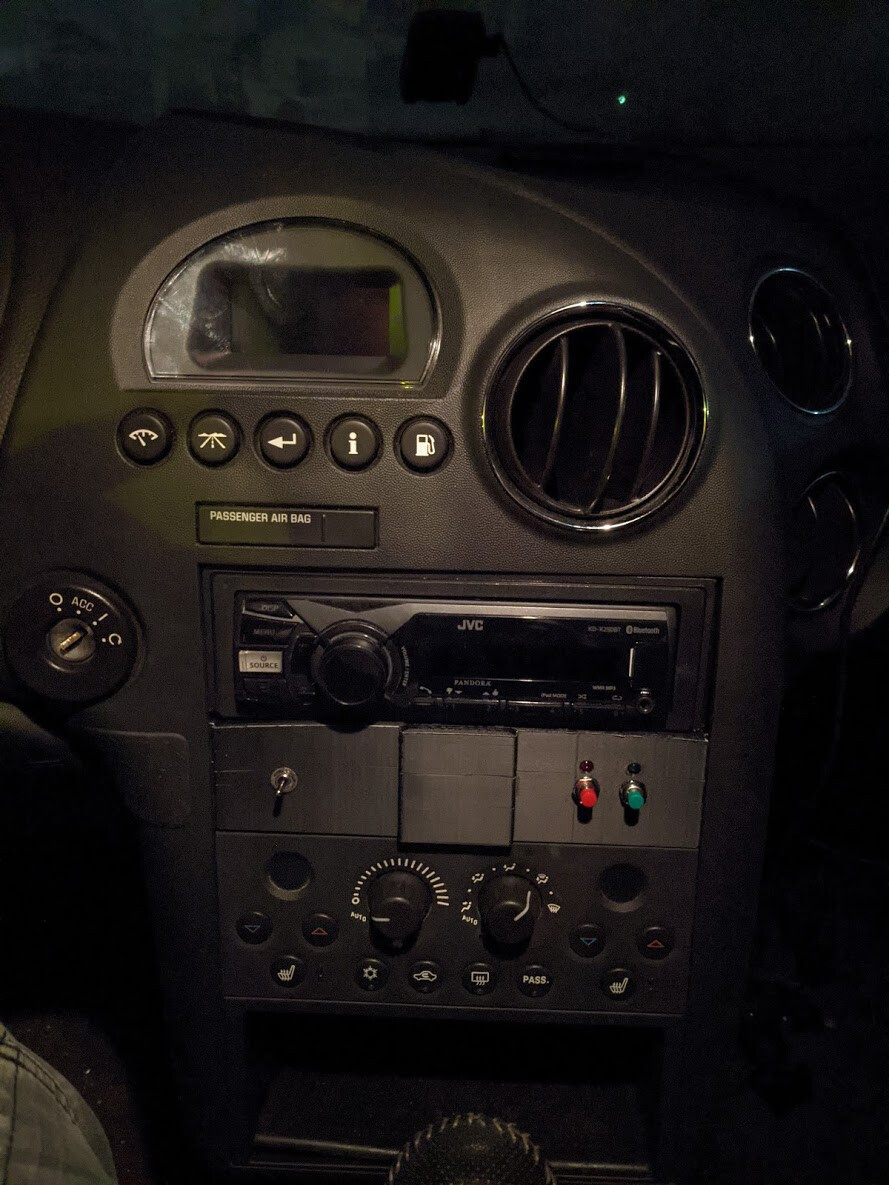
Just got back from driving for an hour, to double check that everything is fine (it is). An hour ago, before the drive, I installed the first front panel. I’m not happy with the print quality, it warped considerably and the layer adhesion is awful (ran the speed too quick), so a small crack formed down the center.

I printed it upside down to reduce needed supports, that’s why the top is warped, rather than the bottom.

Regardless, it fits, and it’s functional. Can always swap in another revision whenever.

Here’s a video of starting it with the front panel installed, it’s a lot more effective than with everything flopping around. I still have to get used to positioning, though.

When I print the next version, I’m going to do so in some black PETG for sure (just ordered a roll). Temperature resistant as well, less carcinogenic, and prints way easier.

6 Likes

Got a new one printed in eSun black PETG (thanks to @DonFire for mentioning it a bit ago, reminded me of it as an option for this). It’s super glossy & the color doesn’t really match, but print quality turned out pretty well, and it’s VERY strong. I don’t really care about the color, it looks worse with flash on anyways.

I was also able to tweak the original radio mount a bit (trimming off the bottom a bit more), and now it fits together very very well. Originally the radio sat a little high, which made it so the front piece didn’t fit in quite right (goes on with clips).

Sorry for the vertical video, but it’s way easier to film that way, plus I originally posted this to Snapchat.

The range on it is actually way better than I expected, the front wall is only .8mm thick. I have no issues hitting it first time with my implants, and the spare key card I made reads from like 2-3 inches away.

The last thing I tweaked was adding PWM to the start/stop LEDs. The green LED I had was absurdly bright compared to the red, and it was distracting at night. Now the brightness is perfect.

Now that I’ve done a lot more stress testing and tweaking, code and KiCad going up tonight. I’ll add it to the original post, and I’ll also throw another comment here. The KiCad files will just be this revision though, with the bodges required. I’ve been busier than expected the last week. I’ll throw the STL for the front panel on there too, why not. Gonna make a git repo.

5 Likes

Here’s the repo.

Glad the PETG suggestion worked out! Could always sand it slightly to give it a more matte appearance, or a coat of spray paint.

Gotta say, this definitely looks very impressive! Well done! I look forward to hearing about a 2nd iteration whenever you find the time

2 Likes

You might want to try this:

Can’t use PLA for this. It softens too easily, it’ll melt and deform in a hot car, especially with a dark color.

That’s why I went for PETG and ABS, they don’t deform at high temps.

Well, they do, that’s how you converted it from a spool into a printed object. It’s just the point where it starts to deform is significantly higher and ambient temperatures don’t really get there.

1 Like

Yeah haha, I meant high temps relative to the inside of a car in the summer.

2 Likes

Yeah, for most parts of the world. If you live in the Australian outback in the middle of our blazing summers it might be a different story though.

PETG / ABS would still likely be ok… glass transition temperature is 79-80 degrees, and if it’s that hot you’re toast too.

However, if that’s still not good enough, there’s always Polycarbonate (I have a spool, still thinking of what I want to use it for) with a glass transition temperature of 147 degrees.

BTW, it’s good to see you active @Compgeek :heart:

2 Likes

Haha, guy’s if you park your car here in Alabama in a Walmart parking lot on a nice summer day it’s getting close to 200.

Guessing they’re talking celcius :wink:

2 Likes

I think C and F are getting mixed up here, @DonFire is using Coherent units and @Intector is using Freedom units…

200F is 93C, so still in that range.

I found studies indicating that the temperature in a car can easily be 25C over the ambient temp, plus about another 5C if your car is black. On a 45C summer day that would be 75C, so we’re not too far off either, but probably fine except for the really hot days once every few years. Seatbelt buckles can become branding irons!

I thought I’d add to the other comments, in the 3D printing world Celsius is always used, regardless of country. Since you have to constantly swap materials with different ideal temps, it’s a lot easier having the printers, filament, and the community all using Celsius.

I printed the front plate at 245 C, by the way, which is 473 fahrenheit.

1 Like

That’s funny, you remind me on the fact that the whole world, except the USA, is using the SI-System, but the Americans are calling their system “standard”. I’m not a native American and utterly fail to comprehend why the American people doing this.