Hi, I bricked my PM3 a little while ago and since I was able to solve it I was asked to do a guide.
First step is to press and hold the boot button when plugging in the pm3, if it shows up in your COM ports you can just follow the flashing part in the PM3 setup guide provided below.
Requirements:
Software Linux/Windows:
Install Proxspace (if not already done) by following this guide.
J-Link Commander, J-Flash from here (it’s bundled, uses WinUSB drivers on windows)
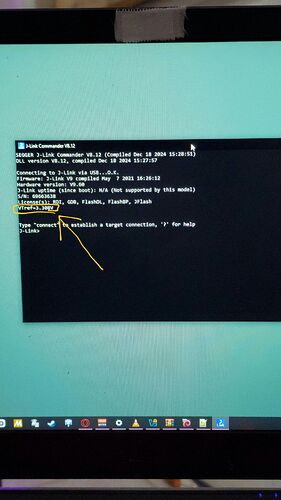
Plug the Jlink into the computer and open J-commander, it’ll auto update the firmware if needed but you’ll also want to check the terminal to see what voltage it’s set to. Make sure it says “VTref:3.3v” and not “VTref:5v”
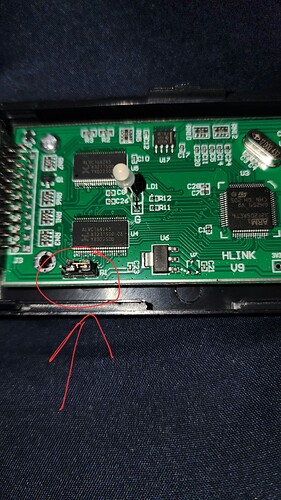
If it says 5v you’ll need to open the Jlink shell and switch the jumper to 3.3v
HARDWARE:
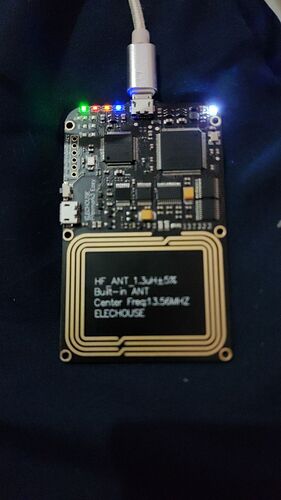
PM3
Usb cord
Dupont cables (i used male-male)
Small piece of conductive metal (i used tweezers)
Multimeter (to check continuity)
J-Link JtAG Programmer (I got mine for 18 CAD here
Here is a US Amazon link
DO NOT USE A STLINK (V2), theoretically you can get it to run JTAG on openOCD but i was unable to get the transport layer to be JTAG, it kept defaulting to SWD
You can also use a FT232H but i don’t currently have one, if i get one I’ll make a guide
TO UNBRICK:
Assuming you’ve already tried the button trick; Your next step will be to reset the AT91SAM7 chip by shorting pin 54 and 55 togther whille power cycling the pm3. (power cycle: turn on pm3 with pins shorted for a few seconds, then remove short, use this time to also write down what the chip writting shows. You’ll need it later)
With the short side usb port facing up, pin 49 will be the first pin (top pin) on the left side of the chip (shown in red)
If done correctly, all lights on the pm3 will glow.
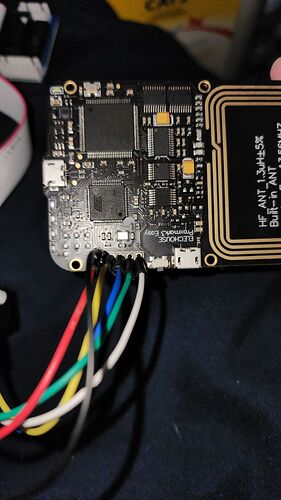
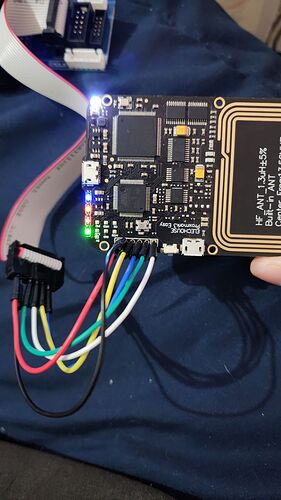
You can now remove the usb cord from the pm3 and start to set up the JTAG connections to the JLink, I used a multimeter to verify the connections matched the correct pins.
Youll want to connect:
Vtref to 3.3v
GND to GND
TCK to TCK
TDO to TDO
TDI to TDI
TMS to TMS
Verify connections (multimeter and write the color of dupont wires down for each connection. eg: tck yellow, tms white, tdi green, tdo blue, gnd blk, 3.3 red)
Once verified you can now plug in the Jlink and open J-Flash (I had to hold the dupoint cables in place to get a solid connection)
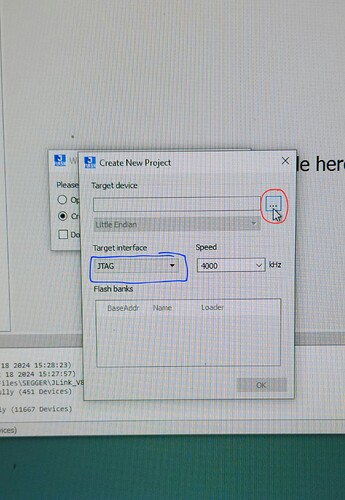
Create a new project for J-Flash, it’ll open a pop up to select which chip you’re targeting. Change “SWD” to “JTAG” (circled in blue), leave the speed as the default 4000 kHz.
Then click the 3 dots (circled in red).
Under “Device” type what the chip had wrote on it from the reset step above. (mine is a AT91SAM7S512) then click the device so it’s highlighted and then “okay”
Leave everything as default (unless it reverted back to SWD, change it to JTAG) then click “okay”
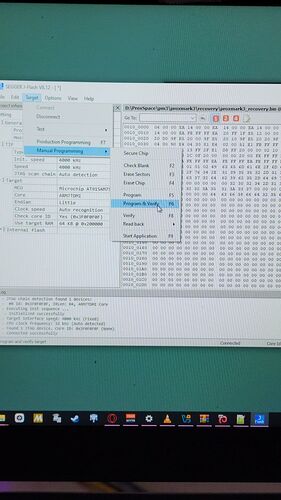
Under “Target” click “Connect” to connect the jlink to the AT chip.
Open the proxspace directory and navigate to pm3>proxmark3>recovery
Drag “proxmark3_recovery.bin” to j-flash and keep the target address as the default.
Press “F6” or “Target>Manual Programming>Program and Verify”
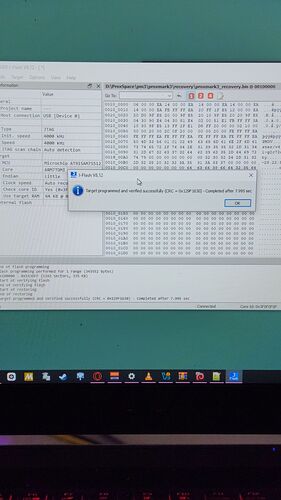
Wait for the chip to be programmed and verified.
I reverifed but it’s not needed.
You can now unplug the jlink to cut power from everything (to avoid shorts)
Plug your pm3 back into the computer using the usb port (short side)
If just the white LED glows, that means it’s unbricked. You can start up proxspace.
You can now follow the original pm3 guide to update.
