Thanks for sharing the other thread, I will take a look.
I just thought with this particular project if it wasn’t too technically challenging then it might be good to mitigate a potential risk - at the moment if one mode is used numerous passwords can be stored in plain-text on the reader, so if the reader was stolen they could be extracted by someone competent and in-the-know about the setup - if that risk can be mitigated easily then why not?
Unfortunately I am using a Proxmark3 to set the password /0 is a null byte and I am not sure if NFC Tools can write that I’ve never tried.
I need to add a password setting option using the same hardware, I am just not sure how to make it easy for users. I would have liked to use the MSC mode but that seems to be complicated on the Trinket M0.
I’m all about mitigating risks! I like this very much, I see the value.
I just think we’re too late with these ideas, as a really secure alternative is just around the corner.
You could do something similar with Sparks and the KVP API already and you can just manage passwords on the Apex later.
If you have access to iOS I don’t mind gifting the Pro Edition of NFC Tools to you.
The Pro Edition of NFC Tools can “Edit Memory” it reads all the memory in a very raw form by the looks of things and allows you to adjust it, but I can’t say I know what I’m looking at in there. It is a bit like this (this is someone else’s screenshot however):
And only £2.49 to upgrade from the Standard to Pro Edition, not too badly priced either. I feel like it gives me the access I need - I just don’t know enough to know what areas I should be editing for this particular project there looks to be hundreds of memory entries in my list.
If you wrote that data block as ascii to the chip then you should be able to fix it with the edit record. The other thing to make sure is that you have removed the UID from the internal password table. It actually checks the UID first as that is faster than scanning though the chip for ZPKW.
Thinking about it, being able to obfuscate the password table will only give a false sense of security as the code itself for de-obfuscation will be right there in the publicly available code.
Perhaps a better option would be to have a single entry table containing just the password, but each entry is encrypted with the relevant UID. Thus the scan provides a UID which is used to attempt to decrypt each password until it finds one that decrypts.
Yeah I’ve made sure to remove my UID from the password array. Unfortunately I’m still not having much luck. I don’t know how to convert the text/record type to ascii, I have tried.
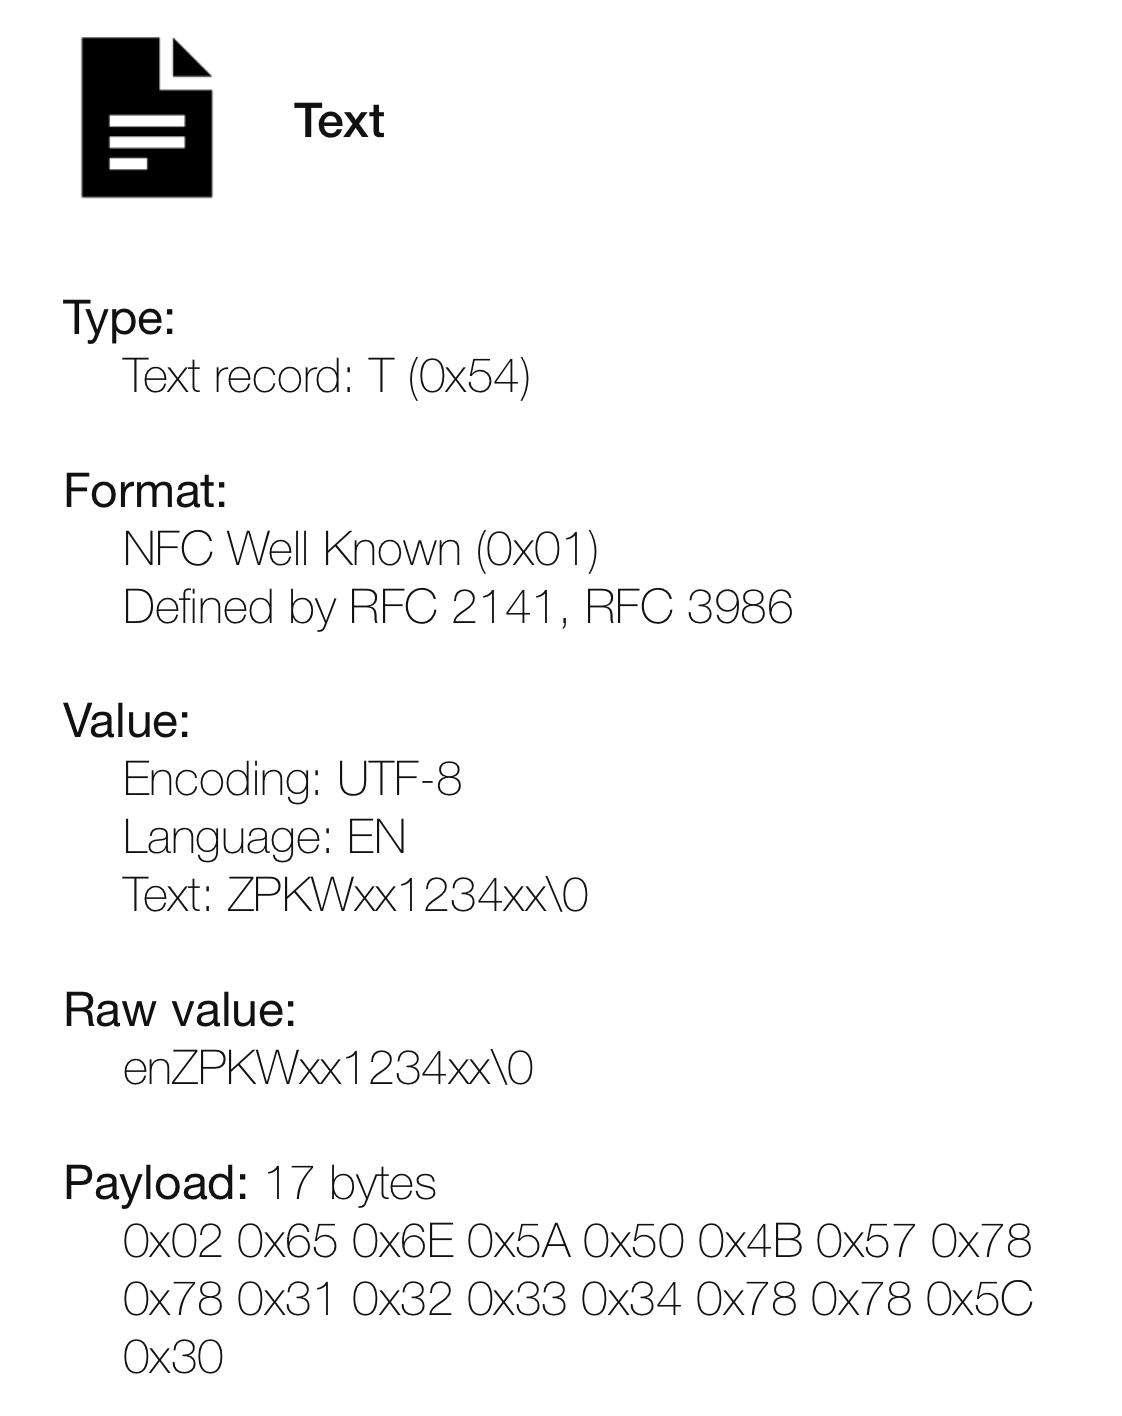
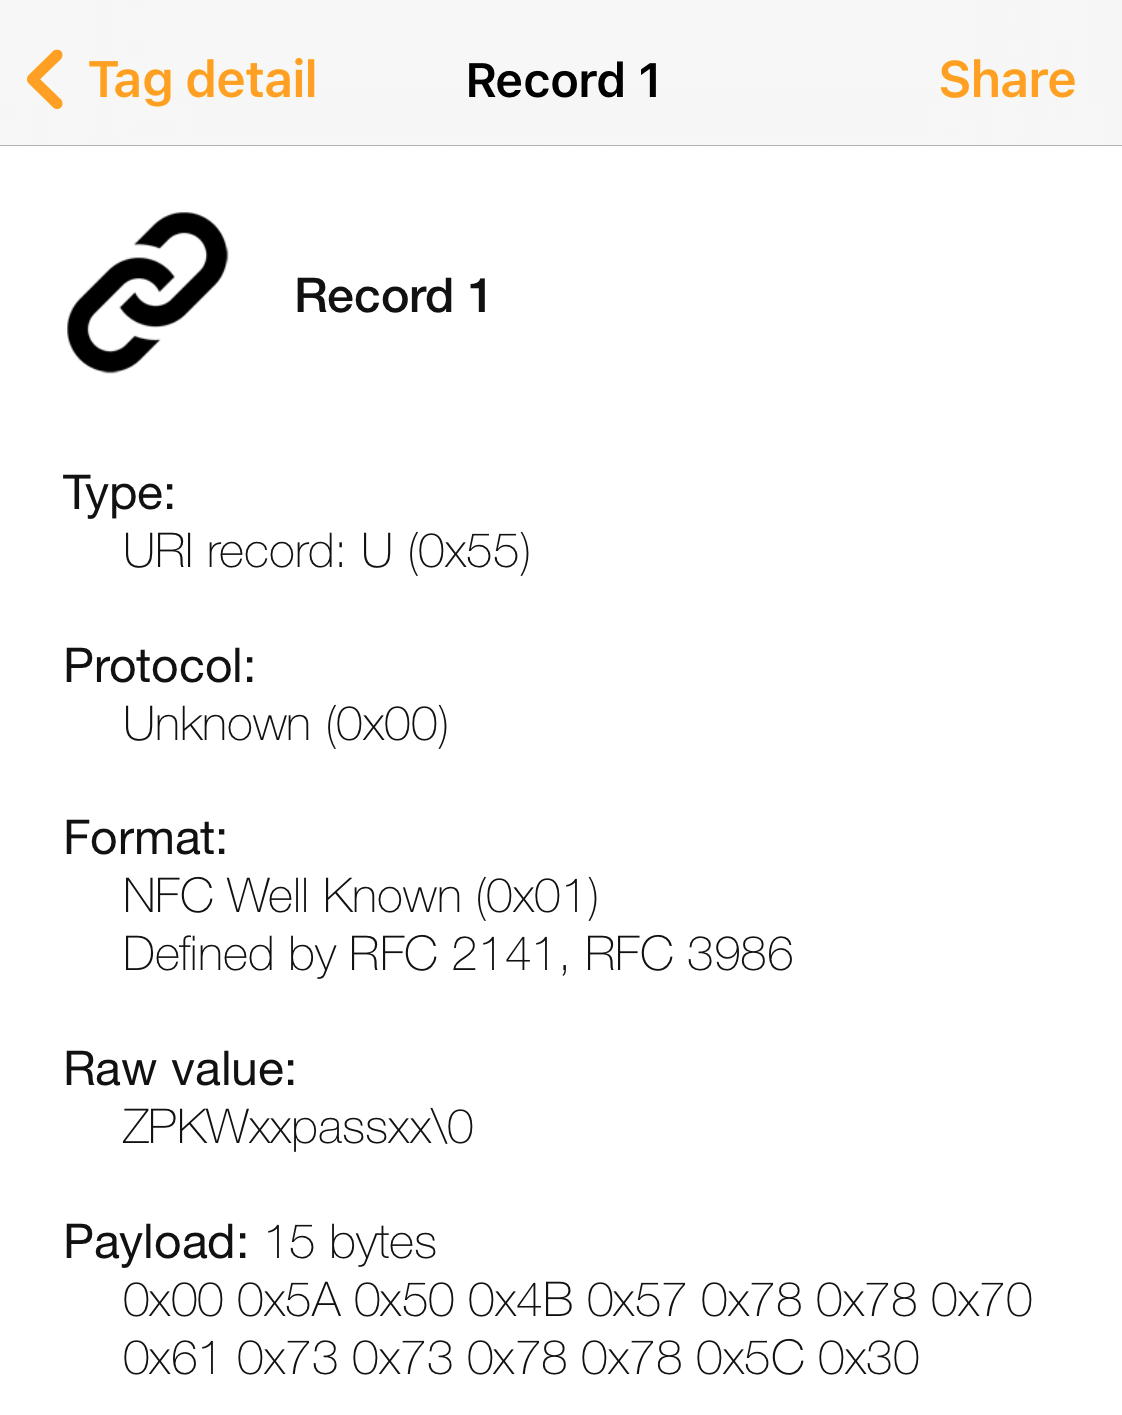
One also thing I’ve noted after writing the ZPKWxxxxxxxxx\0 record with three different pieces of software in text-mode none of them are being recognised. I think one or more are potentially writing it in UTF-8. Would it be possible to make the code parse both ascii and UTF-8 in order to improve compatibility? As I say I’ve tried writing the record with three different softwares, I’ll post a couple of screenshots of the record types:
Just wanted to say, that I appreciate the design for this keyboard wedge
I am going to get an xSIID implanted next week and I am looking forward to using this.
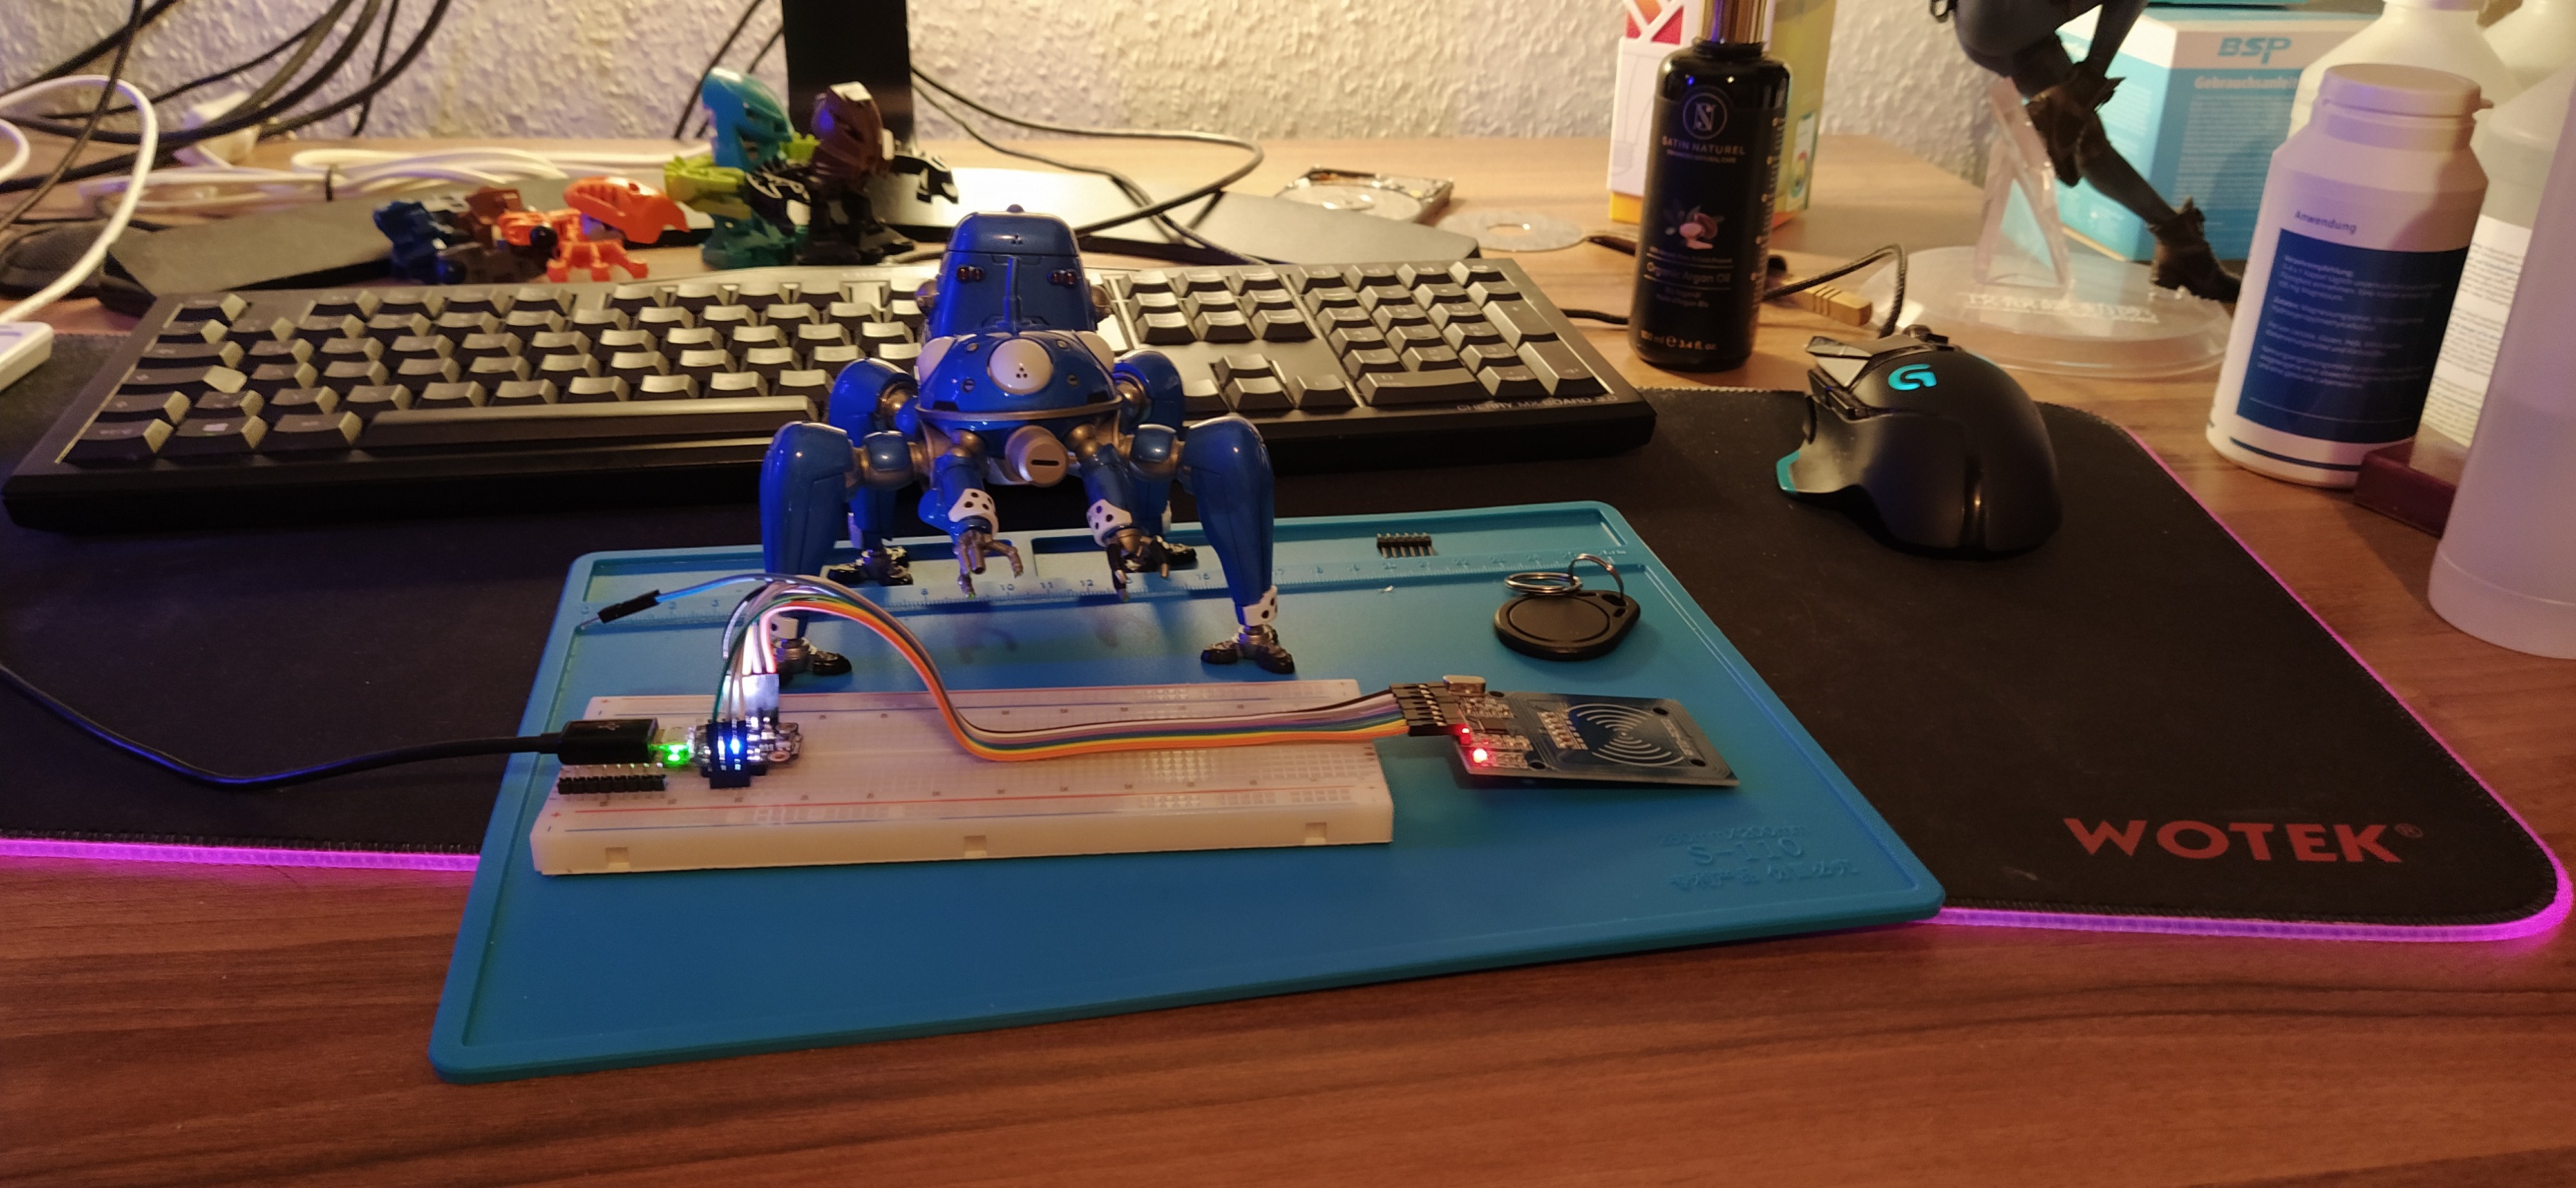
Spent today looking at a couple of options for mass storage class USB devices (not going to be happening at the moment) and cryptography for the encrypted password table.
I decided not to use cryptography for that password table for two main reasons.
Any decryption key would be on the device anyway so it’s not going to be worth the extra computation.
Rather than including an extra library I might as well just obfuscate the password by XORing the password with the UID as suggested by @anon3825968. (Repetitively if necessary).
As for the option for writing the password to the chip, I think I will use the USB serial port rather than a mass storage device class. Connect to the USB device, it will prompt you for a password, ask you to repeat it and then assuming they match will write it either over the old password or find a blank space and add it to the chip.
I don’t think the ide is hard to use … Once the library are linked and installed it’s just a matter of updating ypur ow and click send …
It also protects the password stored on the m0 from being read without having the UID.
There is always a possibility of someone scanning your chip … But that requires special equipment and knowledge. They would have to know exactly what they are doing and Target you specifically, I feel there are easier way to get in your computer than that …
That would save the step of the proxmark.
Will we be able to chose where it get written? I still need to test it, but I was gonna try to add it to the end of access card (hotel key pass). I’m thinking the reader might not care if there is extra code at the end and it would allow the chip to be use for 2 different things.
Edit: also got the cases ready. Need to finish my second wedge to make sure I didn’t miss anything and I’ll upload the files somewhere. Thinking about Cults 3D since thingiverse has been hacked/is out of the picture …
I have the start of the “write a password on this chip” completed. At this rate it should be finished tomorrow… Hopefully.
This requires you to connect to the serial console of the Arduino. At that point you follow some simple instructions. While in this mode the built-in red LED next to the usb port is on. Unfortunately it is next to the red led on the RFID module so that might not be as obvious as I would like.
I might change the colour on the dotstar as well to make it more obvious.
Ok, so we can go back to “programing mode” on the m0 and use it to write to the chip?
Being able to chose the location might be helpful (starting block?) (if feasible)
Basically the idea is you use something like the serial console in the Arduino IDE, or putty or…
You then press 1 and enter and it switches you into programming mode.
It then asks you for a password, and asks you to repeat it (to make sure you either didn’t typo or typoed twice in the same way and spot).
Then it asks you to put your chip on the reader and press a key. It then searches for an existing password. If it is big enough then it replaces the old password with the new one, otherwise it blanks the old password and writes the new password to a large enough blank area.