DT should sooo sell this in kit form. A community-created product to replace the KBR1 would be fantastic. Or possibly alongside the KBR1.
5 Likes
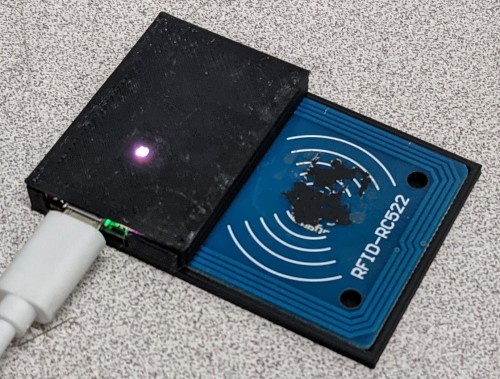
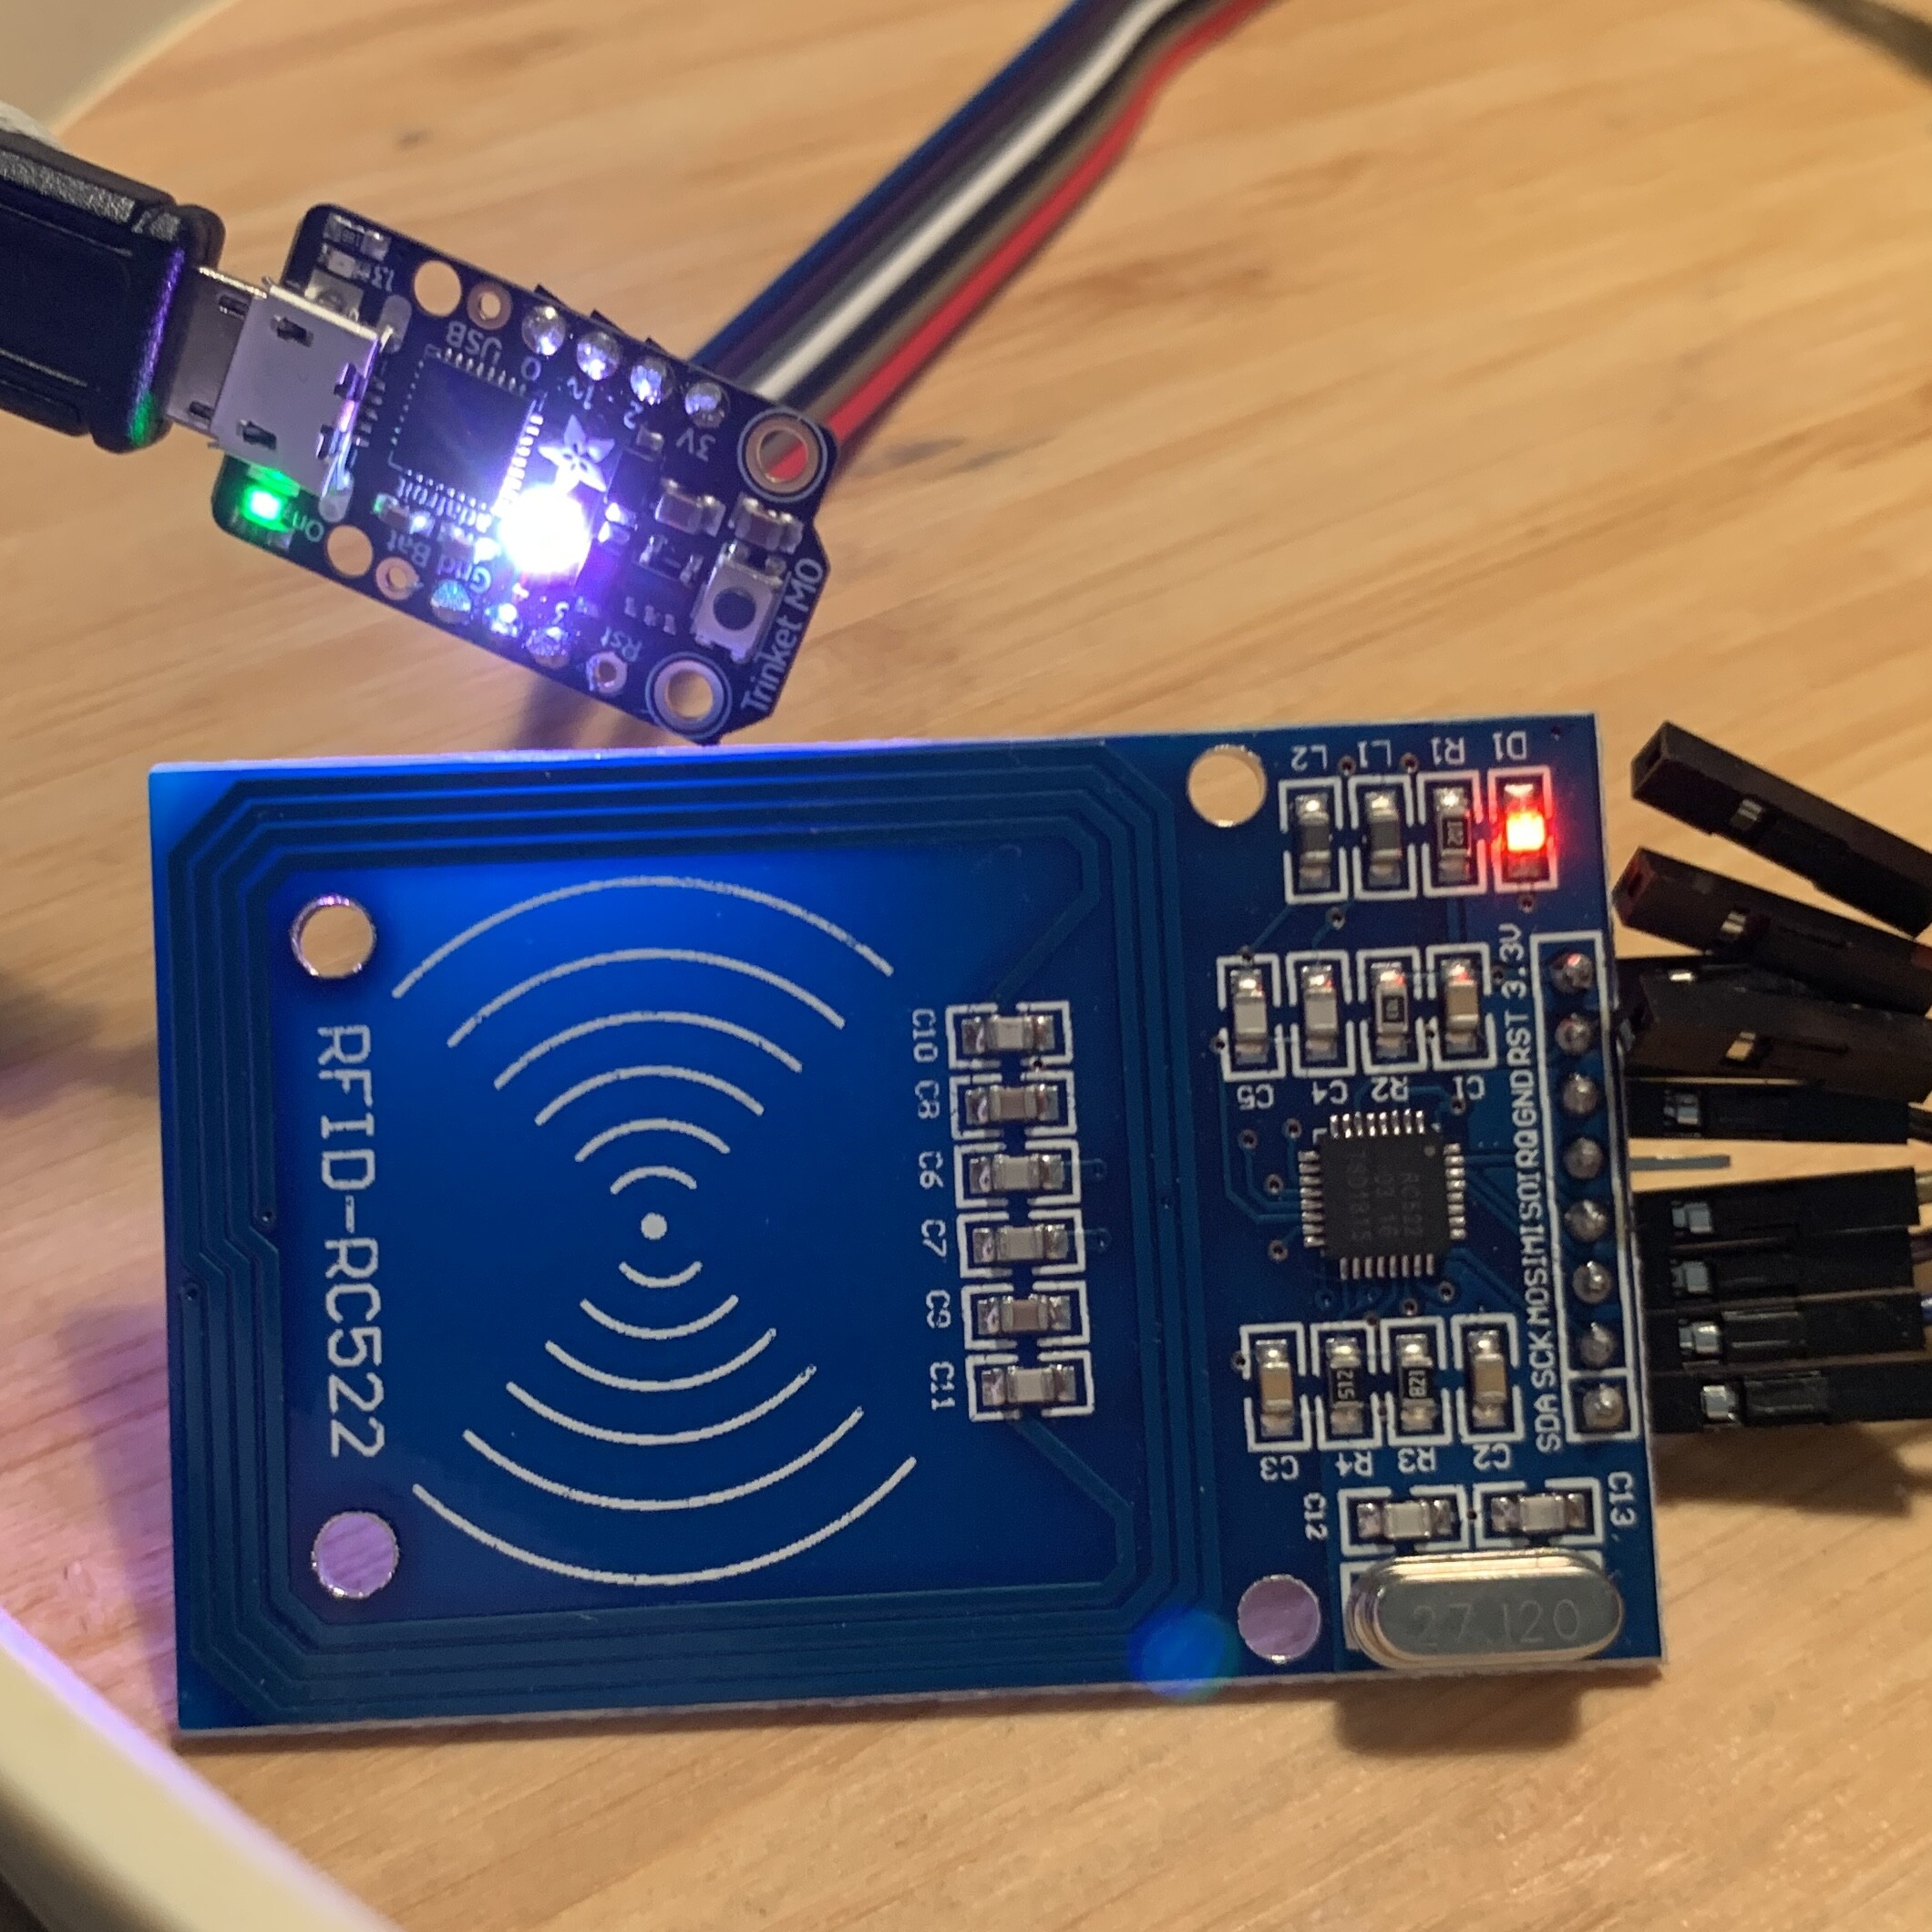
I have my Trinket M0, RC522 & 3D Printer at the ready! Cards, fobs and implants to test.
I’ve been familiarising myself with CircuitPython and the trinket today as that just turned up. I’m thinking of printing this case in a moment just to hold things as a test base.
If any of you get a nice design together please do share the STL / model. Hopefully I’ll get some more time soon to piece it all together and do some testing. Thanks for your efforts on this all.
1 Like
While Circuit python is nice, this is I’m afraid an Arduino Sketch. It’s not much harder to use. You will need to set up the Arduino development environment, as per this post. You will probably also need to load the rc522 library. Then upload the sketch onto the Trinket.
The sketch is basically C++ code. There is however nothing to stop you playing with Circuitpython on the Trinket and putting this sketch on when you are done. I have a couple of Trinkets ones dedicated to this and one for playing with for development. A Uno, a Metro Mini, and a few Digistump Digisparks.
The Trinket is a nice blend of size and functionality though. (A few extra I/O pins might be nice.)
1 Like
I should have a few case design (a full one and one with exposed antenna) ready in a week or so.
I’ll post it somewhere when they’re ready.
The Arduino nano is the only one that comes to mind, but there is no USB/keyboard output/emulation …
I’ll keep the m0 for the wedge and the nano for access control ![]()
1 Like
Understood, thank you for the heads-up on that.
1 Like
The Adafruit Trinket M0 has been my go-to MCU dev board for awhile now. It’s such a perfect blend of features and size for a measly $8 USD. There’s also a true DAC on pin 1 that can source a pretty good amount of current. I bet someone like @Az_F could make good use of that for magnet feedback like the SMIS Cube does. I’ll have to explore it more
1 Like
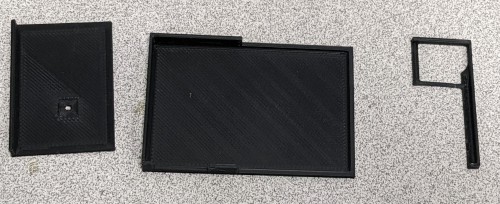
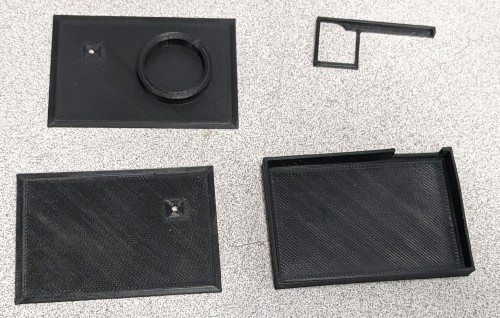
Ok, big update on the case:
I have the design just about ready!
I will do another print tomorrow with some minor tweak and if they work, I’ll post it up.
Also, I have another trinquet coming so I’ll take some pictures for an assembly “guide” …
Here are pictures of everything:
There are 2 possible tops for the full case, one flat and one with a spacer above the antenna so it doesn’t collapse.
Also the “P” shaped part is a guide to glue the trinquet at the correct location.


5 Likes
very nice congratulations for the project, but are you going to do a series in production to sell them?
Where have you been! My savior! Is it powerful enough to do an fft and reverse fft real time though? I need to shift the audio frequencies to magnet frequencies… ![]()
By the way if anyone here needs something 3D printed I can do that ![]()
1 Like
I really like the half case design.
As for a production run, I am not planning on doing a production run myself, but if @XEMON wishes to do so then I am fully behind that as he has been a great help in testing and he has designed the case(s). Software issues can be reported to me here or through the GitHub.
As the hardware is just a Trinket M0 and an RC522 another possibility is that some people might like the encased hardware for other software that they are working on. xM1 unlock block 0 @cells-called-nick would you be interested in this case design?
1 Like
I’m really digging this!
I’m quite busy now in the last few weeks of the semester but I’ll have plenty of time to tinker soon. If you start producing some of these I’d be keen!
There is a libfft for Arduino, and it does accept direction to the compute function. Do you have any example of what you are trying to achieve here?
I might be able to knock together a quick test and see if it can perform an inverse fft fast enough.
1 Like
My goal was to take standard audio in 20Hz-20kHz and map that to 10Hz-400Hz, maybe get rid of some of the hf…
I would start with a voice sample which should be a much smaller frequency range than 20k.
1 Like
Latest version: Added NXP NTAG 213/215/216 detection.
So, those are explicitly supported along with most MiFare types.
3 Likes
Apologies for the delay; I’m holidaying in the remote wilds of Exmoor at the moment!
Thank you for adding NTAG216 support - I’m now using it successfully with a xNT / NTAG216 implant.
So before I left home; I quickly soldered some dupont cables to my M0 so I could do some testing with this from my laptop whilst away. Just sat down to test and it is working great, I followed the various documentation dotted around and so far I have tested two modes:
- No password stored in array or on chip (so it prints out the UID).
- Password stored in the array
And I’m happy to report both of those modes are working beautifully for me with this setup on a xNT / NTAG216 implant.
I’m looking forward to trying out the third-mode soon by writing and storing a bespoke password on my implant and then reading that.
I have an idea I will run by you soon @Zwack regarding the password-array mode, I can’t code like you can (I’m a beginner!) so I’m hoping you might be able to tell me if it would even be possible or not. I’ll post the idea soon.
1 Like
The more ideas the better. I can certainly try and code it up for you if nothing else.
As for my coding skills, almost 40 years of practice helps…
![]()
1 Like
So my idea to expand upon the password-array mode you have built in - whilst I love that capability, the paranoid in me knows that the password is stored in plain-text within the code on the Trinket M0.
In the unlikely event it was stolen; most thieves would be oblivious to it, so the password would be very unlikely to be extracted and stolen from the M0’s memory I would guess. However, would it be possible to obfuscate or encrypt the password within the code so it is actually hidden from view entirely from a more informed attacker. My idea is that your code would use the input (password or UID from the RFID chip) as the decryption key to unlock the encrypted password that is stored in the array.
I fully appreciate that you have taken to steps to try and make this easy to use and adjust for people which is great, it is already very versatile and I think the design is great so thank you. I also appreciate that if a user wanted this higher level of security I’m talking about they would have to be savvy to the process and jump through extra steps, like passing their password through some algorithm or process which would do the obfuscation/encryption for them of their password and then they would take that output and drop it into their KeyboardWedge.ino code. This could potentially be considered a new “mode” perhaps.
It sounds like you’ve got plenty of coding experience, so hopefully you’ve had some prior experience working with encryption. I have zero experience with encryption from a coding point of view, but I feel I have a good fundamental knowledge of how it works and have used various different forms of it. This is just a rough idea I had and I was thinking of it a little like a public / private key-pair, the public-key being the one held within the array in the code on the M0 and the private key being the one held on the user’s RFID chip or implant.
Does that make sense? And do you think it is plausible?
Thank you for your time and efforts on this project, I will be following closely and doing what I can to help with testing and adding to it if I can. I can also help with 3D printed case designs when I return home.
Just store a random key value on the reader, and the XORed sequence required to regenerate the ASCII password on the tag. It’s basic secret key encryption.
Of if you don’t want to store anything on the reader, use the tag’s UID as a key. But then it becomes plain obfuscation rather than encryption.
2 Likes
Got around to testing the third mode (retrieving the password from stored data on the chip) but I’m struggling. I can reliably write and read the data but I fear I may be storing it in the wrong format perhaps?
I’m using the paid version of “NFC Tools” on iOS and it lets you write dozens of record types, I realise most will be proprietary but I was hoping the simple text options may have sufficed, I’ve tried:

And I’ve also tried this other method/format:
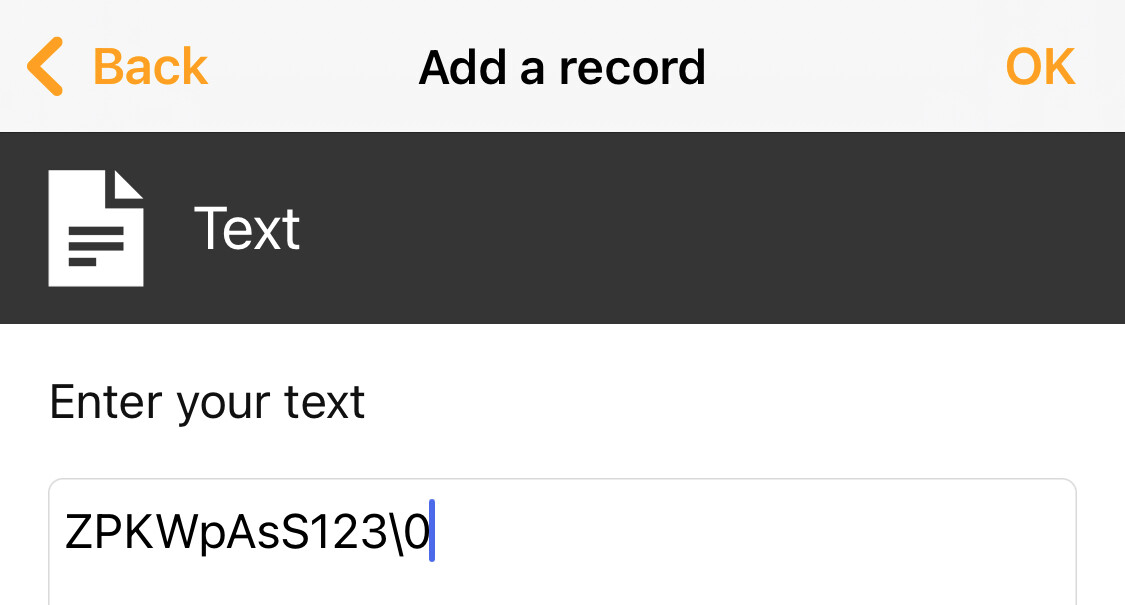
But no luck on the code picking up on the string. Am I at least entering in the string correctly? (That password is just for testing/demo.)
I’ve had exactly the same idea before. Splitting the secrets between reader and chip.
Maybe you’ll find some interesting thoughts there.
In the end all this work isn’t worth it IMO since there are crypto implants that are actually secure.
1 Like