Oh I also wanted to comment that this is a great video… OBS screen cap of the pm3 client with webcam showing the action is a perfect way to video this kind of stuff. Great job on that ![]()
3 Likes
I watched your video (great video by the way, tells a very clear story)
To add to Amals comment, I dont think I ever saw a good placement of the antenna being perpendicular to the implant.
Your xFD placement is what you want to replicate with your implant.
Your Flipper placement was similar.
Locate the antenna with your xFD and try again (It should be near the perimeter of the long side)
Also, remember the NExT has an antenna at each end, HF at one end and LF at the other.
This is something I figured out early on and makes reading and writing much easier.
Go to HF (NFC) on the Flipper, Start at one end of implant, slide the Flipper across the implant and take note of when it reads, then try the same from the other direction, this should tell you where your LF antenna is and where to focus your placement.
I’m not near my Proxmark at the moment to take a photo of suggested placement, but keep trying, I think you are just missing the mark, and truly, millimeters matter
1 Like
I hope this is a bit more verbose, please let me know if you require more information.
As a HEAVY disclaimer, I do apologize if I sound short, impatient, annoyed, or upset. I’m not good at recording things live and not really used to it so I don’t want you to take it personally. I also mistakenly called “electrical tape” as “duct tape” so yeah.
To preface the situation, I have covered up the pins with electrical tape to avoid any interference that could be caused. I showcase that it proves useful and does not contribute to the interference. I also test with my other chips.
This time, however, no matter how hard I try, I cannot get detect to work. I am at the point where I refuse to continue trying only because it’s unbearably painful. I do understand I don’t need to be pushing so hard, but I want to showcase the effort I’m putting into trying to get this to read.
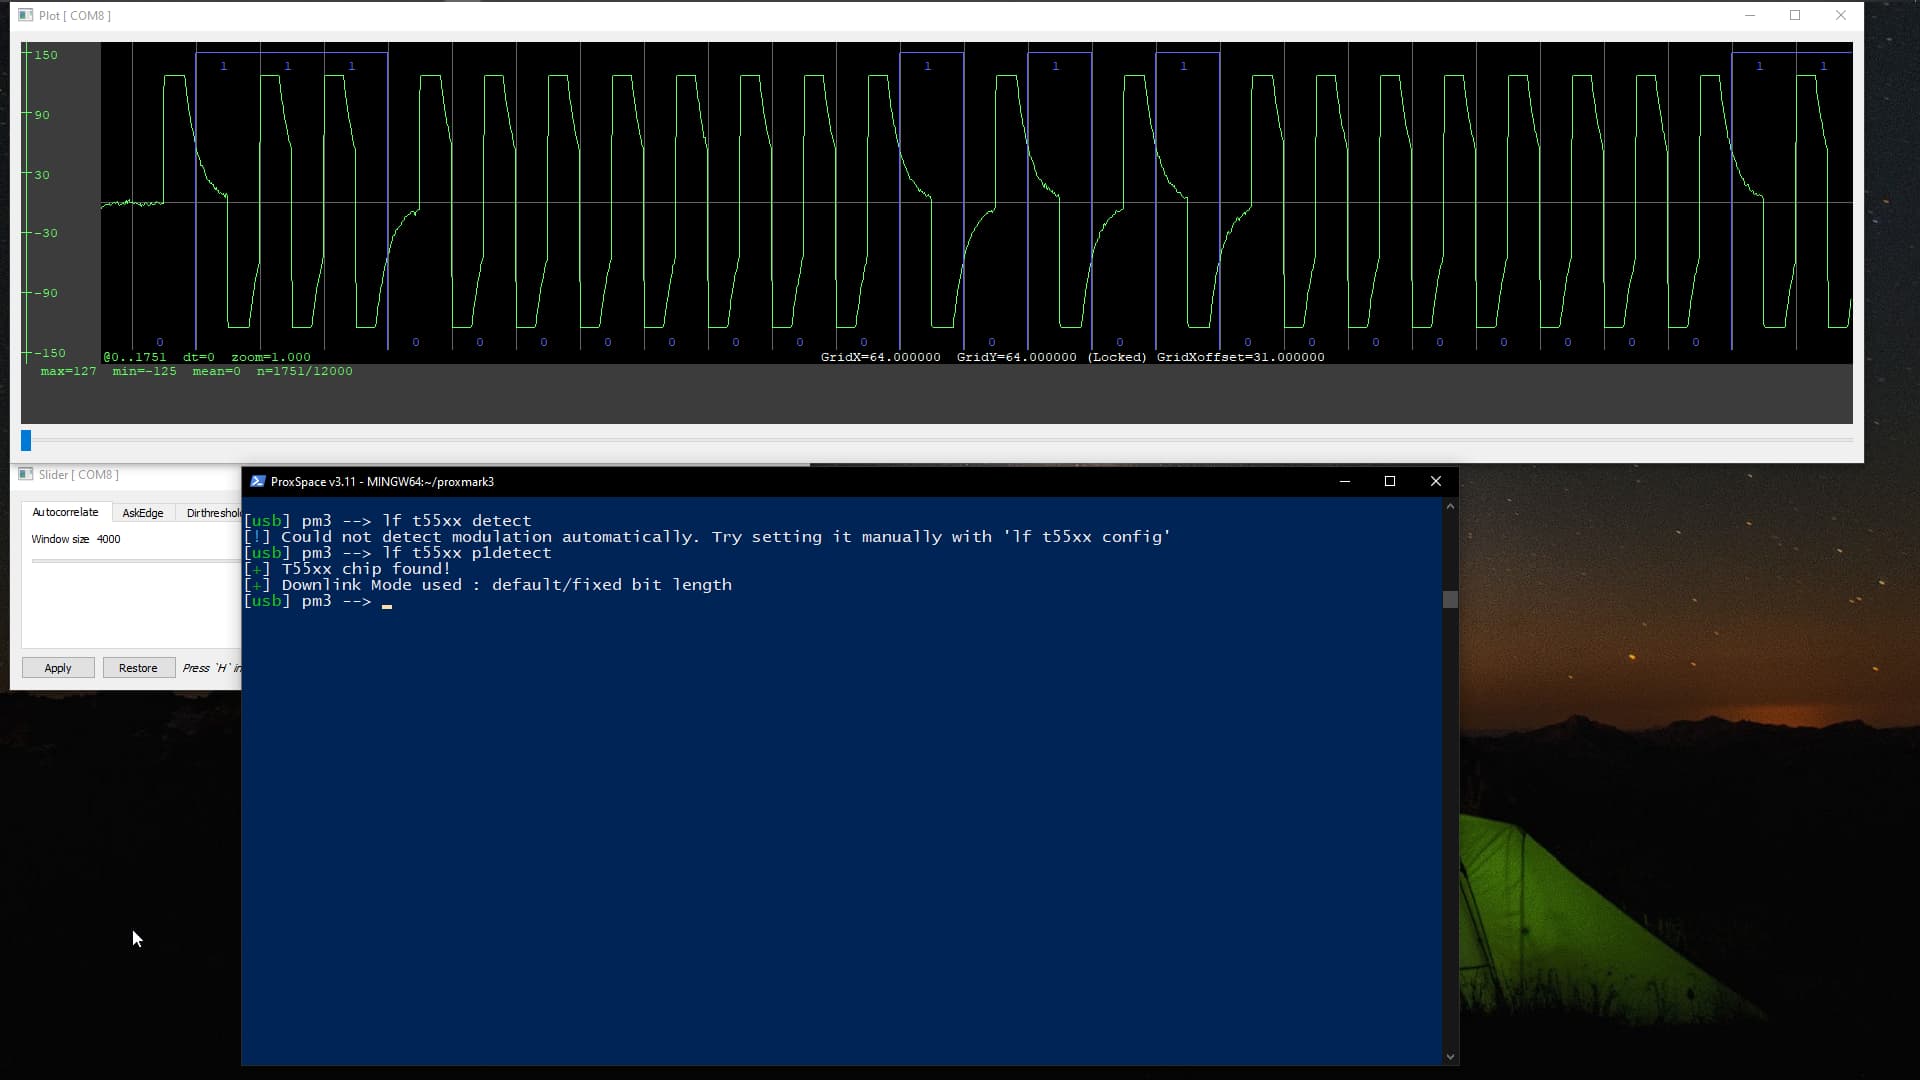
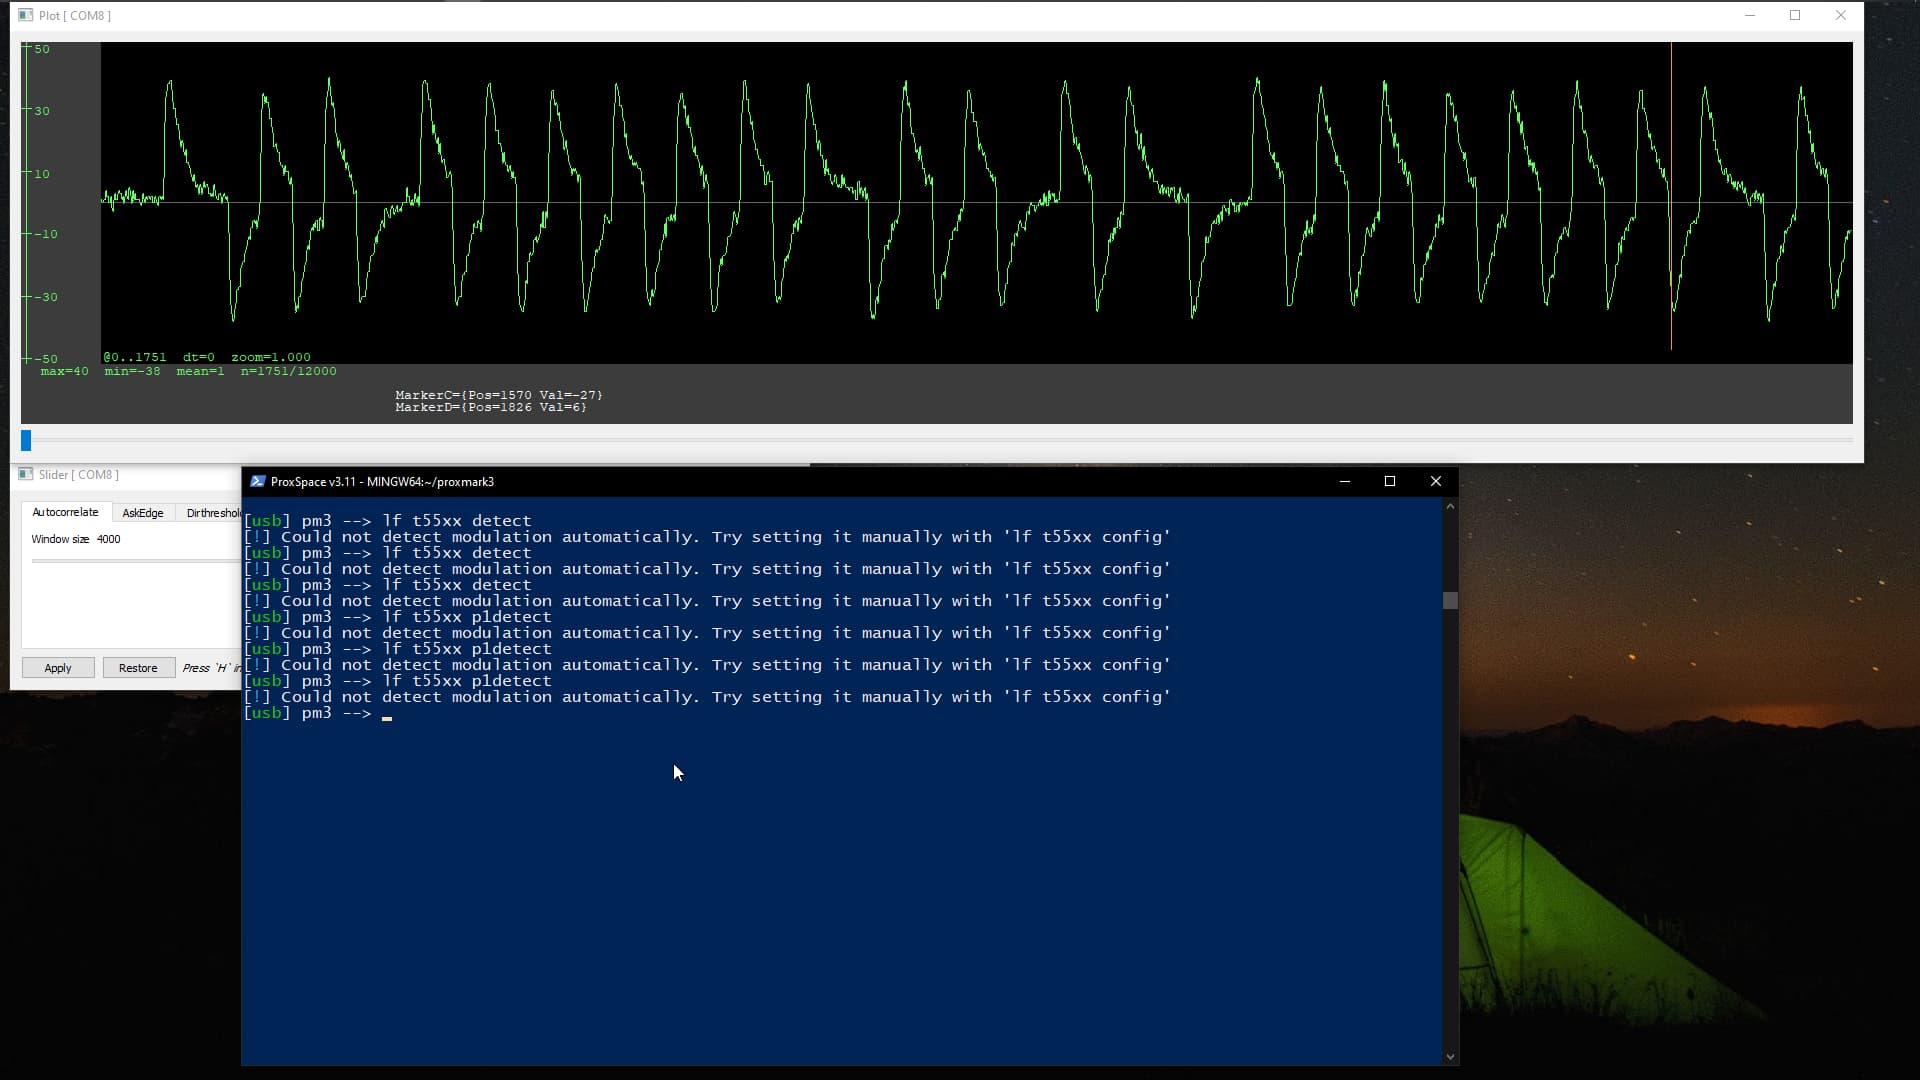
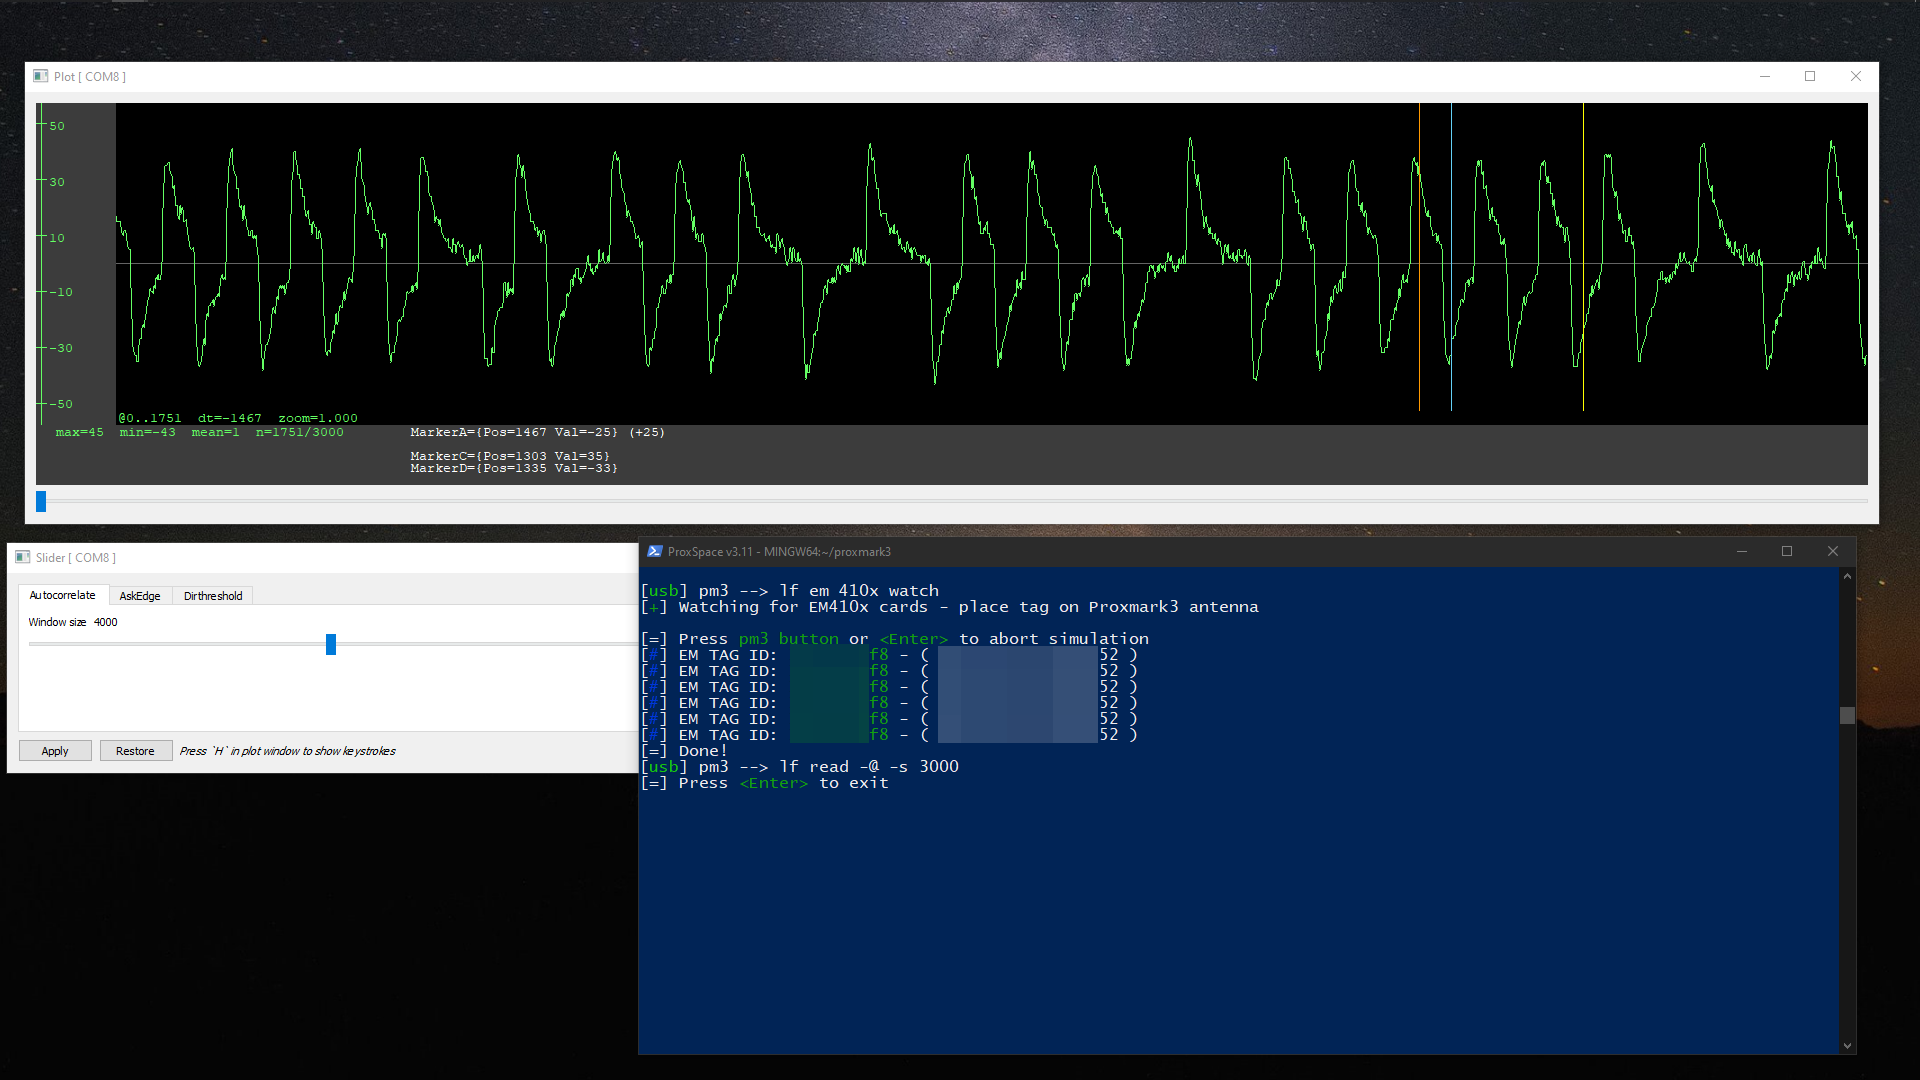
Additionally, I would like information about the plot graph. Why is it displaying the way it is and what could be causing that? With all my other T5577 cards that I have, it doesn’t read like that at all.
To close, please let me know if there’s anything else I can try. I feel like I’ve exhausted all attempts on getting this to read as well as any preventative measures that could impede on a false reading. Thank you for your help yet again and I look forward to your response. ![]()

Edit: Thank you for the compliments on the OBS solution. I’m trying to give the best possible POV to show what I’m doing and how I’m doing it, so I really appreciate it! I hope others can take example if they need to provide evidence on what is being done. ![]()
1 Like
No prob
perfect
The short answer is “I don’t know exactly”… but I have a good hunch. The T5577 chip works by configuring an “analog front end” which governs how the chip actually communicates data to the reader. The signal you are seeing on the graph is a direct result of this configuration setting. Clearly the chip is behaving and configured in a fundamentally different way from your other chips. This is probably the reason you can’t actually get it to perform a lf t5 detect properly… it’s not talking in a “language” that the detect code can interpret. To read more about the configuration, here is the data sheet;
How this happened, I’m not sure… but it’s probably a corrupted configuration block. This can happen from something called “tearing”…
Your best bet I think is to keep blasting the T5 with test mode recovery methods at it.
Follow the recovery steps… once you think you hit it plenty of times with recovery commands, clone an EM tag ID to it… you may still need to try blasting this several times at the chip to get it to pick it up… then do an lf search
2 Likes
Dude, thats some thorough testing.
FYI you didn’t come off abrasive.
I get the frustration, but there are a couple of things that give me hope.
-
Faults are very very rare.
-
You mentioned getting a “one off” read
-
Also You can read with the Flipper!?
It SHOULD be recoverable.
THIS next thing sounds like bullshit, but trust me, it is a thing.
What mode is your NExT T5577, Read ranges can differ significantly depending on the mode.
It’s probably not that, and more likely a tear, but worth ruling out.
Quick question, with the Flipper.
When it reads, what have you tried to write?
Have you tried other modes?
There should be some samples in your flipper library you can try.
Once you get something else written to it, you should be able to circle back and write what you want.
2 Likes
I’ve created a Lua script to allow the Proxmark3 to repeat the same five lines as was stated in the troubleshooting guide. So far, I’ve attempted the following approximately 16000 times while in a compression sleeve so I can do other things. I then repeated the same moving it around for about 2000 times.
    "lf t55 write -b 0 -d 000880E0 -t",
    "lf t55 write -b 0 -d 000880E0 --r0 -t",
    "lf t55 write -b 0 -d 000880E0 --r1 -t",
    "lf t55 write -b 0 -d 000880E0 --r2 -t",
    "lf t55 write -b 0 -d 000880E0 --r3 -t",
I will attempt more tomorrow as I feel like I’ve done enough for today. ![]() I’ll keep moving the Proxmark3 as described in the troubleshooting guide.
I’ll keep moving the Proxmark3 as described in the troubleshooting guide.
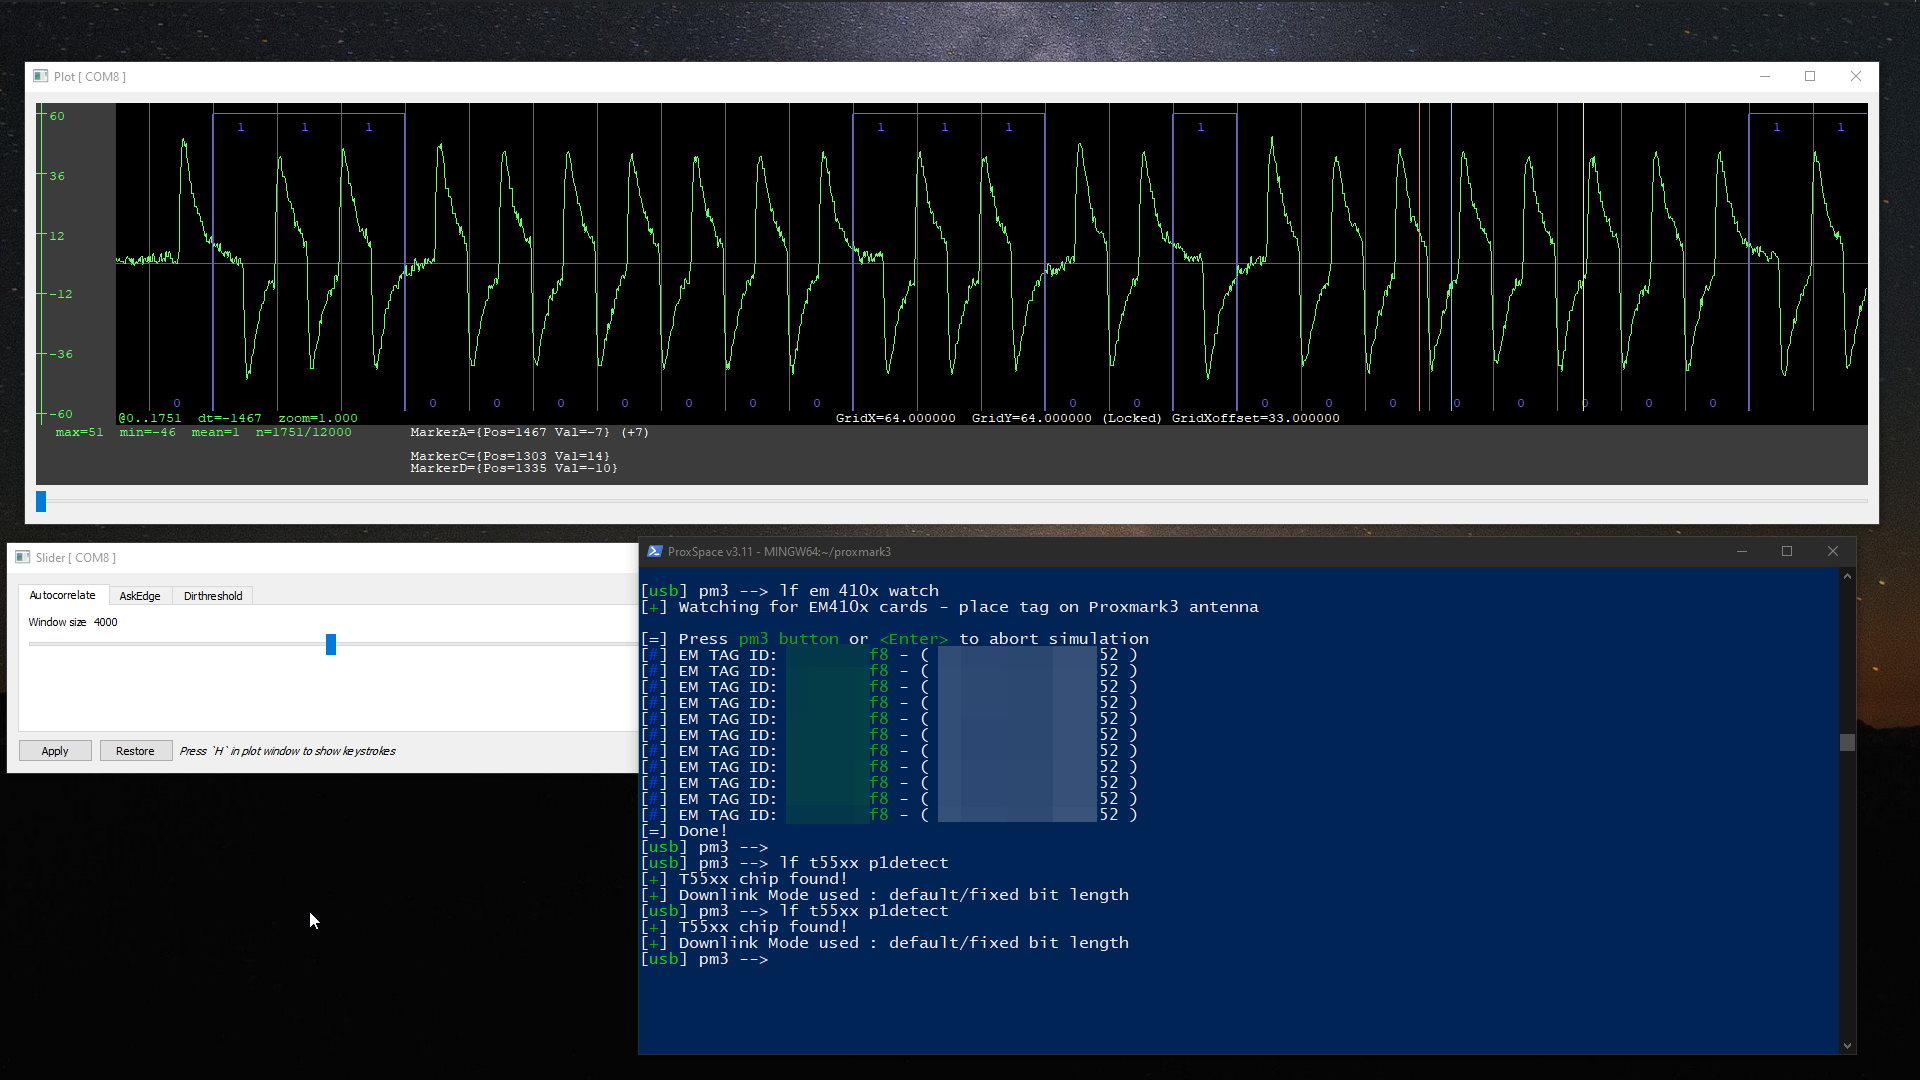
Still not reading with detect, info. Not writing with lf em 410x clone --id 0102030405 or with the Flipper Zero, so no progress yet! It still reads as random if I use detect on my xMagic and then use info on the NExT, but I don’t think that’s relevant.
From the signal graph we can see the chip is alive and “talking”… sadly it might be in an unrecoverable state at this point ![]()
2 Likes
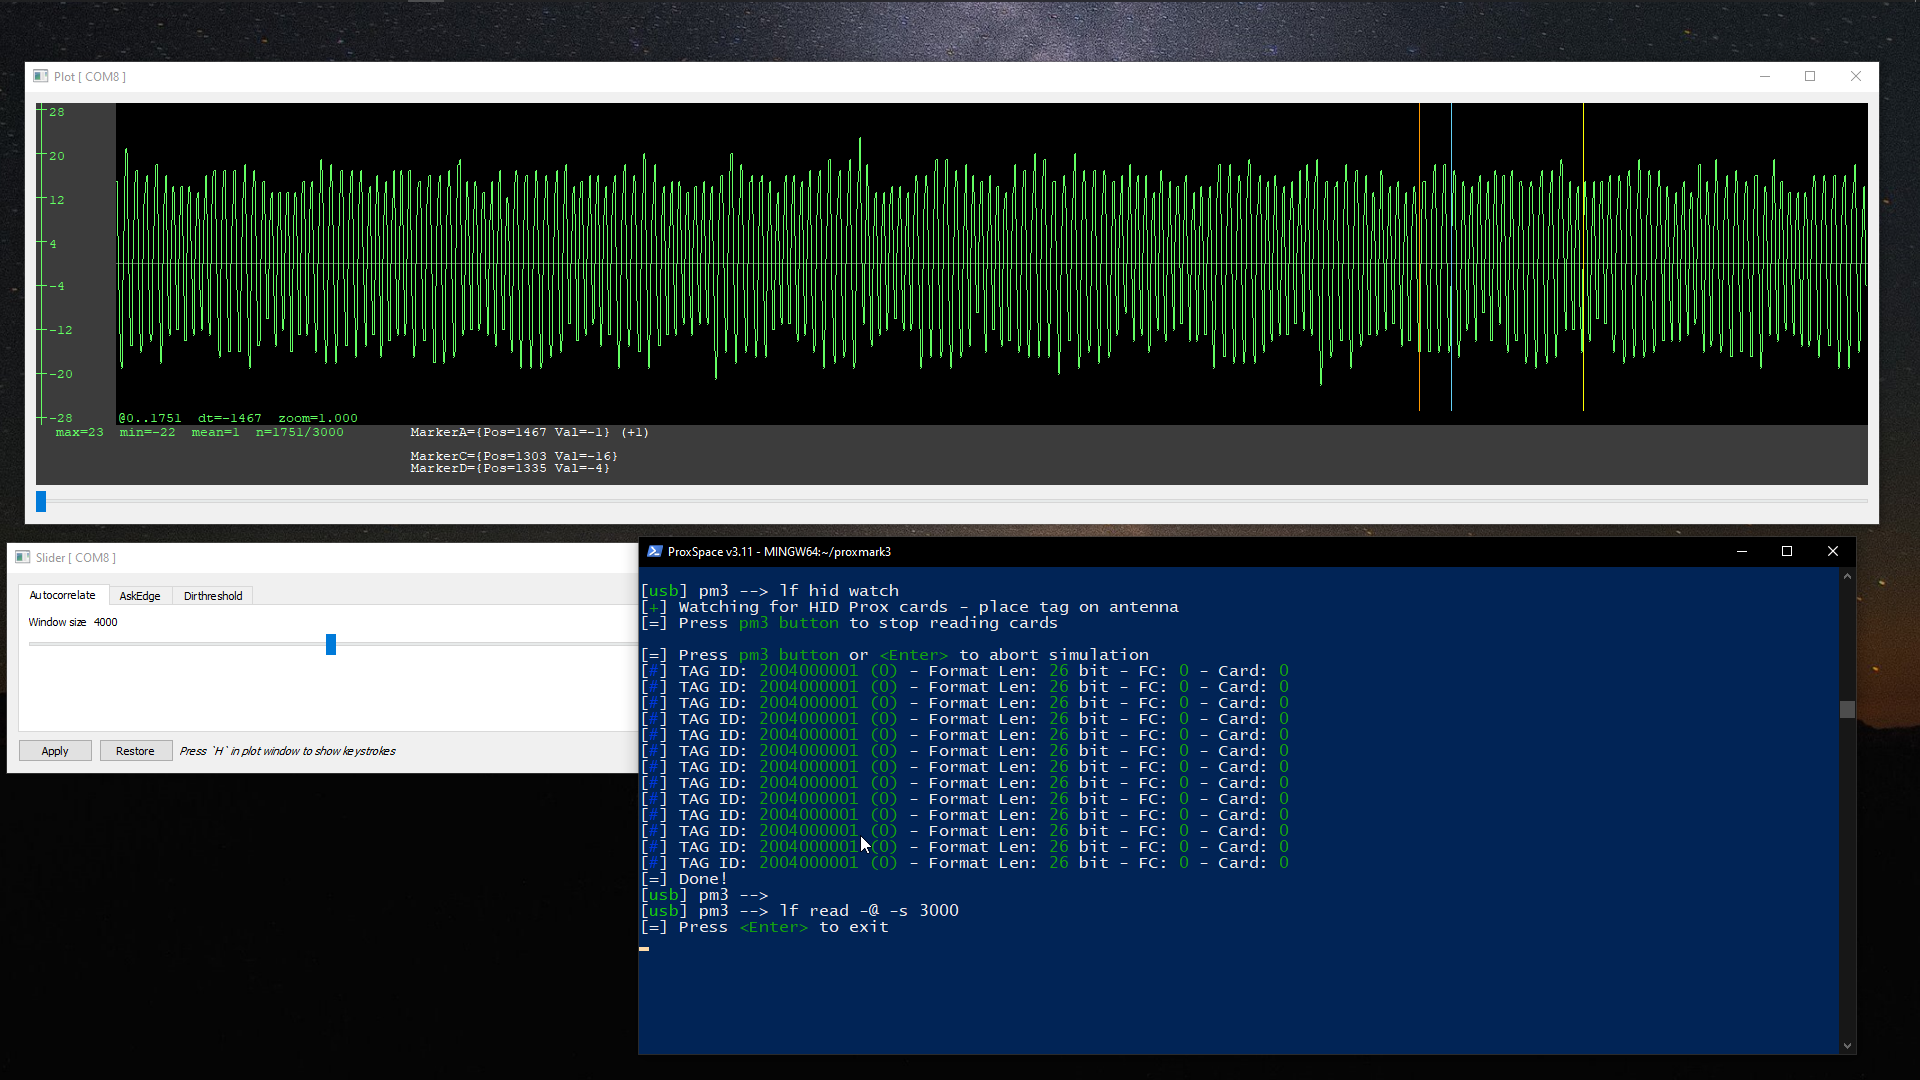
Reading with the Flipper Zero is consistent each time. It’s currently written with a EM-Micro EM4100 when I read on it. I have attempted to write the NExT with another card of the same type but no success. I also have attempted with a HID H10301 as I really enjoy having that one as my “blank” to wipe it, but again nothing. My friend’s FOB is etched permanently into my hand. ![]()
I haven’t tried to use much else, so I decided to try them all. In the Flipper Zero, it gives the option to “Add Manual” so I created tags of every type with all bytes being zeroed. I tried it in the same location where it reads quickly and consistently while pushing gently into my hand. I tried each for approximately 20 seconds, allowing the message that it’s not finding the device to hang for a bit. I am aware not all types can be written on the T5577 but tried everything on the list as an attempt. I’ll list the types it has that I had tried below:
EM-Micro EM4100
EM-Micro EM4100/32
EM-Micro EM4100/16
Electra
HID H10301
IDTECK Idteck
Motorola Indala26
Motorola Indala224
Kantech IoProxXSF
AWID
FECAVA FDX-A
ISO FDX-B
Generic HIDProx
Generic HIDExt
Farpointe Pyramid
Viking
Jablotron
Paradox
PAC/Stanley
Keri
Gallagher
Honeywell Nexwatch
Hillman Group InstaFob
Securakey Radio Key
Guardall GProxll
I really appreciate the compliments and helping comfort me on not being abrasive. I do have hope that we can recover it; I hope that my findings are verbose enough to understand the situation better. Thank you! ![]()
Dang. I’ll keep trying tomorrow, but do you think this will be one of those rare cases where I’ll need to send it in and get a replacement, if it isn’t able to be recovered?
As a personal opinion, it’s really weird to me to see the whole inner working as before any of this, I was just a Flipper Zero script kiddie, using the easiest duplication process possible. Seeing all of this, I feel like I’ve learned a whole lot, which is awesome and I’m not at all upset by.
I hope y’all have a good night and see y’all tomorrow. ![]()
1 Like
I hope this is sufficient enough, considering this forum public and these keys private with permission.

All “blurred” parts are considered identical. It is able to read the NExT well with one tiny fluke that happened when moving it around. Very interesting but I don’t know what to do with this information. Thanks! ![]()
Edit: I had written the same card to my xMagic to show and see if there’s any difference. I love my xMagic
I don’t know if this is worth mentioning, but I had also tried running lf em 410x clone --id 0000000000 to see if it would write. I had used watch to try to find the right spot, attempted to write, then used watch again to verify results and they were still the same.
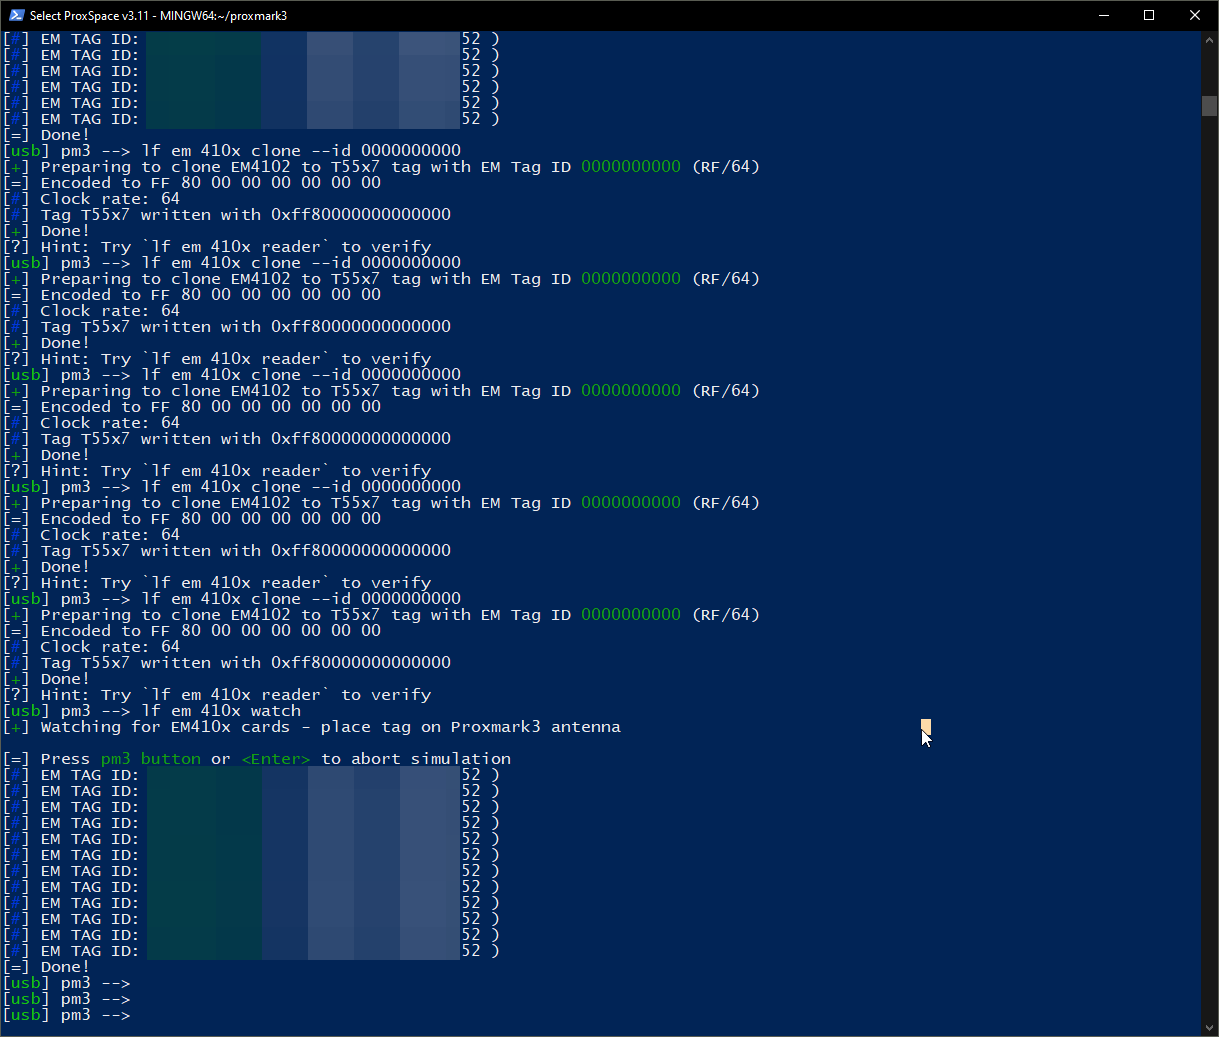
The TAG ID is recognizable to what I read on the Flipper.
The return! I have no had any success yet as a disclaimer.
I have attempted another 10000 attempts at blasting the chip with the following script (disclaimer, I used ChatGPT for assistance).
-- Filename: write_t5577_loop.lua

core.clearCommandBuffer()

local command_list = {
    "lf t55 write -b 0 -d 000880E0 -t",
    "lf t55 write -b 0 -d 000880E0 --r0 -t",
    "lf t55 write -b 0 -d 000880E0 --r1 -t",
    "lf t55 write -b 0 -d 000880E0 --r2 -t",
    "lf t55 write -b 0 -d 000880E0 --r3 -t"
}

local function write_loop(iterations)
    for i = 1, iterations do
        print(string.format("Iteration %d of %d", i, iterations))
        for _, cmd in ipairs(command_list) do
            core.console(cmd)
        end
    end
end

write_loop(10000)

print("Write loop completed.")
In addition to running this, I ran lf em 410x watch and it still continues to read successfully with the code of my friend’s fob.
Lastly, I don’t know if it proves helpful on what I’m doing, so I decided to record my efforts. (Maybe for the last time?) To preface, the sped up part is 15x since it went on for over an hour. I had tried keeping in place where the watch command was successful and then moved it around in gentle circles.
At the end, I tried blasting it with lf em 410x clone --id 0102030405 a couple of times as well as lf t5 p1detect but still no luck either way.
The only reliable method I have is to use the watch command. It’s almost as if it’s frozen solid and you can see it, but can’t interact or make any changes to it, purely as a read only situation.
As a disclaimer, I do apologize for the blurring being so massive at the end, I can’t be arsed to edit videos as I am not used to it. Just know the blurred part is the fob reading correctly like before.

One thing that did occur to me is previously, I had tested the T5577 commands with the Flipper by intentionally “bricking” one of my T5577 chips with a read-only mode. On the Flipper Zero, when trying to set the password, or clear the password, it will prompt to “Set tag configuration block read-only? If unsure answer no.” I had previously said “yes” to this test chip (it’s a standard one you get off Amazon) and it seems to be reading awfully similar to the one I have in my hand.
From my recollection, I was writing the NExT with a standard write at the time when I put my friend’s fob in my NExT. I was not running any tests as I was trying to help her figure out the best placement for unlocking her apartment since she has a xEM in the same placement (L0). (Also spreading the word!) These two interactions are not in the same timeline and have not occurred on the same day.
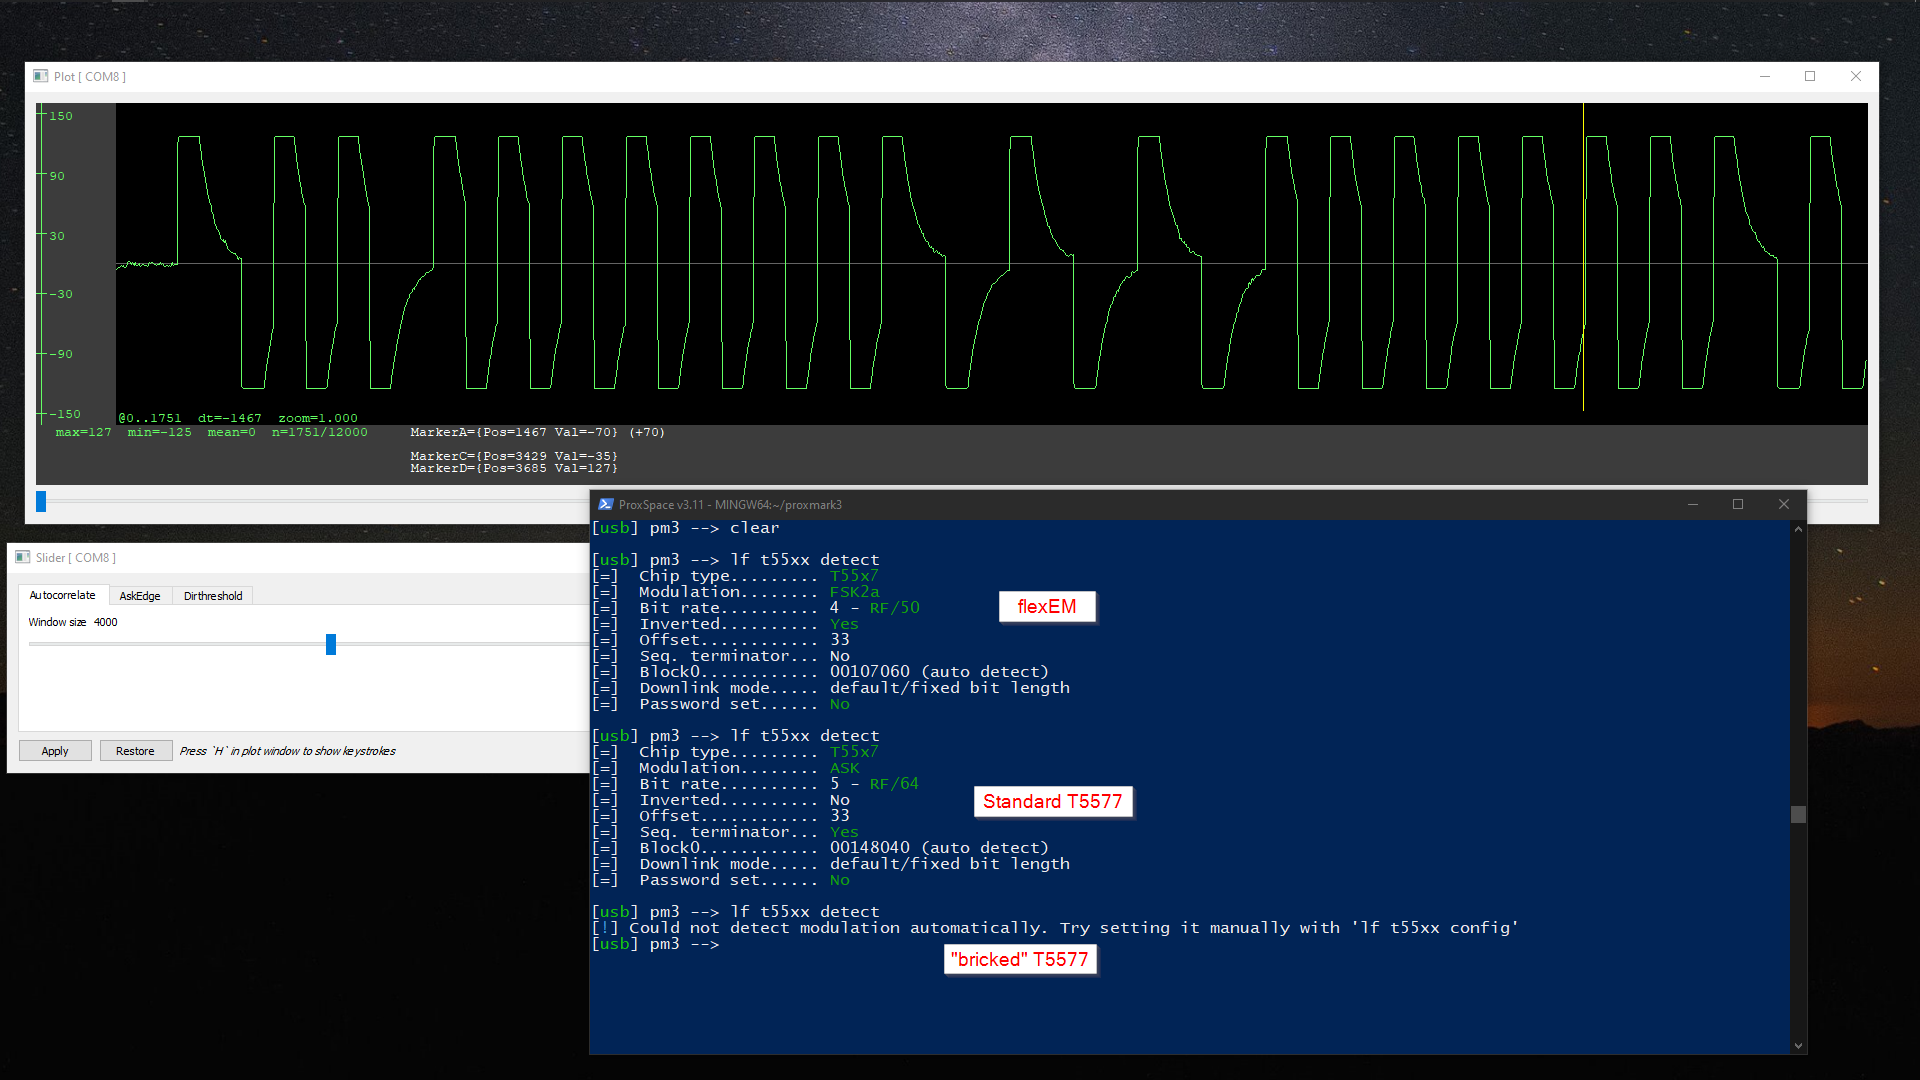
Here is the “bricked” read-only chip I had messed up permanently:

And here is the NExT:

The only different I could summarize is that the “bricked” chip does not have any code on it as I had wiped it before attempting the read only, so I can’t really read it. Nothing showed up on the Flipper when trying to read it.
Secondly, when trying lf t55xx detect, the “bricked” chip wouldn’t read as per normally. However, the difference being that when I run lf t55xx p1detect the “bricked” chip would detect with a “T55xx chip found!” notification whereas the NExT does not have this luck.
“Bricked” chip:
NExT:
Please let me know if there are any additional troubleshooting steps required to be made or if this is the end of the line since my “read-only” findings feel quite similar. I’m still open to trying anything. ![]()
Your testing is super thorough and I can fault it.
I might drop an @Equipter here, he may have some other ideas to try.
2 Likes
Thank you! I want to be as verbose as possible so if anyone else has the same issue, they can follow my journey and know they’re not alone. It’s been a fun journey for myself as well not having much Proxmark3 experience prior to this. I look forward to seeing what next to try. ![]()
I think I may have been barking up the wrong tree concerning the read-only situation.
I decided to test my xMagic located in my R0 to test and show some results. This chip has zero issues and operates normally, fully readable and writable.
First, I have written my “blank” profile to it, “HID H10301” with hex value: “00 00 00”, pretty basic.
Then I write my friend’s fob to the same xMagic and read it as following:
I do apologize for my inexperience with the plot graph since I didn’t realize it would drastically change based on the mode the T5577 chip would be in. Learning a lot and this is a huge learning experience for me.
The question is still at large though on what’s going on with the NExT. I can’t use lf dump but I have attempted to do the p1detect and it does work when I move my thumb differently.
(This image is the NExT)
Again, apologies for the misleading info, I was quite exhausted from the many commands being pushed out. ![]()
So this is where I’m at, the NExT, the xMagic, and the “bricked” appear identically in the plot chart, the p1detect, and with the empty dump, with only the xMagic being readable and with the “bricked” chip not reading anything with lf em 410x watch.
Not to subtract too much, but testing detect further with three easily readable T5577 chips, I’m able to confirm the “bricked” T5577 cannot be read with detected, no matter what.
The flexEM is using a HID H10301 mode, the Standard T5577 is my friend’s fob with the EM4100, and the “bricked” remains unknown as it cannot be read. (Maybe wiped?)
Now, I’m not going to pretend I know what I’m talking about, but would this have something to do with the EEPROM, such that the “bricked” and NExT both have a fried EEPROM… or something?
Thanks! ![]()
1 Like
given its responding with properly emulated data to your flipper i think we are dealing with init delay here.
@alfie65536 are you on a self compiled or precompiled build of the proxmark?
we need to jump into the code and change some lines to introduce the delay into the code so it can catch your chip’s delayed communication and to do that we will need to recompile.
3 Likes
Thanks!
I’m running self compiled as following these instructions.
Is this something I should edit when I clone the github or something that may be pushed as an update? This is all so exciting so thank you for your patience!
1 Like
so you don’t need to pull or update anything, this change will remain local so you’ll need to edit the files yourself, i would just change it on the repo but introducing delay timing for everyone who doesn’t need it would slow down lf operations a bunch for no reason.
hold tight. instructions incoming.
3 Likes

okay so
navigate to armsrc directory
edit the file labelled lfops.c
around line 1730 you’ll find
static void T55xx_SendCMD(uint32_t data, uint32_t pwd, uint16_t arg) {
within that, locate
uint8_t start_wait = (t55_brute_mem) ? 0 : 4;
change 4 to 80, save and exit the file, navigate back to the main proxmark3 directory and run
make clean && make -j8
then when that’s completed
./pm3-flash-all
then
./pm3
and now try doing lf t5 detect with your implant intersecting the red ring LF antenna, it will take longer to get feedback now but keep trying until you get consistent outputs.
let me know when you do
edittoadd: this is not standard debugging this is elite level fuckery, for your own sakes if this is not a problem you are having with a t55, do not make these changes as it slows your lf operations down 20x.
2 Likes