
5 Likes
Making some assumptions on how your going to do it, but an idea or 2
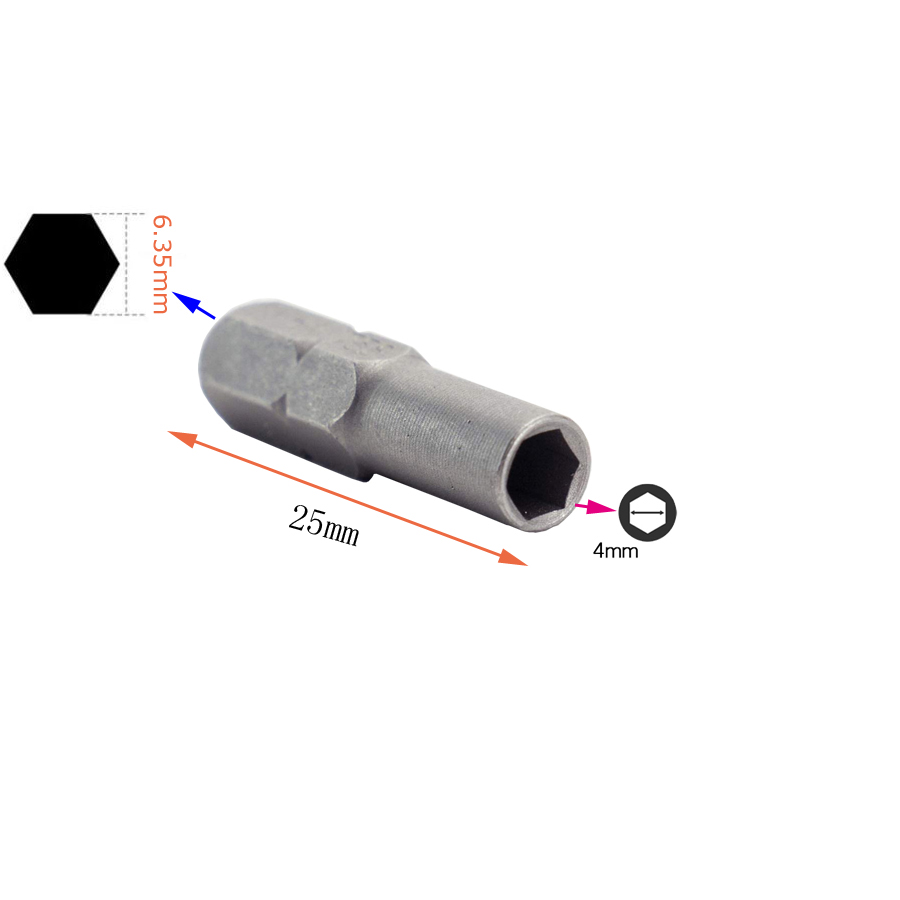
Instead of out diameter being cylinder, why not go for 1/4” hex… then you can pop it in and out of screwdriver attachment systems… wouldn’t need to use a chuck everytime you part change
1 Like
The cylinder could easily be that shape or have an extension coming from the back / bottom of it down this purpose
1 Like

4 Likes
Are you familiar with 5C collets?
You could replace the 3 jaw chuck with a 5C collet adapter, and use a nylon 5C emergency collet (emergency = machine to size)
Just the first links I found. Also a couple hundred bucks. Might be better for production runs, but prove the process out with a 3d printed part first.
1 Like
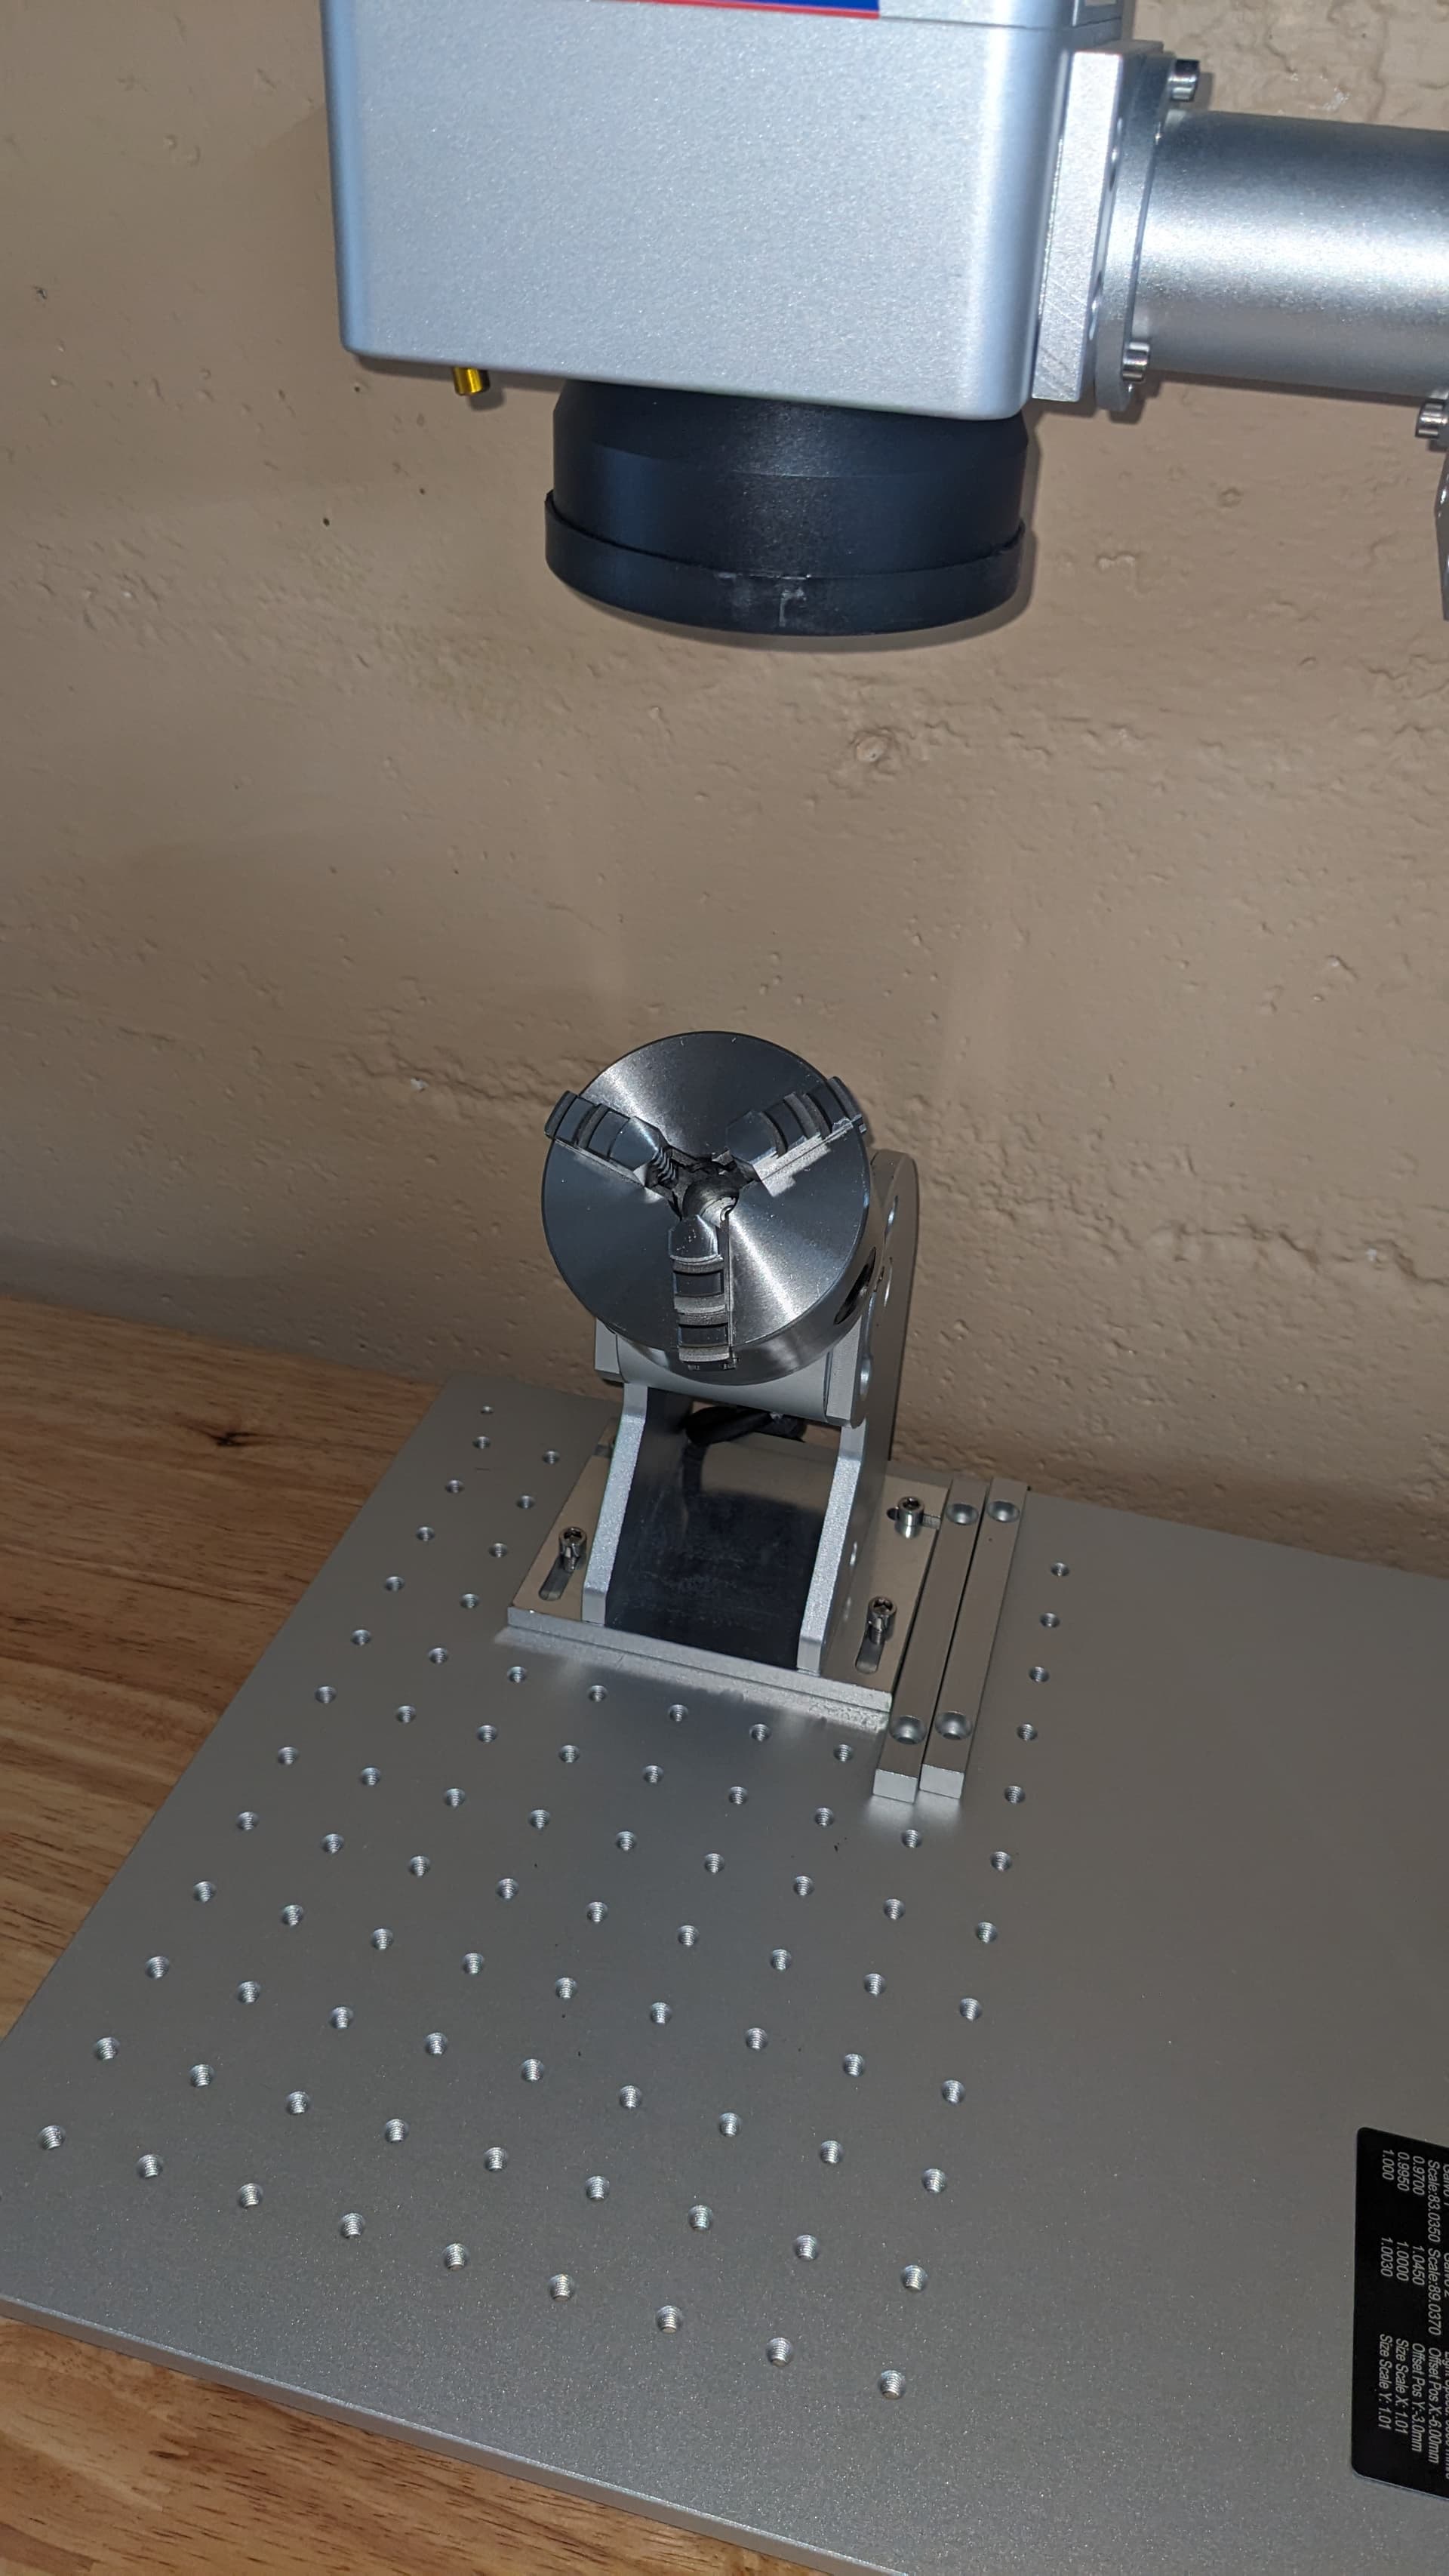
Interesting. It looks like a miniature… something else hahahah! I can’t remove the chuck since it’s directly connected to a rotary stepper for precise control of rotation.
I’m sure with some disassembly I could replace it to be honest… but for now it’s the only thing I plan on using it for so the chuck and indeed the entire rotary system will probably no go through many changeouts… just tilting out of the way when the wife wants to blast some stuff.
I’ll probably be trying out some etching of rings at some point too.
2 Likes
I need to get myself a bigger lab… That looks awesome!
2 Likes
How much distance do you have from the chuck to the focal point?
You can always get a part holder that fit into the chuck.
I’ve done several 3d printer and machined part holder with a back so you just drop the part in and tighten the chuck to hold it, but being plastic they don’t mar or damage the part. Makes the process extremely repeatable ![]()
Let me know if you need help with it, I can definitely make a few for you ![]()
1 Like
2 Likes
That’s exactly what I have done in the past.
You’re better off with some harder plastic so it spring back than TPU …
I can cad and print something for you if you want ![]()
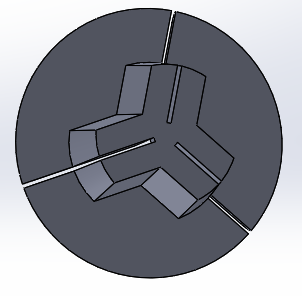
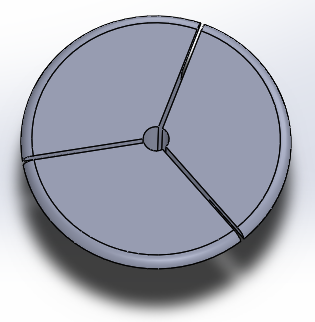
PS: whipping something quick on the computer, this is the design ive had good results with:
2 Likes
Huh how does that work? 3 parts? Can I easily pull the glass out and put new glass in without needing o adjust the chuck? My brain isn’t processing this very well right now ![]()
The back side is tapered, so the jaws of the chuck will close the fixture as they tighten. All 3 segments are connected in the back so they stay put and spring back open when you open the chuck a bit. The main “pocket” is just deep enough for the part to bottom out so the face is always at the same place (assuming the parts are all the same length).
I’ve done them where you only have a bit to tighten on the chuck to grip the part. If the sizes are correct, 1/2turn on the chuck key will go from loose to tighten.
You could leave it barely snug so you don’t have to touch the chuck at all, but you’ll loose a bit of concentricity (may not matter?).
1 Like
So the point of this is to make me think about getting that Ender 3 S1 with the laser attachment, isn’t it? I was originally planning to buy a Prusa, goddammit!
My dad gifted me the S1 I’m playing with now, and a MK4 is on its way, who knows when with their lead times. I saw my dad’s MK4 and it was AWESOME compared to my Ender 3 and the S1.
I was actually looking at the “new” later attachment
You don’t remove your hotend, but rather just Z to like 100ish seems a lot better concept than their previous versions
Looks like they either got scared of being sued or listen to people and starting TRYING to add a
bit of laser shielding… but it’s still inadequate
I still am very questioning of their power
The smoke and fume generation could be a issue
2 Likes
@amal
How much heat builds up in the glass during laser sealing?
Too much heat could be an issue for TPU
I still like my idea of sticking something like this in the chuck
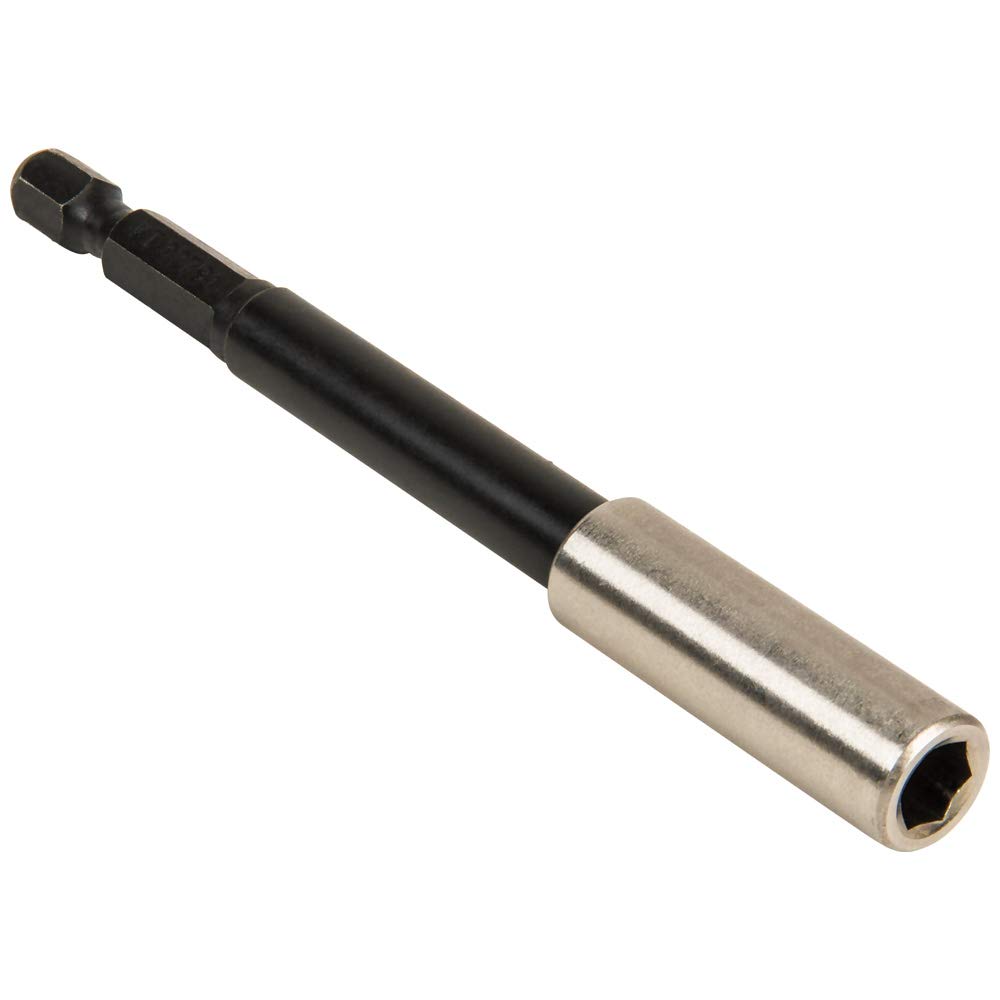
You can cut to the right length to get you into focal point
And then have a dozen parts like this… quick and dirty google picture search
The end sized for your various glass
1 Like
Enough to melt it but the idea is to blast it fast enough to melt the end without letting the heat propagate very far down before the process is done. Proper airflow near the workpiece is also key so once the blasting is done the airflow kicks in high gear to get things cooled somewhat quickly. With glass it’s kind of tricky though if you care about crystalization producing the least tension possible. Oil refraction can be used to test but it’s messy etc.
4 Likes
Well, PTFE is always an option for plastic material …
Iny experience with laser welding, aluminum fixture tend to heat up to quickly … I had better results with stainless, but once hot it takes longer to cool …
What about an aluminum water-cooled fixture?