Mole skin seems like a good use case. When I first stumbled across this thread I envisioned a bandage with a ‘O’ cut in the center made of mole skin, like what you would use on a blister.
I worried about sufficient holding force and the implant migrating underneath.
Would you be willing to provide me with some info?
If you tent up your skin by pressing your thumb into the side of your hand and pointer finger so there’s a lump, does the muscular tissue underneath push the implant up with it and hold it in place, or can it be push down further into the tissue, say, with a finger? If it can be pushed down, how far would you estimate before you feel it hit the solid layer of muscle and cannot push it further?
Edit: Millimeters preferred but will happily accept your estimate in any unit.
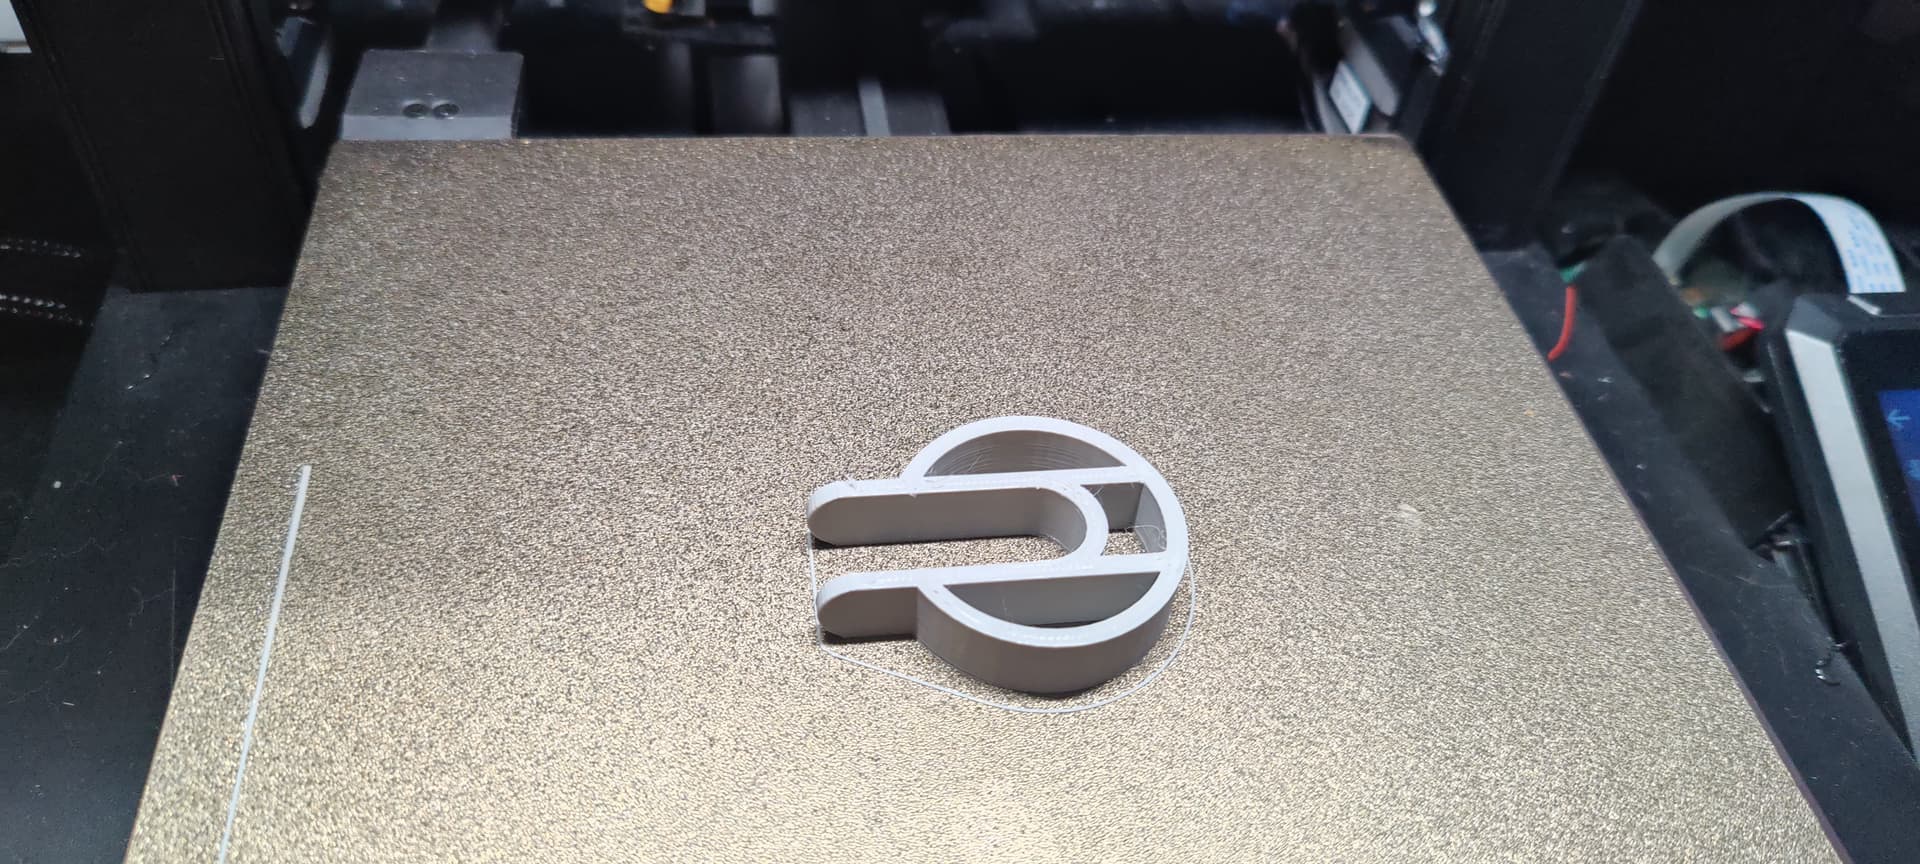
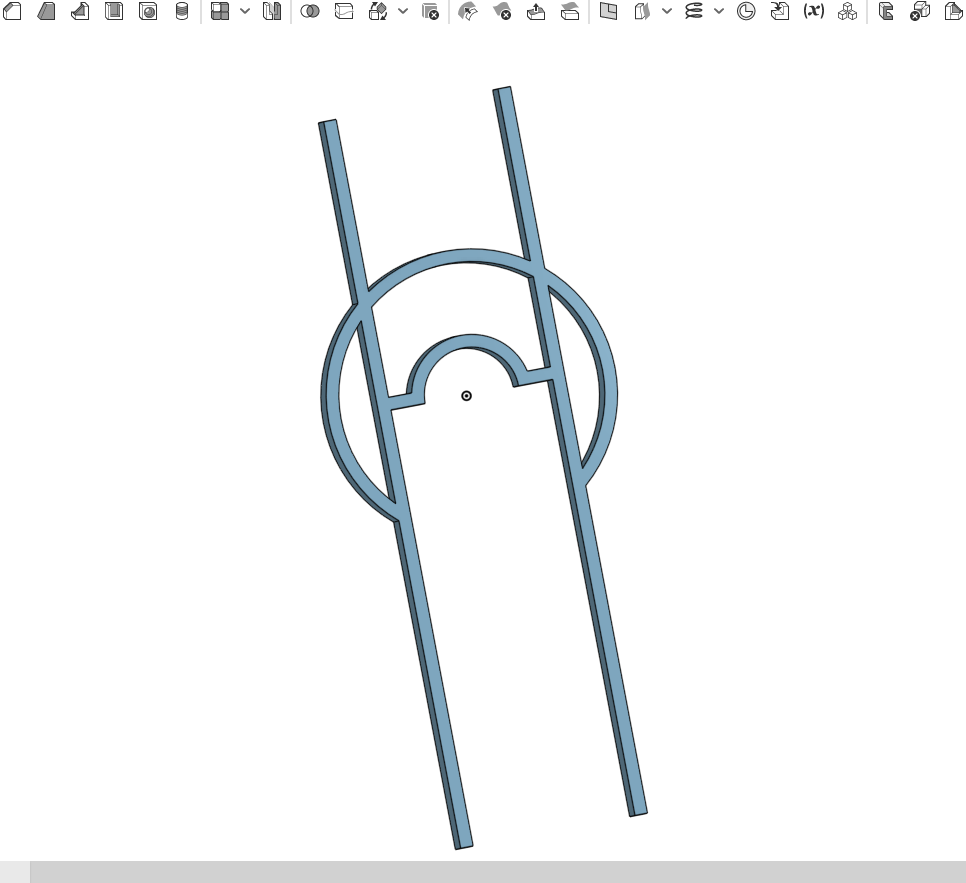
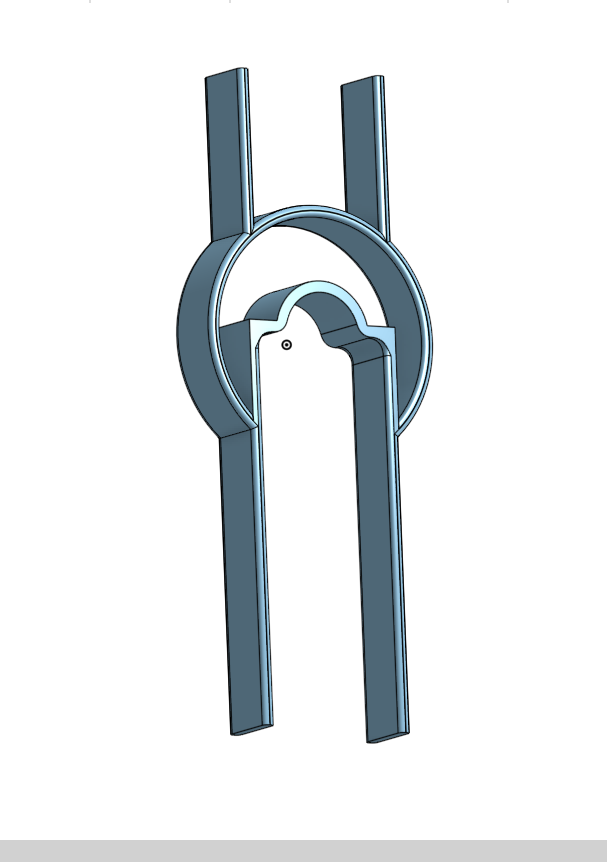
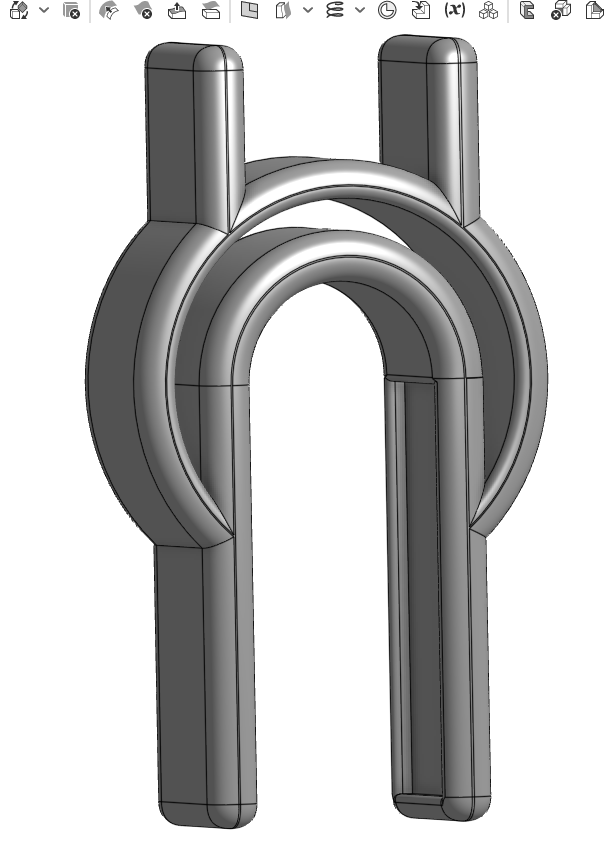
The clamp isn’t really working for my install location, but I like what @Hamspiced suggested. I also tried to recreate your clamp but obviously I’m fricken exhausted because the dimensions aren’t quite right XD
I was thinking having two flanges (is that the right word?) jutting out from the back would be nice to help open the clamp.
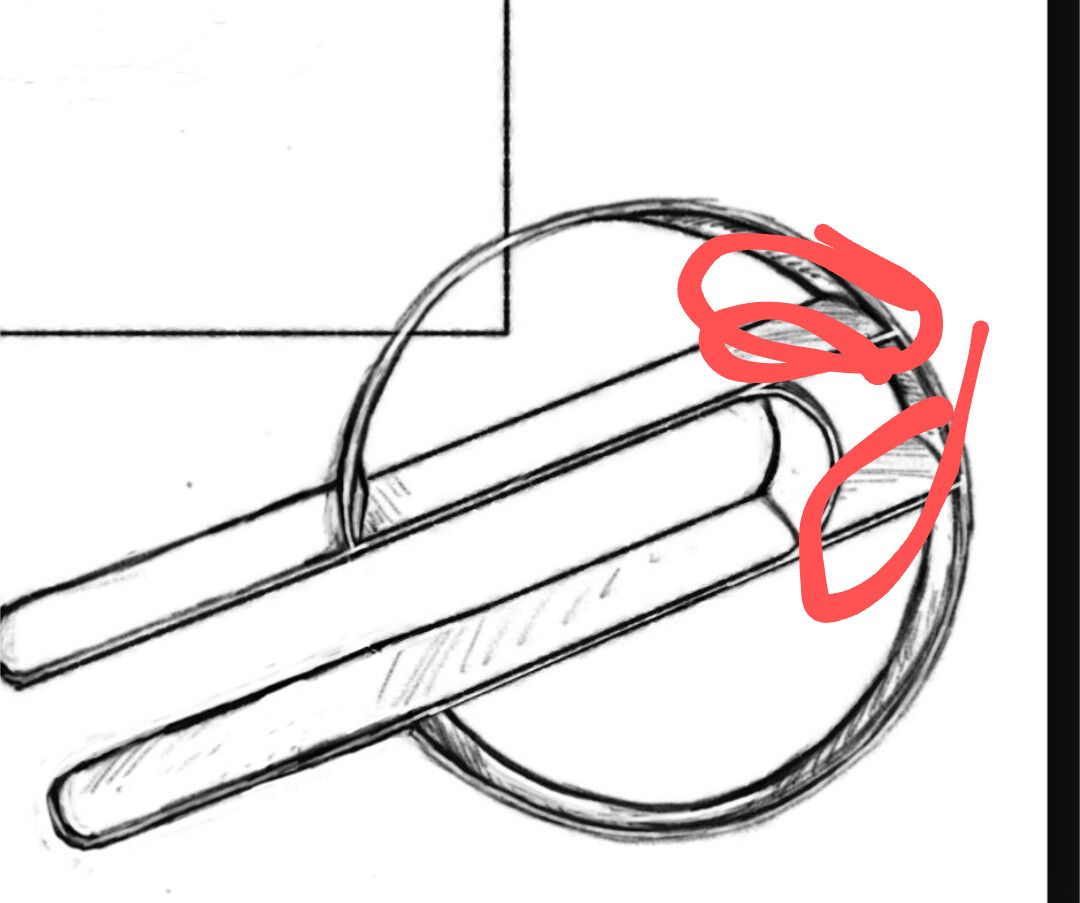
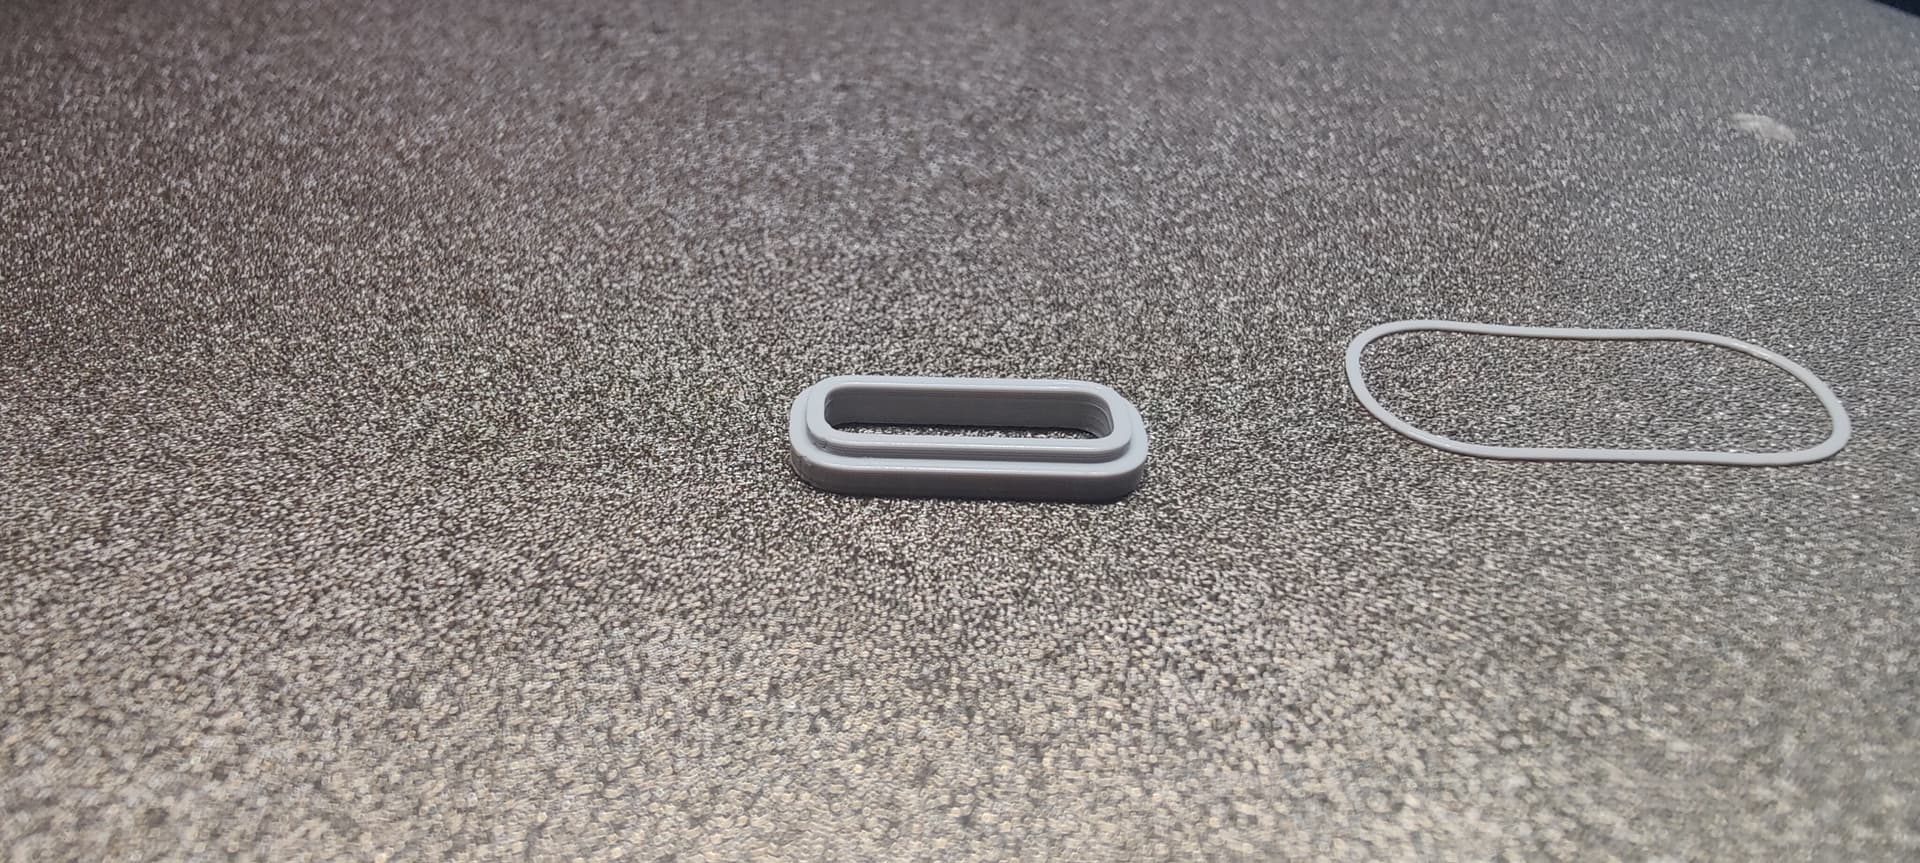
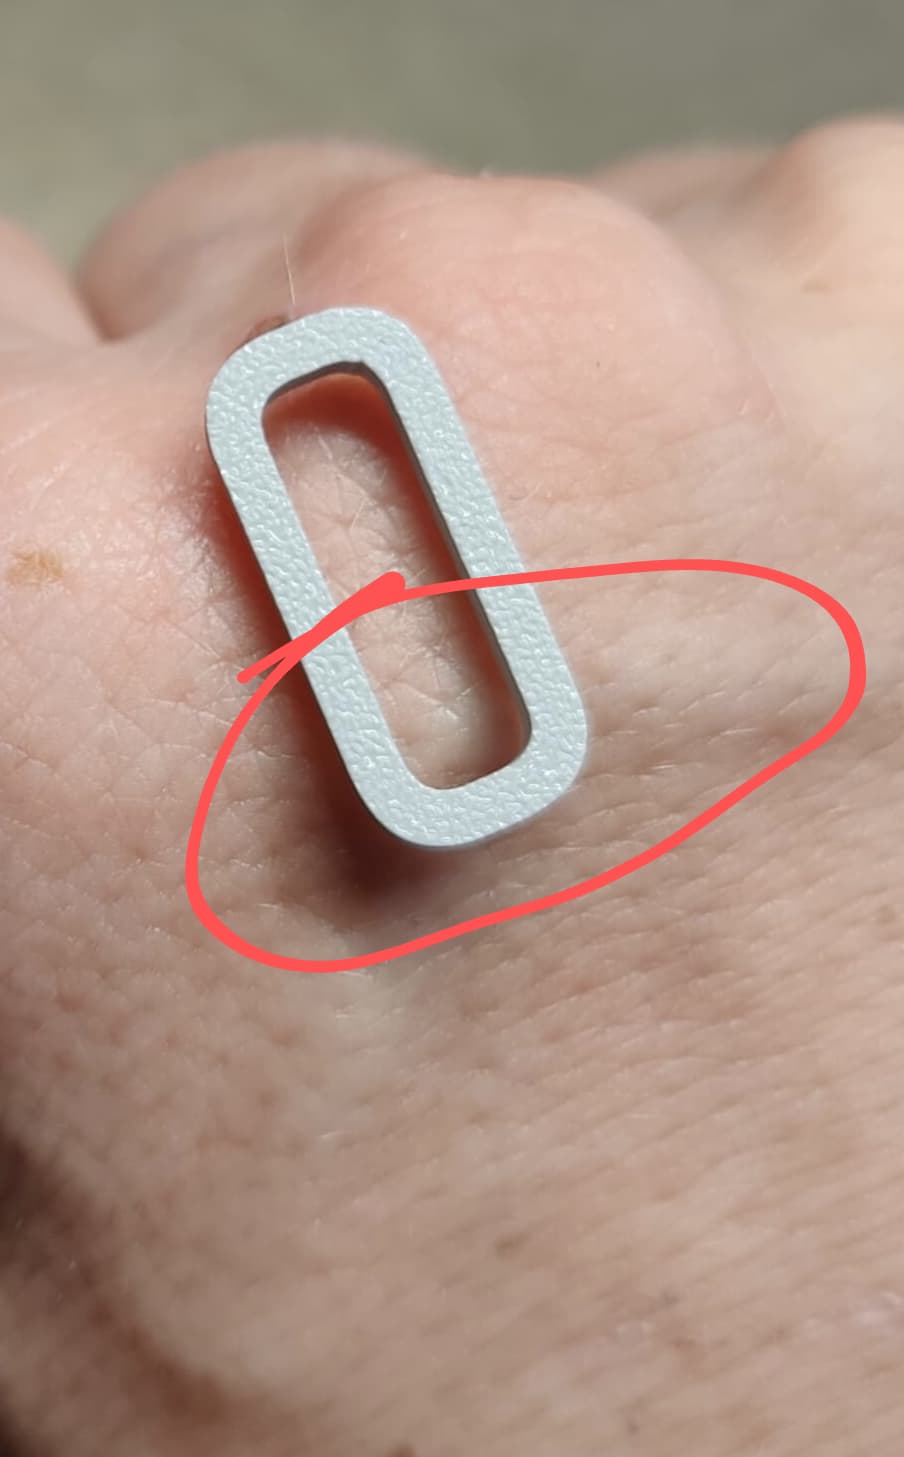
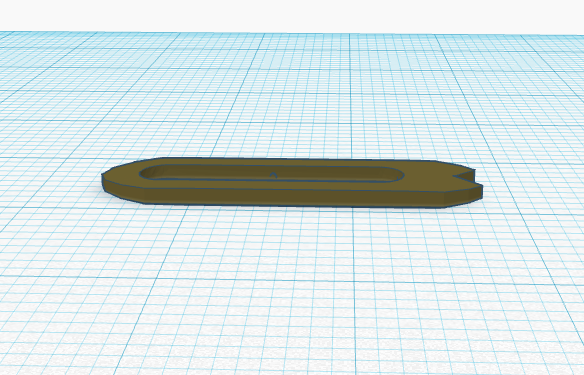
I also quickly put this together which is going to help me in my case with the glassie being between two metacarpals. It has a ridge to sink down around the glassie. Figured I could use some med tape to secure it.
Printed up a few of my own. The 3 mm thickness seems to give about the right flex for anyone trying to use standard resin. Maybe a tad strong.
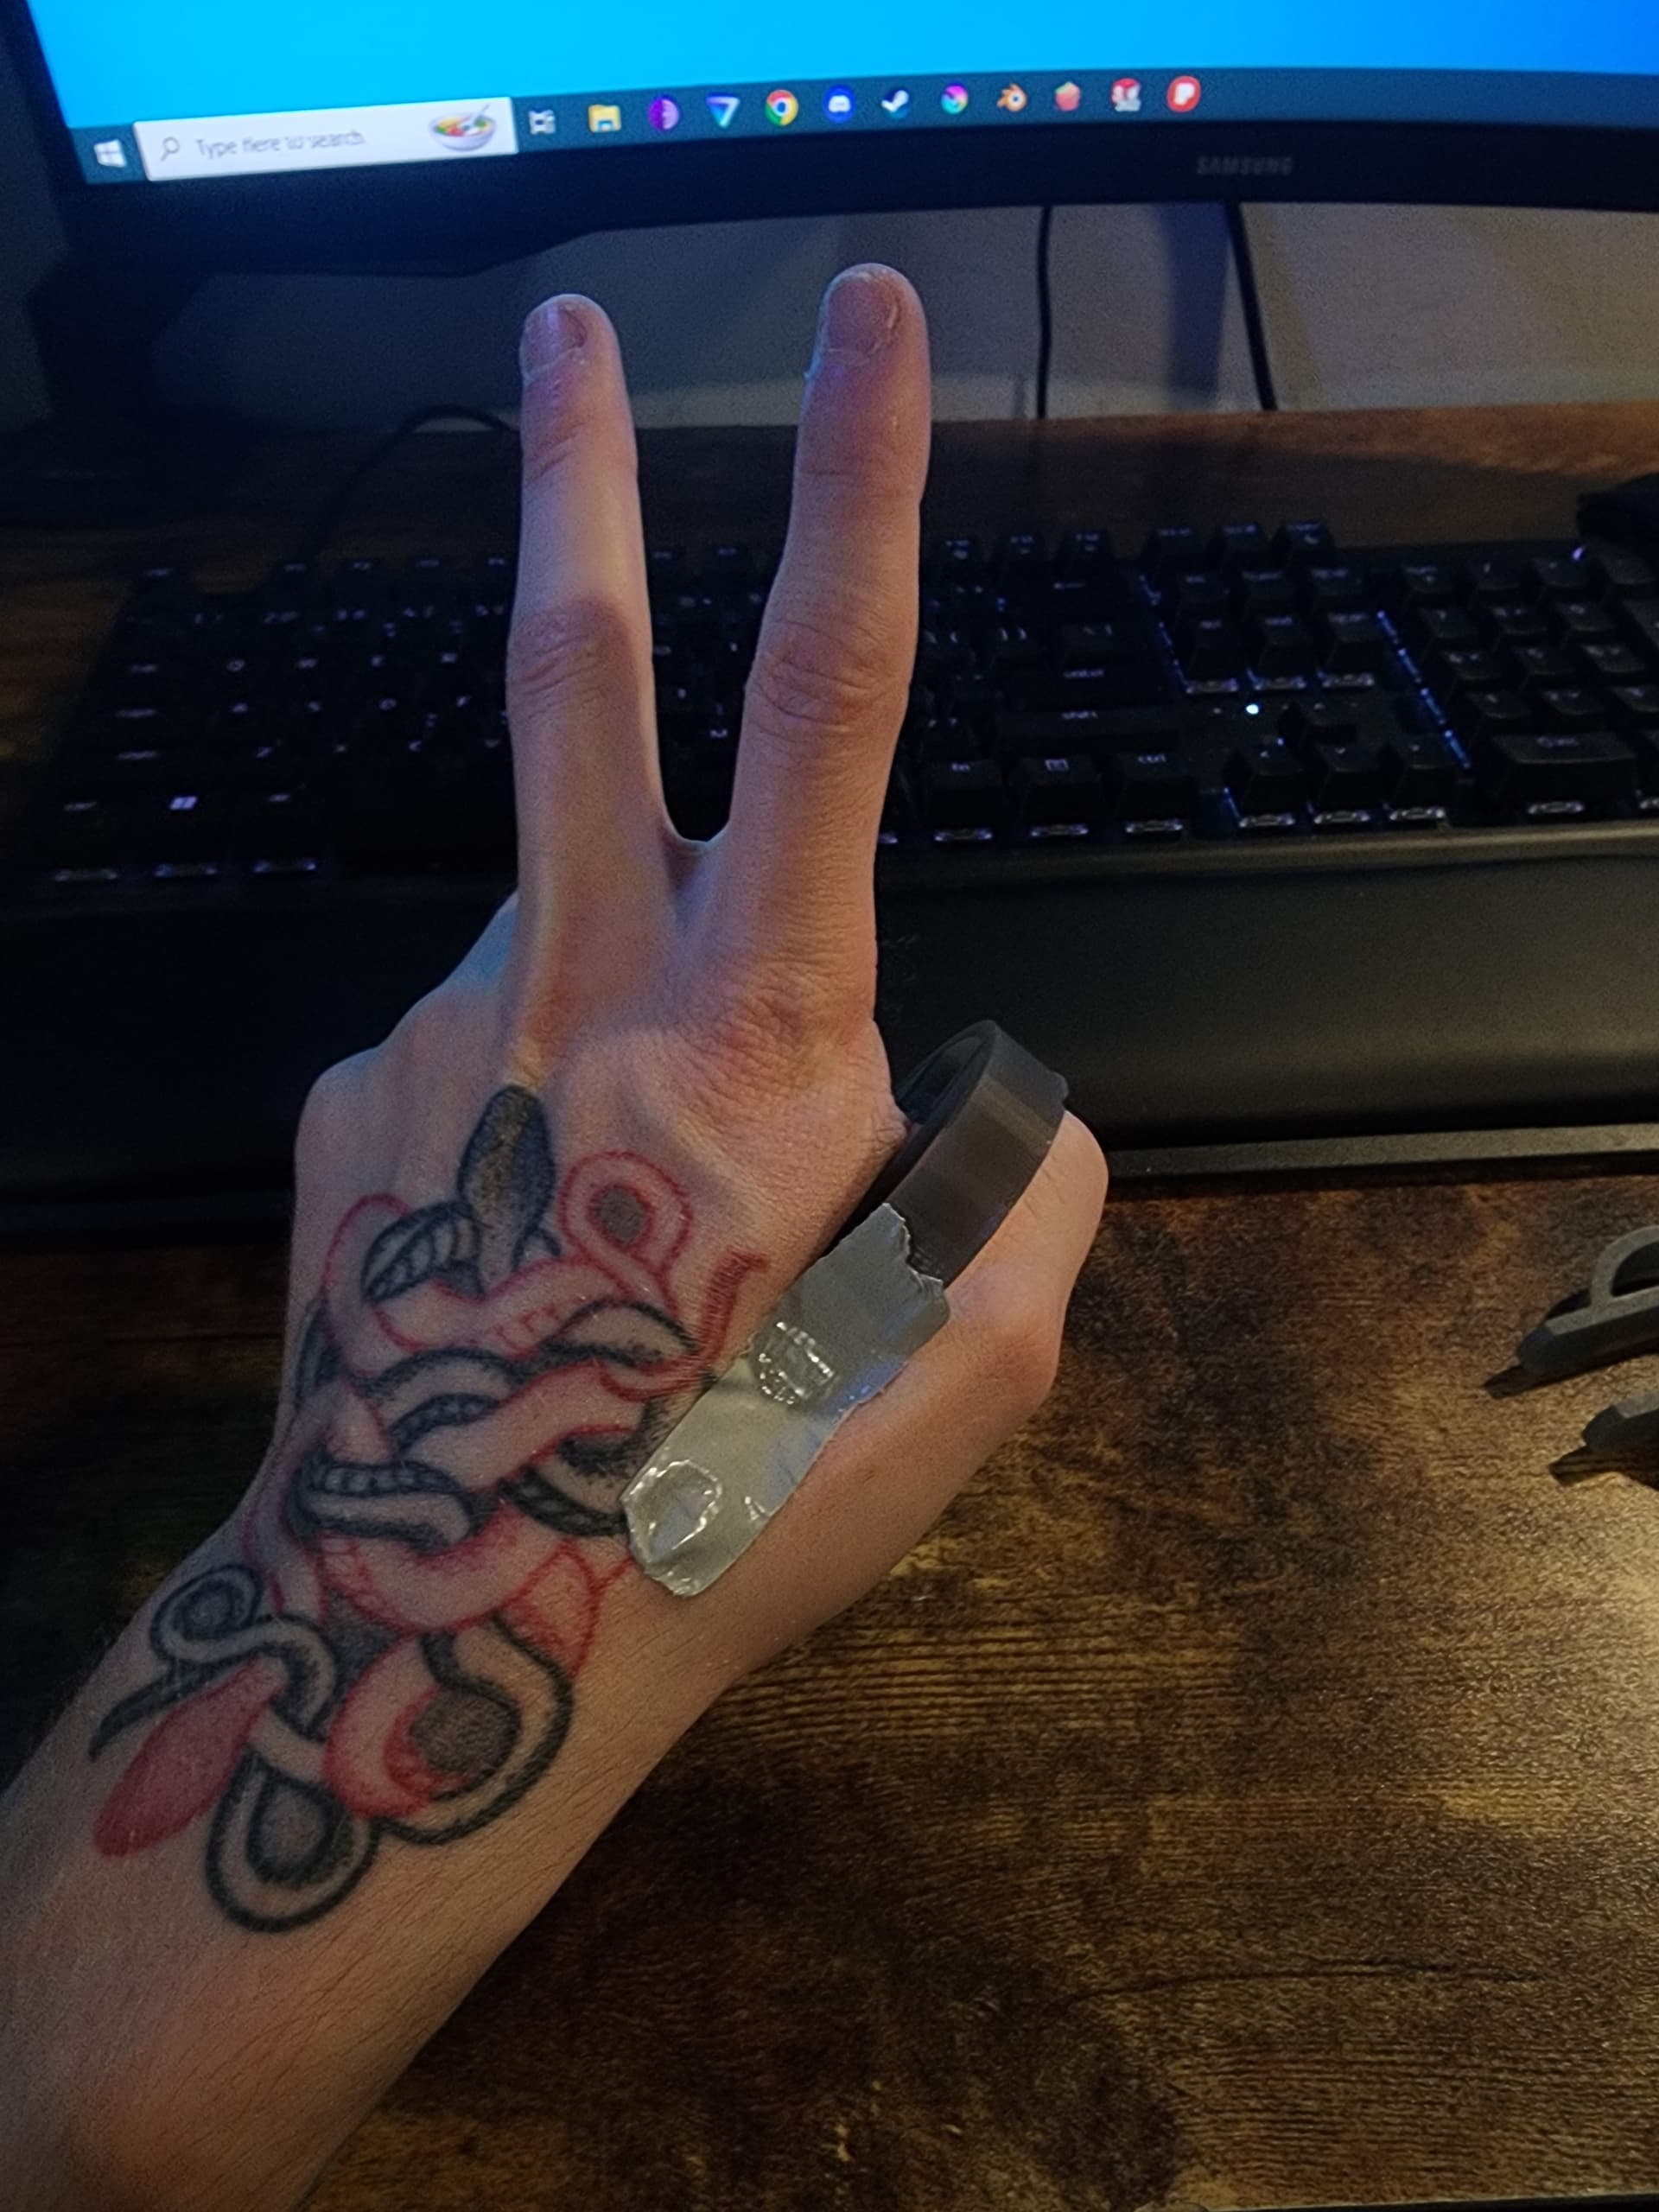
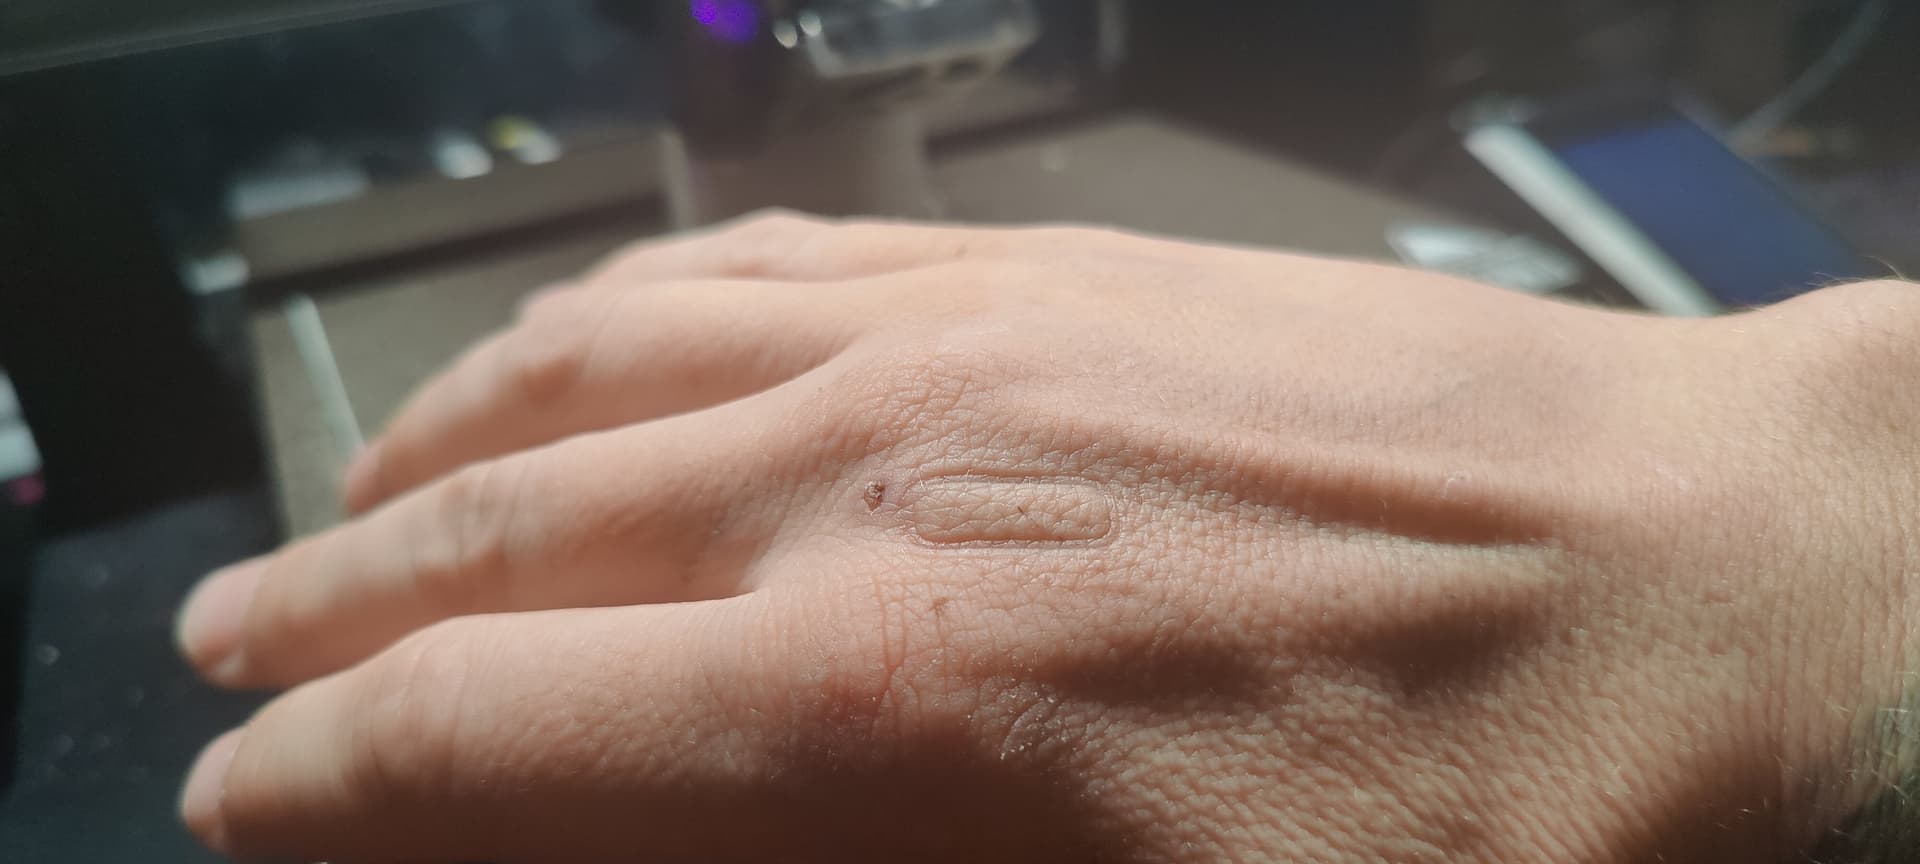
The device itself was actually less cumbersome than I was expecting, with only fine motor skills involving the thumb causing it to shift. Things like turning a dial on a stove, or pinching with the thumb and forefinger. The shift was slight and a quick slapjob with tape kept it in place effectively.
For my hand at least, the contact height was too was too narrow. This combined with a some overlooked sharp edges on the contacting faces started to cause discomfort at about 45 minute to an hour. The device left a pretty good mark on both side of the hand, confirming its too tight. Especially considering the other retainer piece needs to fit underneath.
I think Ill try removing the rear tabs as Hamspiced suggested to see if the increased flex is enough to loosen it sufficiently or if I need to increase the contact height. I imagine any sort of end design will need to be available in at least a small range of sizes.
Sweet!
I’ve got the FDM printer busy, and just started a new clamp version on the resin printer. Will try out ImplantCrimp 1.2 once one of them is done.
Here’s what I came up with trying to copy your idea but with tabs on the outside rear to help open the crimp.
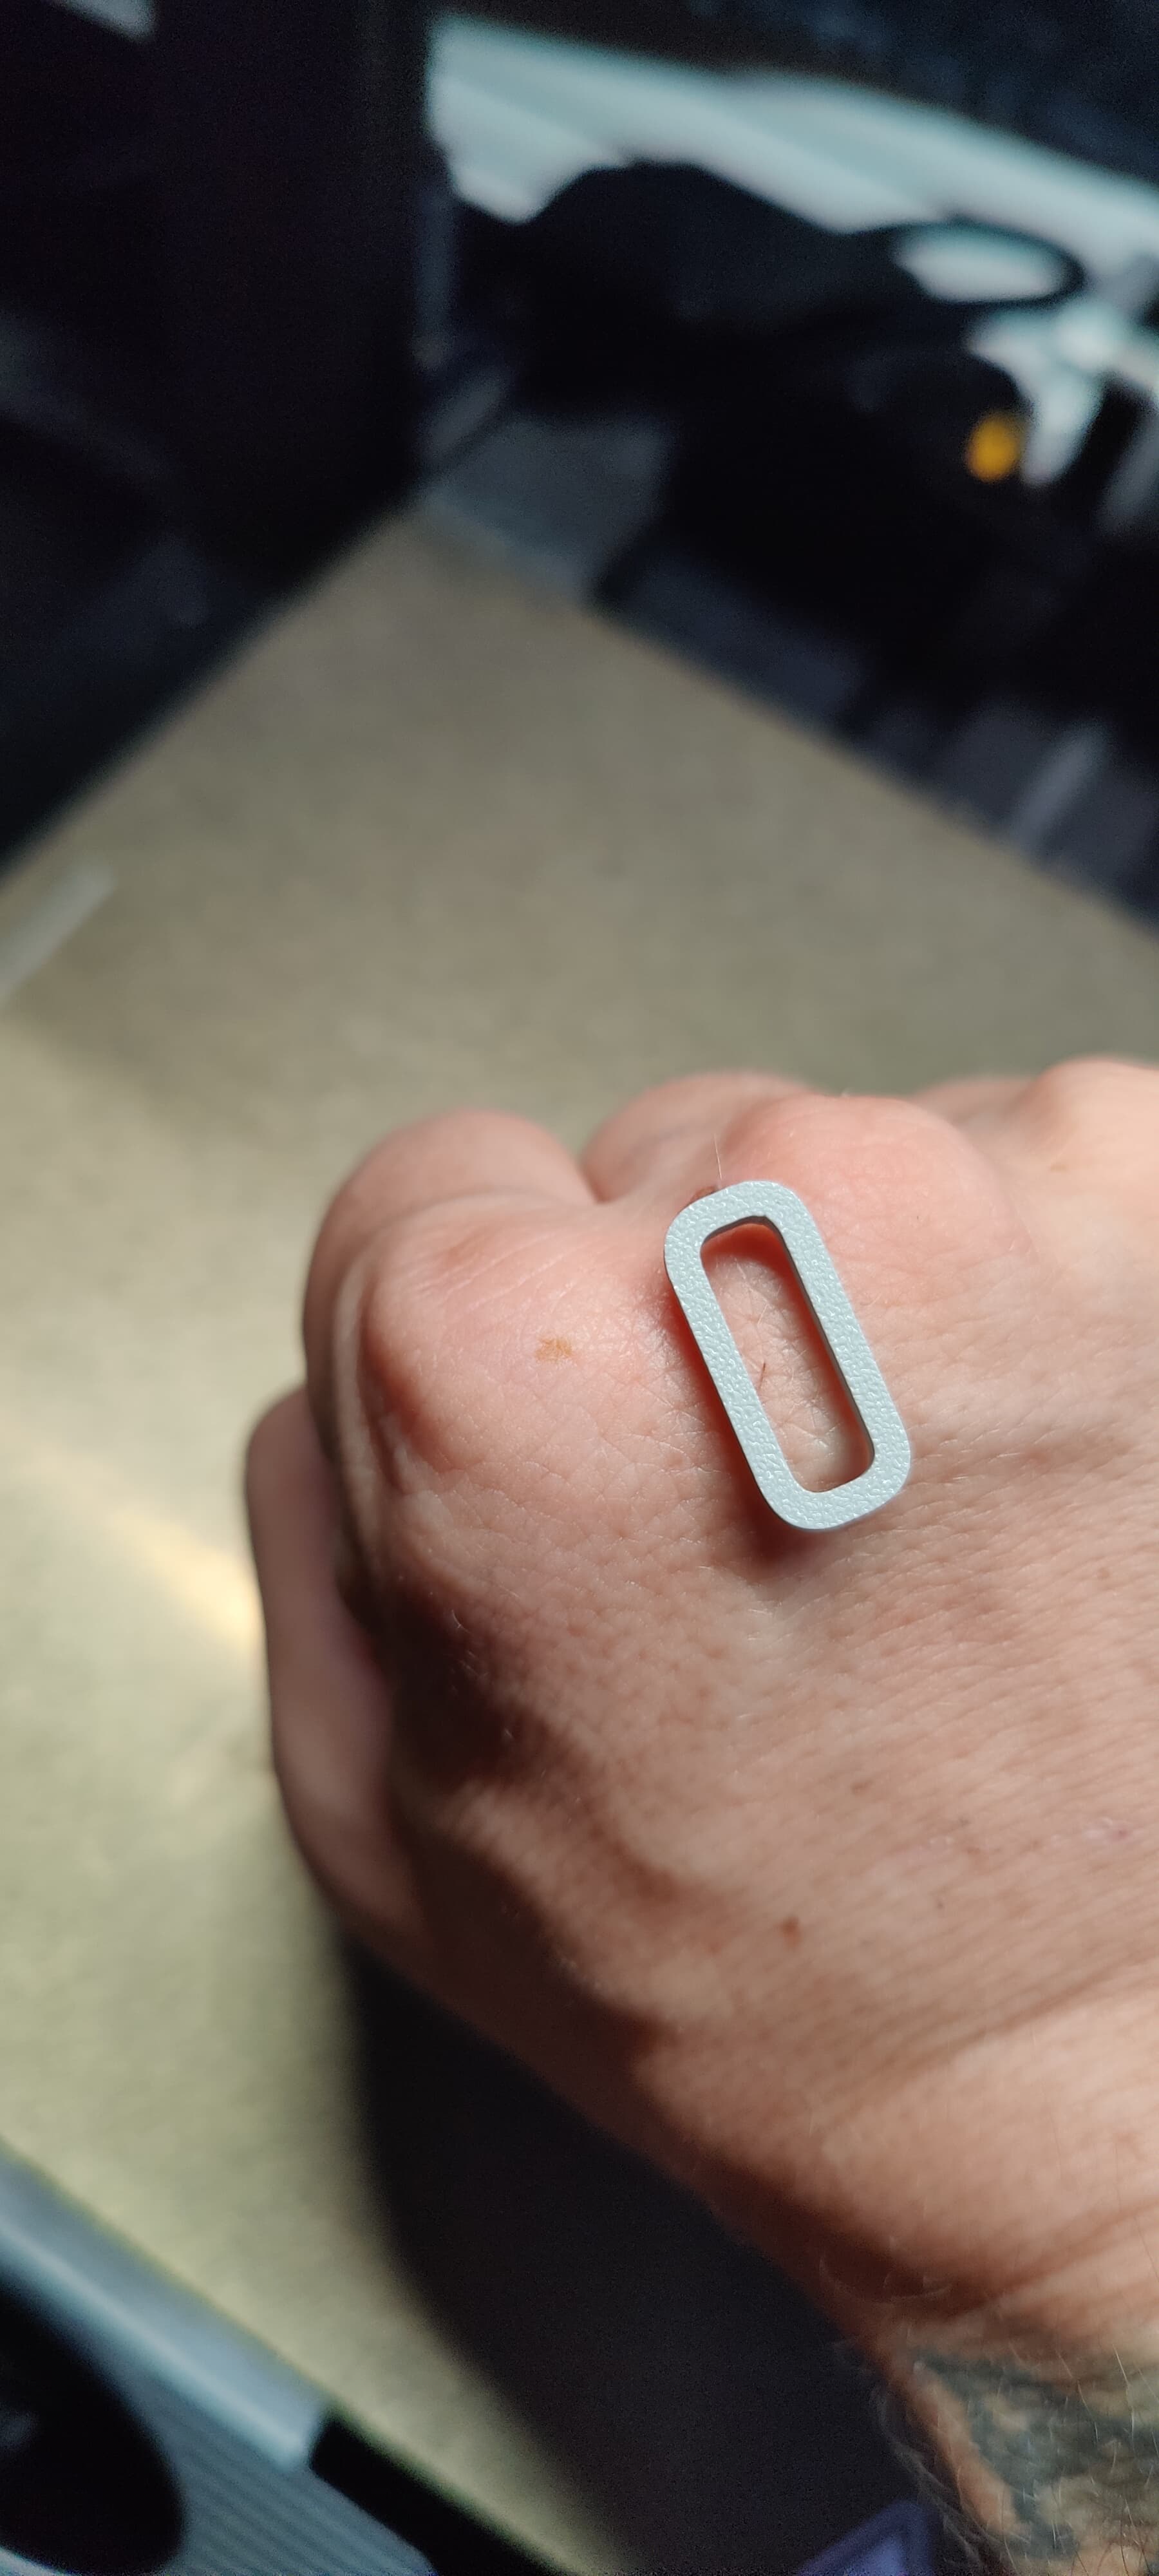
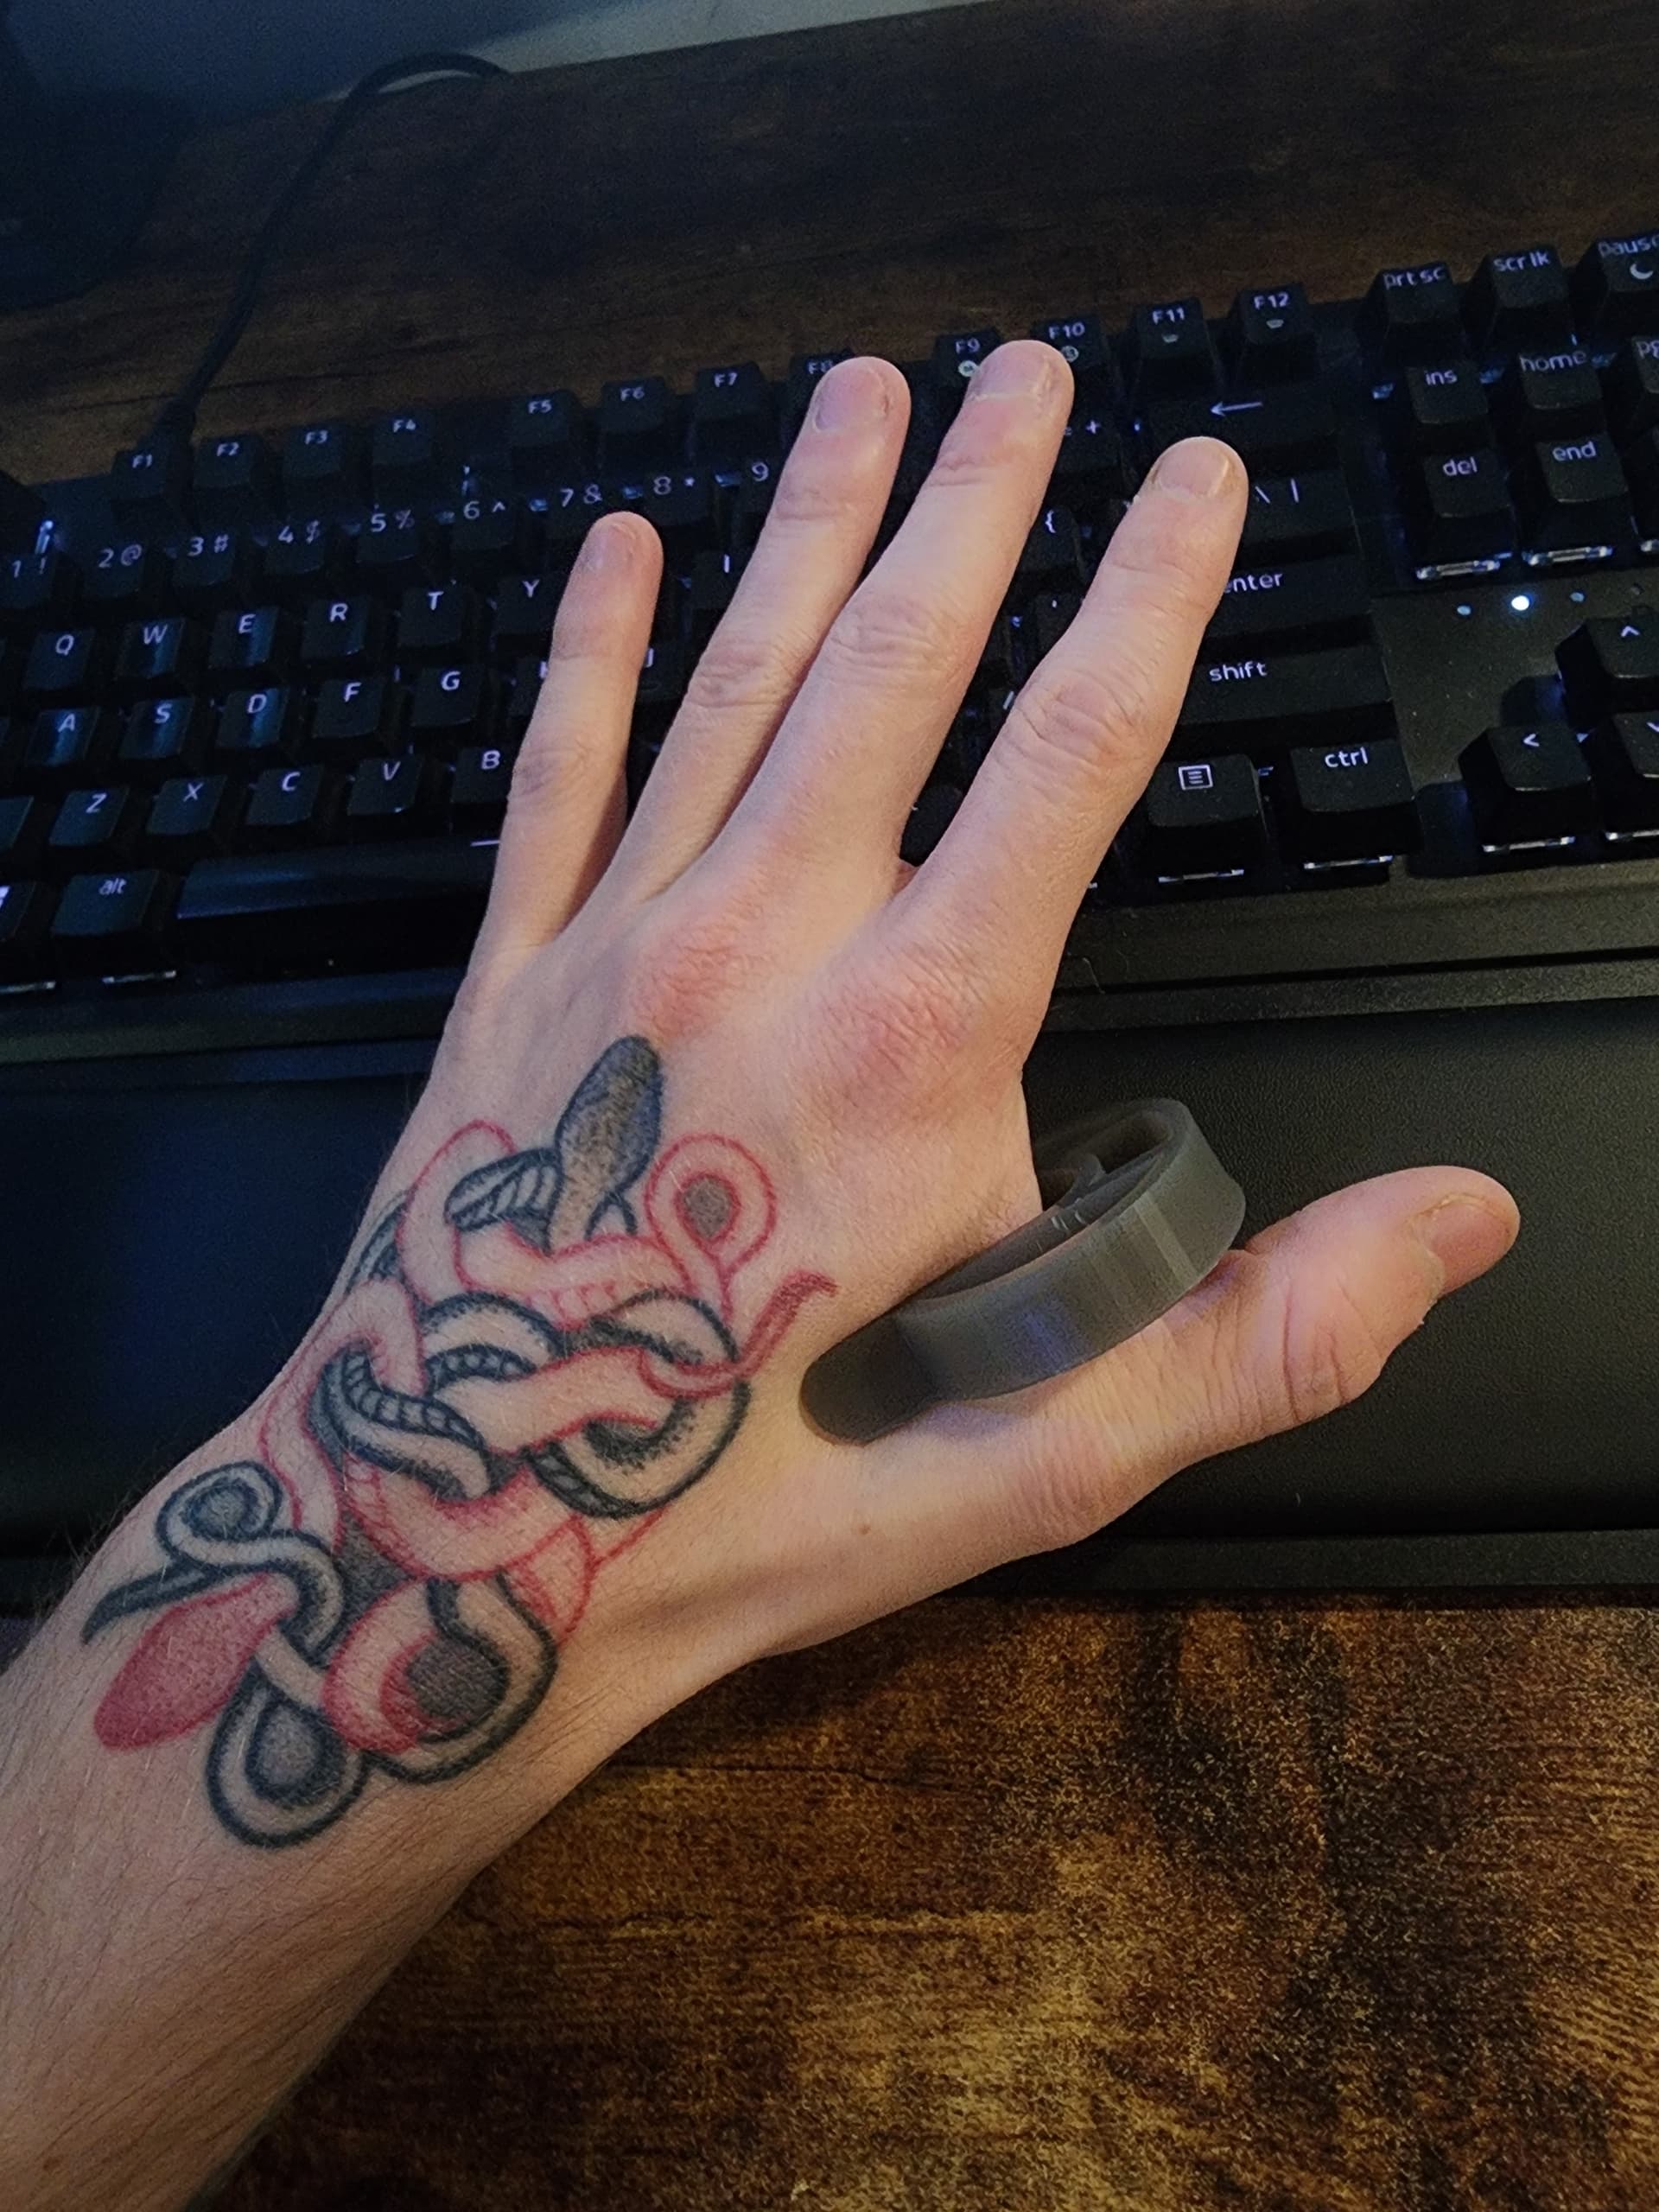
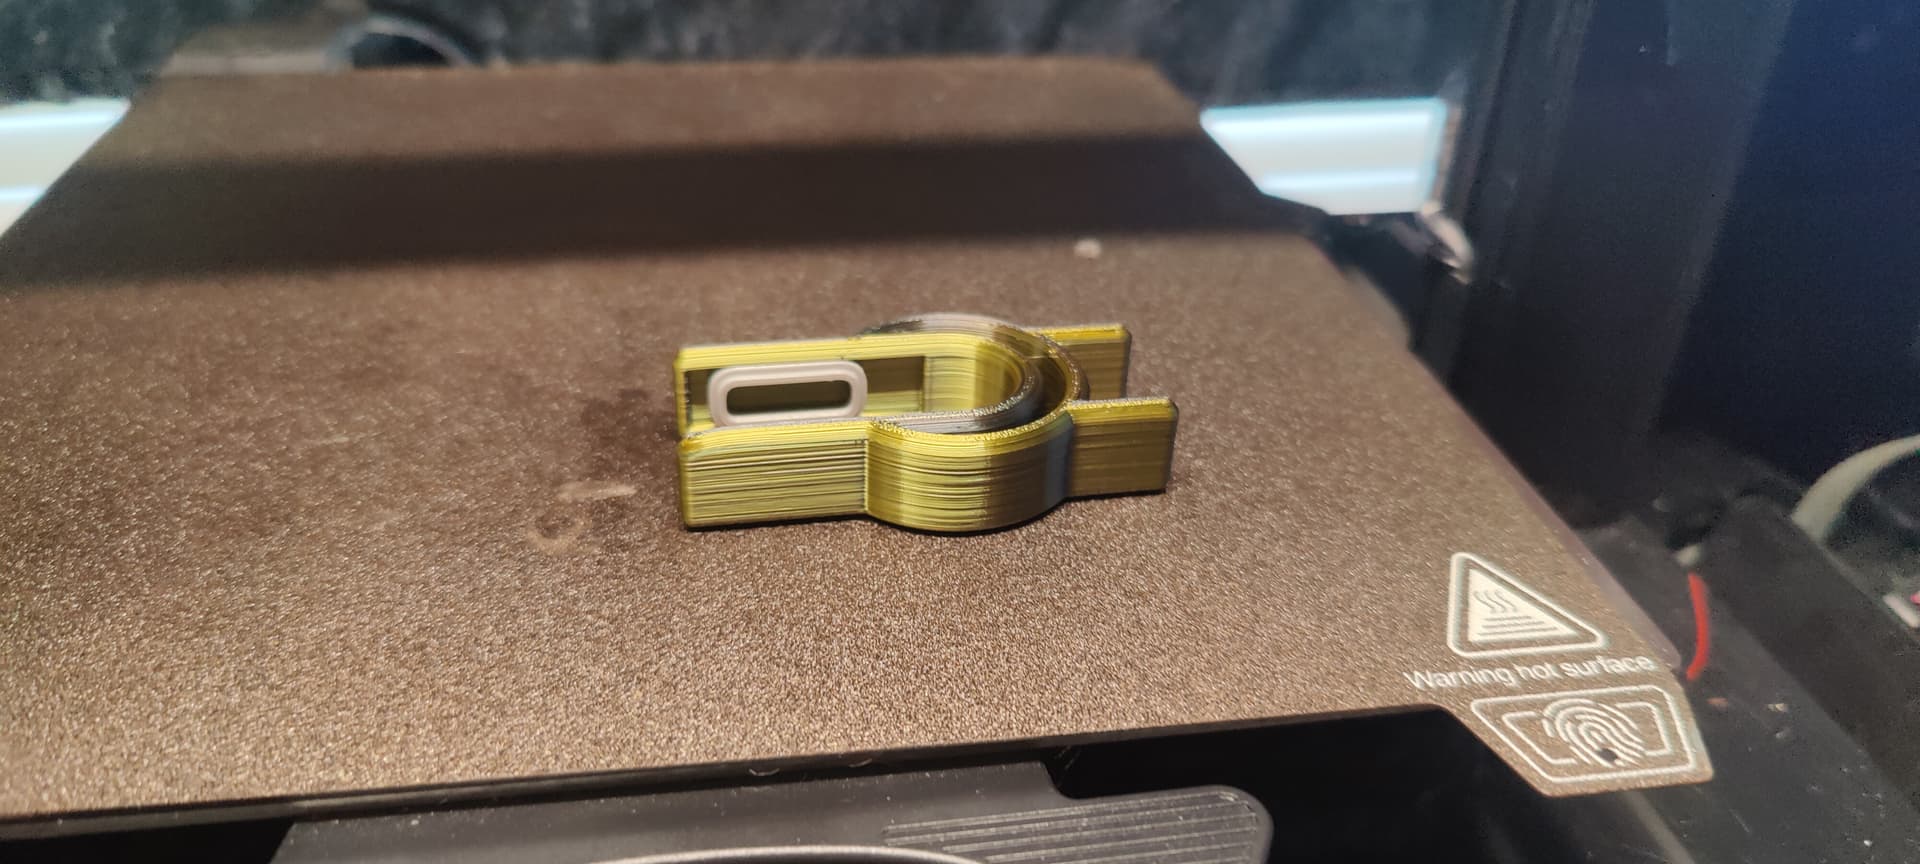
Been about an hour with the oval piece I printed out taped down around my xMagic. It definitely fit nice and snug around the glassie. Might have taped it down a little too hard.
Just added it to a bulk print of random odds and ends Ive been meaning to make up.
Tabs seem like a nice add for ease of use. I was worried about making it any larger and more obnoxious than it was lol. Holding it by the top of the outer arch and slipping the bottom under first so that I could pull up against my hand to flex the crimp as it went on seemed to work pretty well.
Printing another clamp with a cut out for the little oval thing I made to sit inside. It should be done by the time I wake up. I did not expect to be up til 3am again lol
I did not think about that! I could see it being a concern. My veins have easily moved out of the way when I push my implants around and I can see that vein roll out from under the plastic when i put pressure on it. However as we all know, everyone’s body is different.
I don’t think that it would be an issue using medical tape to secure.
I do feel like it’s an issue using a clamp.
Compressive force using this clamp style retainer will definitely cause a capillary restriction and if it crosses a vein I can see it doing the same here.
I agree, the force has to be just right if a clamp is to be used without impeding healing.
Mild compression should be no problem, think ace bandage or firmly wound gauze. Fine line though, and I still don’t know if its the best approach.
I intend to actually wear one of these prototypes for a period of 3 weeks once its dialed in, as I can’t think of any other way to actually test long term affects on the tissue.
Going directly over top of even a minor vein definitely seems like it would be problematic seeing as plastic components concentrate the force on hard edges instead of spreading it out like a bandage. At a minimum, it seems it would be a bad idea in boney areas where there’s not a lot of tissue for the vein to sink into.
3 weeks is a long time, i would advise against that continuously.
The main concern i have here is cell growth under compression of an isolated area. With the implants you want to encourage healing and growth of the damaged tissue below the dermis. Too much of a compressive force is going to restrict the capilaries in that area which reduces fluids to that area that help in that healing.
Our implants dont need that much force to keep them positioned because there isnt much force that acts on them to push them away from positon.
The main focus is
Keeping it from migrating back to the injection positon
Avoid lateral migration
Allow for circulation to the area to promote healing
tissue in the hand regenerates quite fast, and it shouldnt really take longer than a week for tissue growth to secure the area enough to mitigate migration without the need of an assistive device.
I was going off the encapsulation time, but as you say it only needs enough tissue to hold it in place.
Something like 3-7 days sounds a lot more doable.
I never got an answer as to how much an implant can actually move up or down in the tissue. My impression is that you don’t see migration of that type as significant enough to bother mitigating.
This would seem to suggest that the implant can only migrate in the excess path cleared by the implant needle, thus the concern about preventing movement towards the injection site.
My understanding was that the implant was a little more free moving and would be gradually pushed by the moving muscle and surrounding tissue settling into a “least resistance” kind of location, usually within close proximity to the implantation site. This migration would be more multi directional than the simple forward/backward of the first scenario.
Any clarification you could give me would be greatly appreciated.
I can’t say for everyone. But my implant in r0 (Xsiid) doesn’t move at all. During the first two weeks though I could manipulate it about 4mm along the path of injection either way.
L4 (XMagic) is about a month to two months healing and it also no longer moves. However it had an odd torsion of rotation, it wanted to angle about 45* off the path of insertion. I had to break encapsulation a few times to position it how I wanted and I secured it with medical tape for a day and it has stayed where I wanted since then. This is why I don’t believe much force at all is needed.
My xg3 though has been a different story. Tip of Ring finger install. It was freely able to move across the injection path for about 4 days. I kept having to position it and I inevitably secured it with a 3d printed version of itself for a day. However after removing it kept wanting to travel away from the injection site, not towards like other people. I feel that’s because I went further with the location of the install than I normally would have because of fear of it migrating to the injection spot. So fluid build up near m while healing I feel kept pushing it back. It was an odd feeling breaking that encapsulation to move it further from the joint and keep it more centered to my finger pad.
I’m now 10 days from install. It seems to have settled and if I needed to break the encapsulation again I think I might cry. Very little lateral or vertical travel at all. But I also haven’t played with it at all. Aside from accidentally feeling the em fields created by my microwave, bottle warmer, and bottle sterilizer.
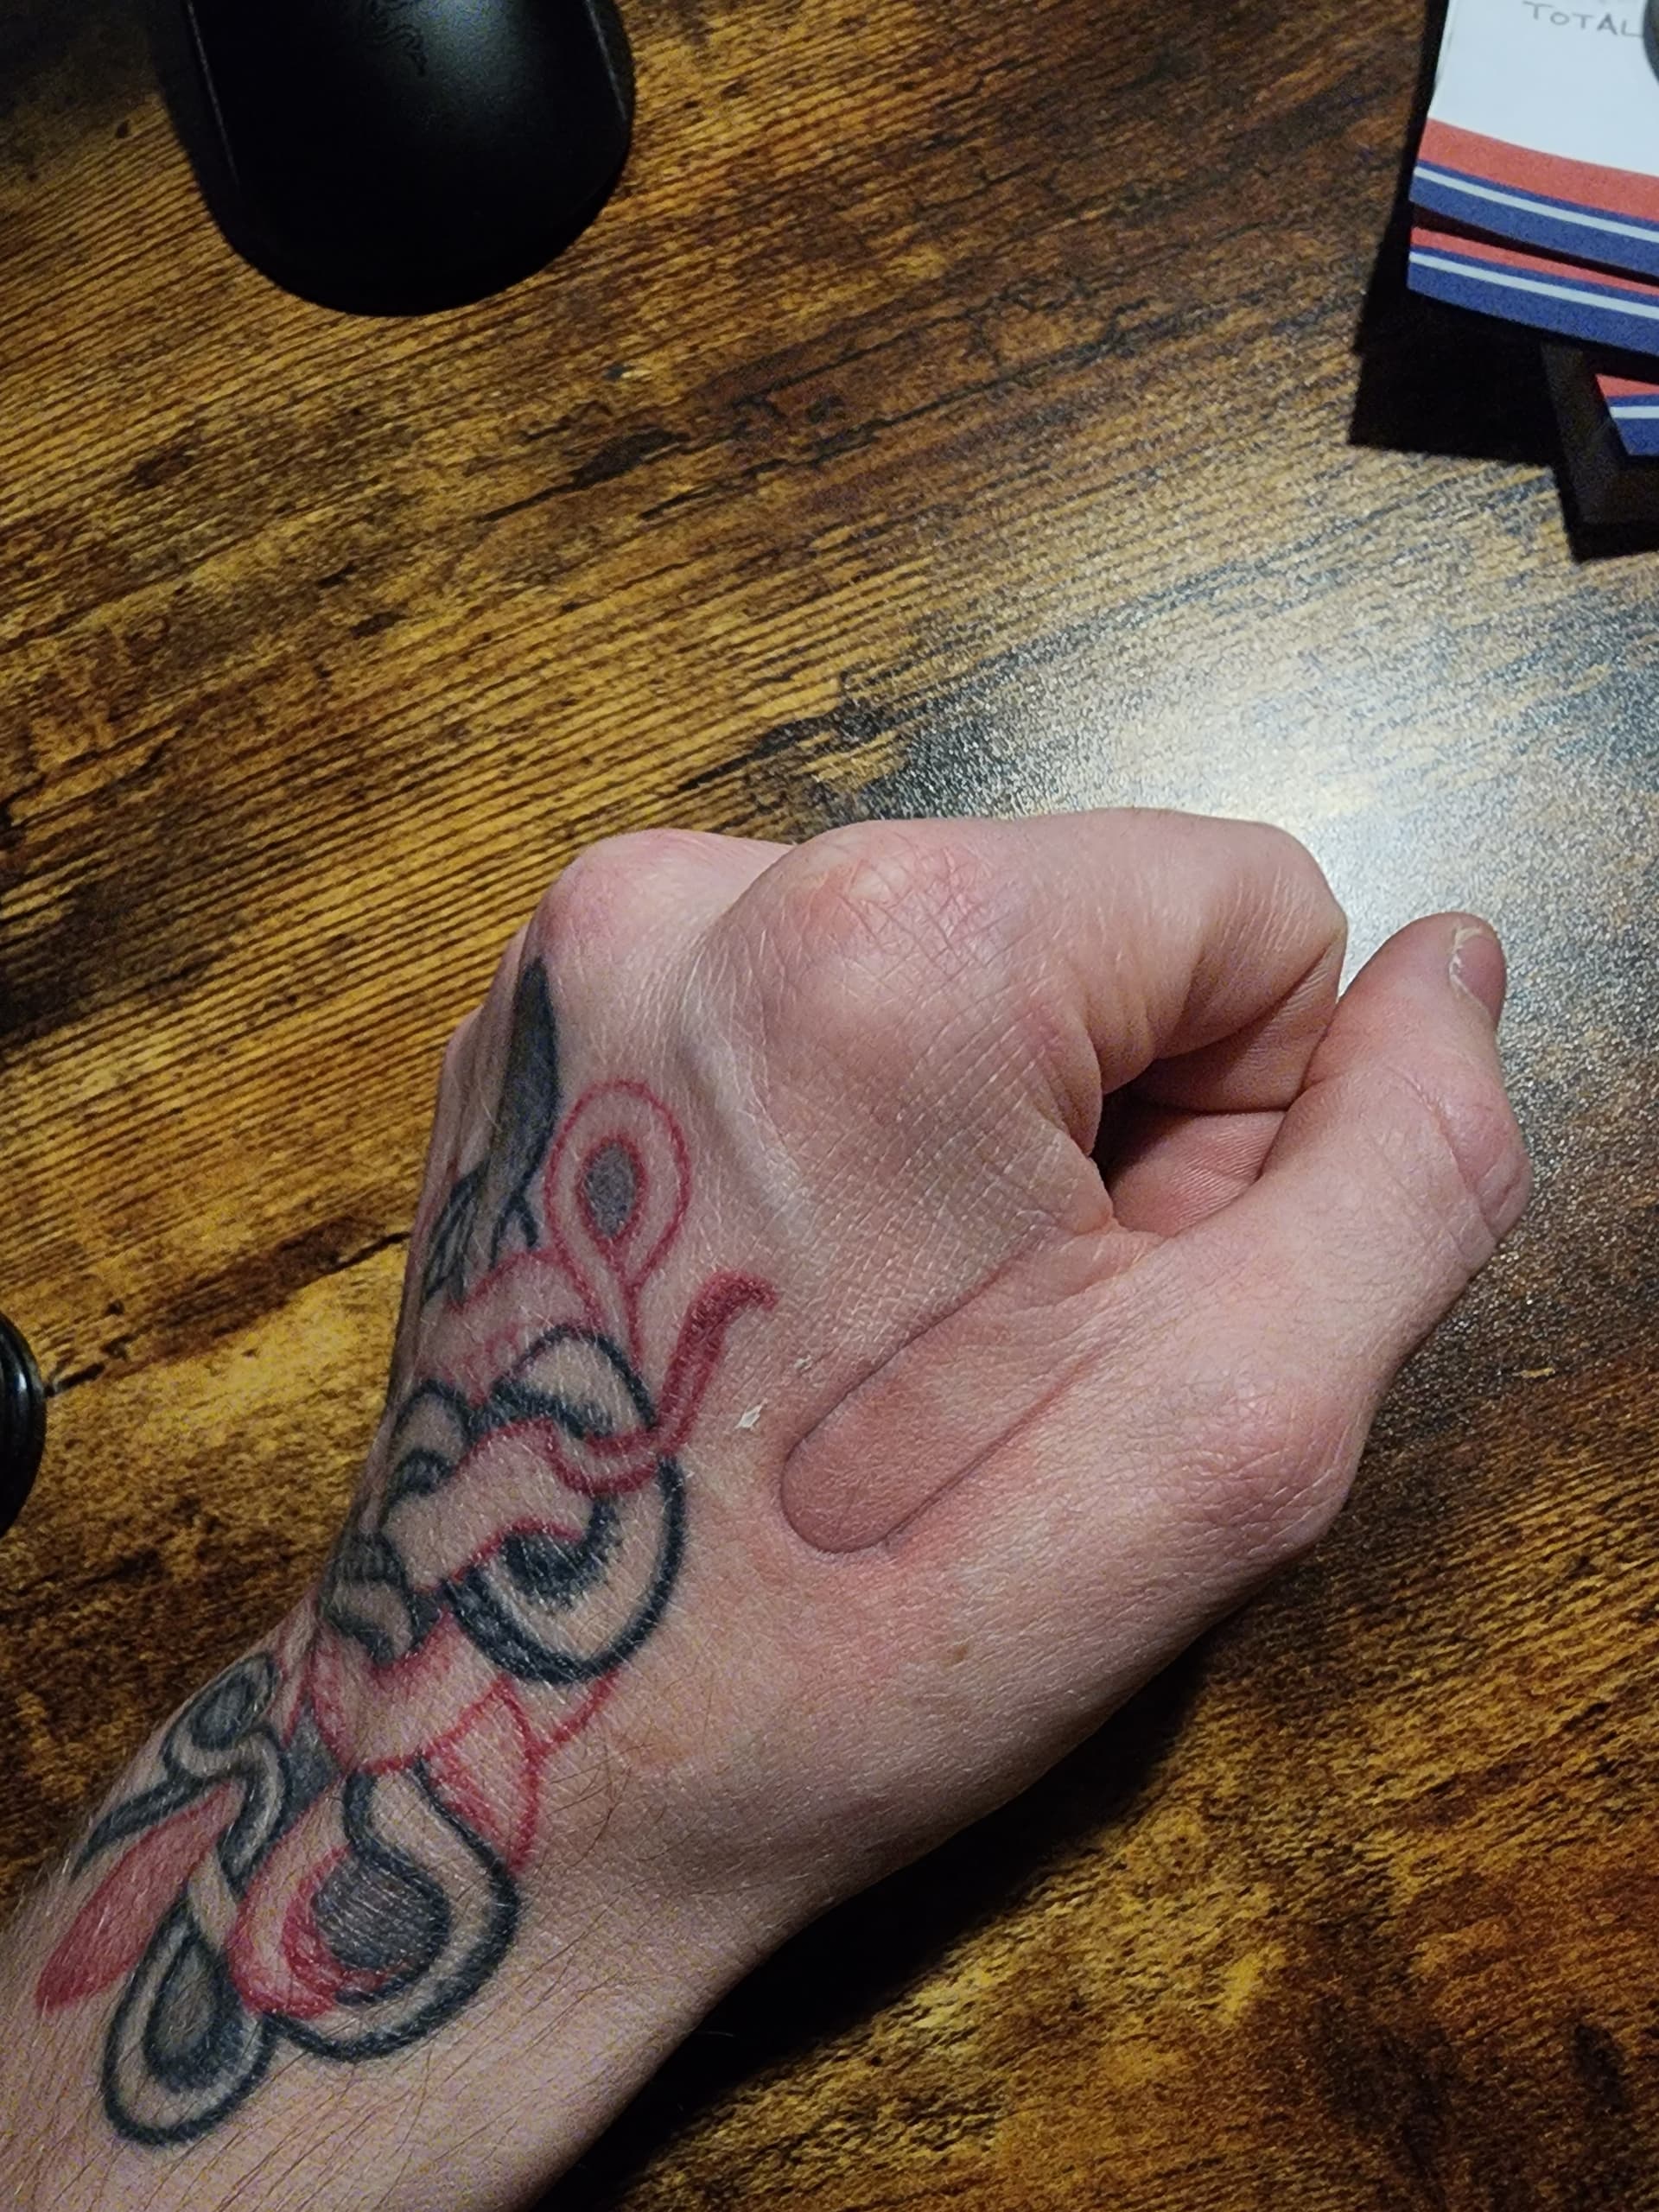
When I removed the bread clip, there was a decent impression, so it may have been holding tighter than I thought. It’s hard to tell as it was implanted quite deep to begin with, but it seems to have pushed the implant out the open end of the clip, away from the injection site. As it’s gone a little too far, I’m not testing it again today as I’d like it to undergo some of its natural migration back down towards the injection site.
It makes sense in my head to have the hole a fair bit larger than the implant so there’s room for the flesh surrounding the implant to bubble up and help hold it in place, rather than letting it drift under the thing.
Also, the wide flat clip has bone beneath one wing and soft flesh under another, which I imagine caused it to press down at an angle and push the implant closer to the bone. Again, hard to tell as it was already close in that direction. Today I’m just using a toothpick to help it stay parallel with but hopefully not too close to the bone.
When I change my bandage again I’ll check the depth measurements. It’s getting easier for me to feel where it is than on the first day.